


Localising a modularised application
Sponsored

A native app for App Store Connect to make managing your apps faster, simpler and more fun. Get early access now!
It had been a while since I had to start a new side project from scratch which required support for multiple languages from the get-go. Certainly not from scratch in a codebase where the code was divided into different modules by making use of Swift Packages.
I had to remind myself of a lot of the processes which make localisation possible, so I thought it would be good to write an article I can refer to when I next start a project like this.
Let’s get started!
Let’s take a look at a very simplified version of the codebase. It consists of an Xcode project, with a single app target (which will run the app) and a Swift Package called ‘Features’. The latter will contain the code for all screens in the app, each of which will be defined as its own product:
// swift-tools-version: 5.6
import PackageDescription

let package = Package(
    name: "Features",
    products: [
        .library(
            name: "Home",
            targets: ["Home"]),
        .library(
            name: "Detail",
            targets: ["Detail"]
        )
    ],
    dependencies: [
    ],
    targets: [
        .target(
            name: "Home"
        ),
        .target(
            name: "Detail"
        )
    ]
)
The app target will act as the compositional layer of the application, and its sole purpose will be to import each of the features, instantiate them and coordinate navigation. The UI, presentation and business logic for all features will leave in its respective ‘module’ (a target in the Features Swift Package). This will allow each feature to be independently developed and completely isolated from other features.
For the sake of simplicity there are only two features in this example: Home and Detail, which represent the only two screens in the app.
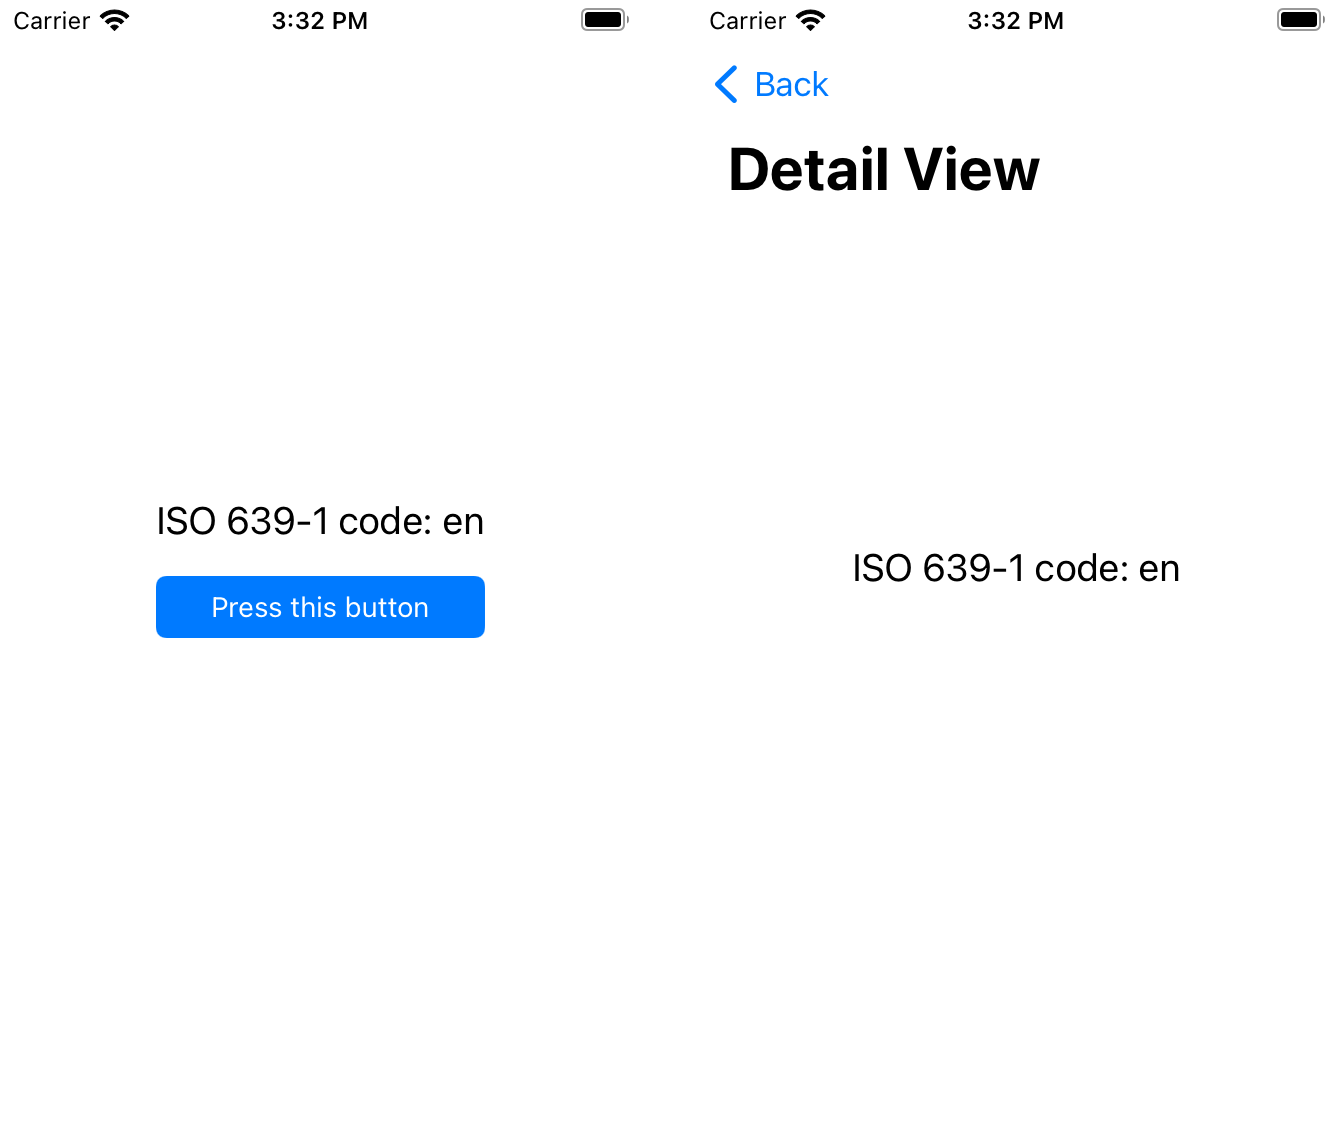
The home screen has a button which allows the user to navigate to the detail screen and a label which shows the current language code for the user’s locale. The detail screen shows a single label, containing the same information as the home screen’s label:
Let’s add some strings!
That looks great, but currently the screens use hardcoded strings written in English. The app requires its content to be translated into two other languages: Catalan and Spanish.
While this could be achieved in a number of ways, my personal preference is that each feature (or screen) contains only the localised strings it needs, which increases the feature’s portability and reusability.
This can be done in Swift Packages by placing all the necessary .lproj files with all content to be localised (in this case only Localizable.strings files) in the target’s folder - my preference is under a parent Resources/ folder and defining these as resources for the specific target in the Package.swift.
Building the feature now after adding those files in will cause the compiler to throw an error:

This is because a defaultLocalization must be provided to the Package.swift. All features are targets to the same package, so only one defaultLocalization must be provided. This is what the resulting Package.swift looks like after adding the localised content:
// swift-tools-version: 5.6
import PackageDescription

let package = Package(
    name: "Features",
    defaultLocalization: "en",
    platforms: [.iOS(.v15)],
    products: [
        .library(
            name: "Home",
            targets: ["Home"]),
        .library(
            name: "Detail",
            targets: ["Detail"]
        )
    ],
    dependencies: [
    ],
    targets: [
        .target(
            name: "Home",
            dependencies: [],
            resources: [.process("Resources/")]
        ),
        .target(
            name: "Detail",
            resources: [.process("Resources/")]
        )
    ]
)
⚠️ Note that the compiler will show a warning if no localised content is provided for the default localisation code. This is very helpful to ensure that you don’t ship a version of your package with the base localised content in.

Supporting localisations
Contrary to what you might be thinking now, running the app with the device’s language set to Catalan or Spanish still shows the content in English. The reason for this is that Swift Packages need extra information to determine which localised content to use and, as it stands, they will just use the target’s base localisation if the package has content for it or, alternatively, the package’s default localisation.
There are two different ways we can make localisation work in our features: making the new localisation available in the app target or enabling mixed localisations.
Adding a new localisation to the app target
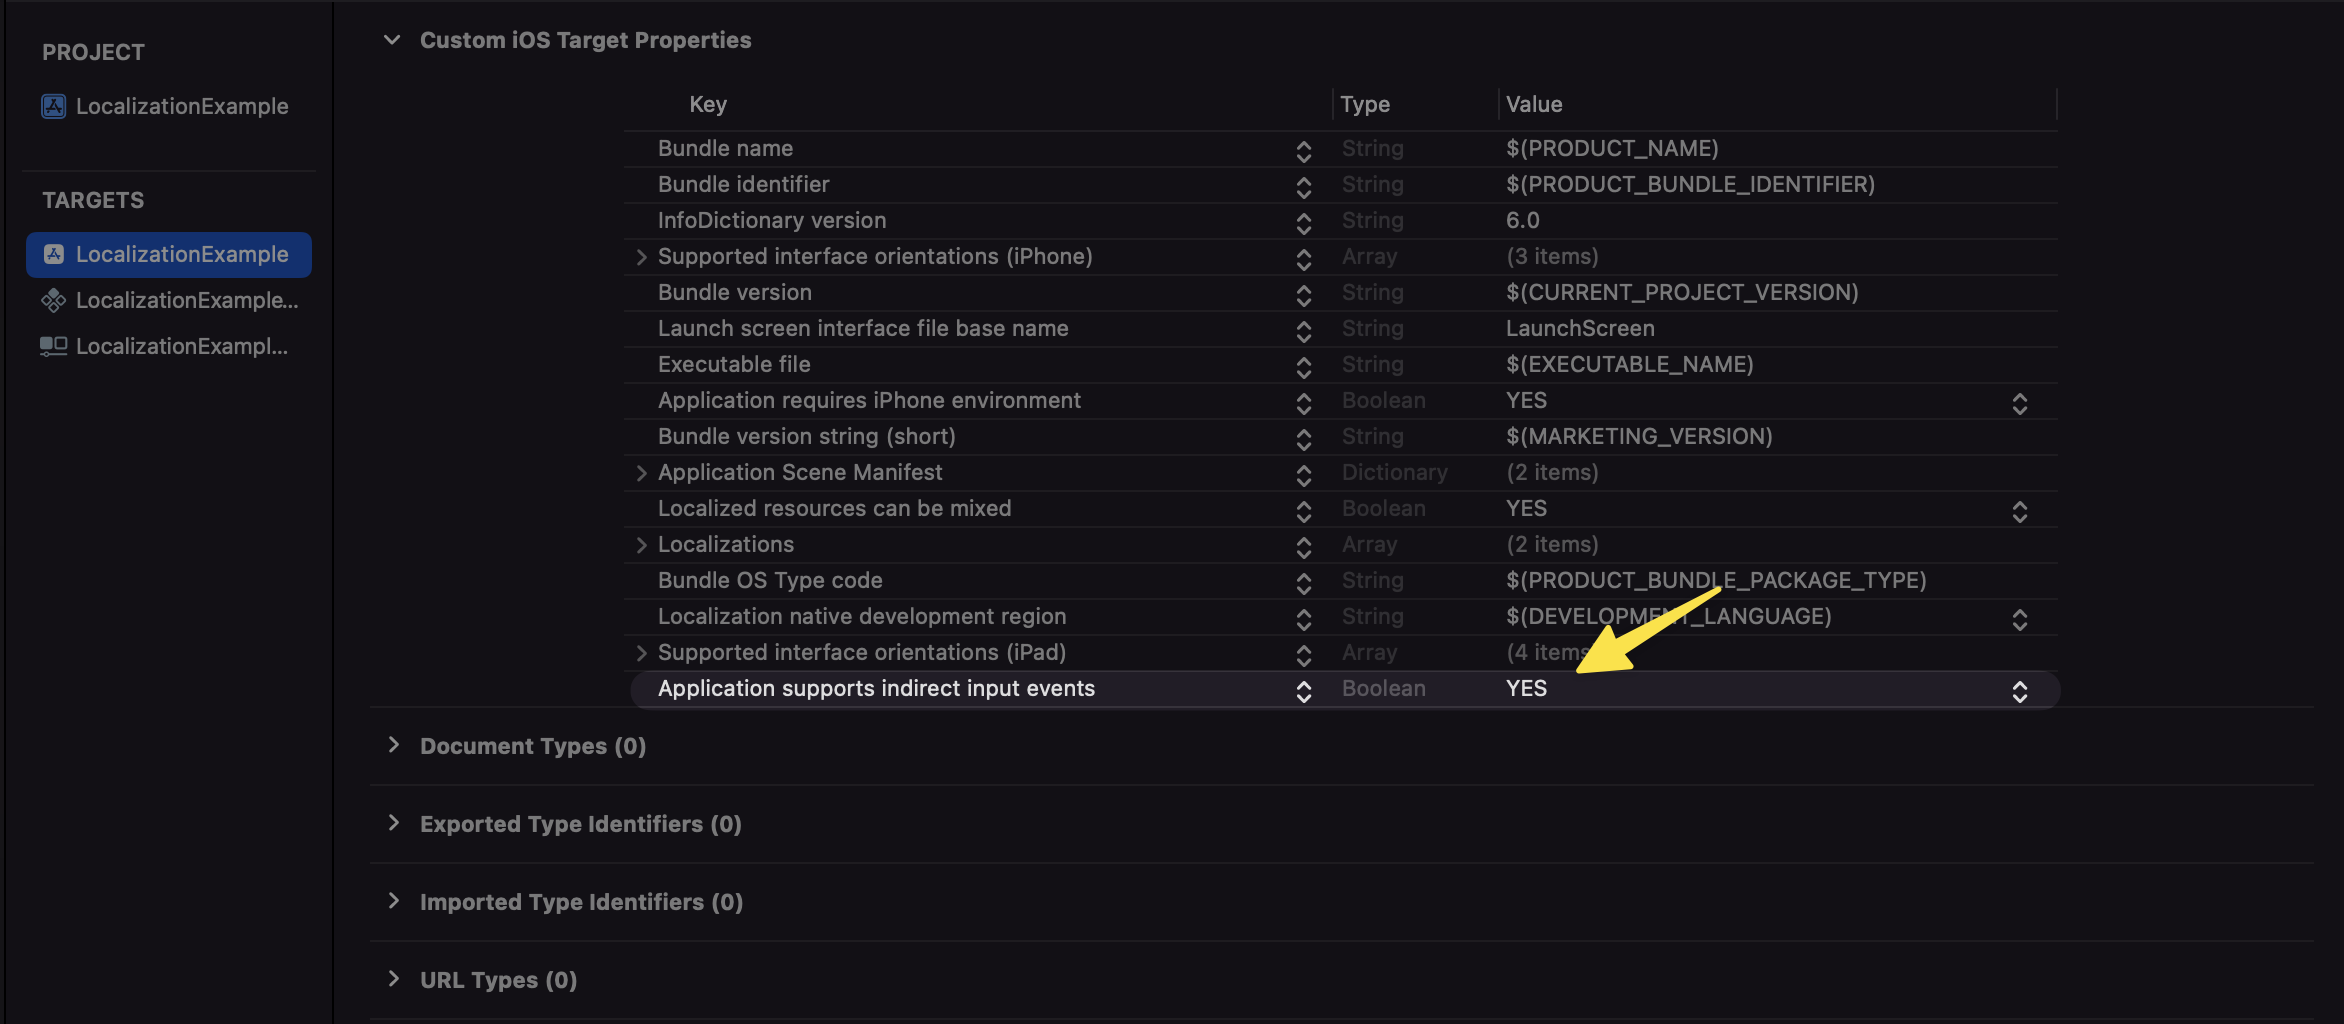
One way of enable new localisations in the ‘Features’ Swift Package would be to add them to the Xcode project importing the features. This can be achieved by heading over to the Xcode project and, in the Info tab of the project settings, adding the new localisation/s to support:
Note that for this to work, the localisation will need to have at least 1 localised file (e.g. an empty
Localizable.stringsfile). In this case, because the app target is built using UIKit and the launch screen storyboard was chosen to be localised when adding the new localisation (see video above), there is already one localised file.
This will now allow packages to get the supported localisations from the main bundle and choose which resources to use accordingly.
It is worth noting that, if the device has a locale that’s supported by the app but not by the package, the latter will fall back to the defaultLocalization provided in its Package.swift.
Similarly, if the locale is not supported by the app, it will also fall back to that same value. This is why it is so important to set the defaultLocalization to the same as the base language in the main app target to ensure consistence across all screens. This is one of the reasons why I prefer to group all features under a single Swift Package, so that there is a single source of truth for the defaultLocalization value across all screens.
Allowing mixed localisations
While using the app target’s localisation tends to be the preferred approach as it ensures consistency across all screens and allows only a few supported locales to be used, there is another way of allowing package content to be localised without having to add any localisation support on the main app target.
This can be done by setting the CFBundleAllowMixedLocalizations value in the app’s Info.plist file to YES.
This setting will then tell the app target that it is fine to have different localisations in different targets or features, which will make our app localisation work straight away when new localised resources are added.
There are a couple of things to bear in mind with this approach though:
- There is no longer any need to add localisations to the app target, adding the
lprojwith the localised content to the package’s resources is enough. When a user changes locale, the package will either show content for that locale if it exists as a resource or for the default provided in itsPackage.swift. - There is as many supported regions as there are localisations resources. What this means is that there isn’t a single source of truth to determine which localisations are supported across the app. This can lead to issues where, for example, a feature has localised content which has not yet been sourced for other features. In that case, there is no way to hide it other than removing the resource itself:
Point number two is portrayed in the video above, where the user has its device language set to French. Mixed sources causes an inconsistency as there is no fr.lproj on the home screen - hence it falling back to the default localisation, which is english. On the other hand, there is localised content available in the detail screen, which is why the strings are properly trasnlated. For this reason, I like to keep the app target as the source of truth for all supported localisations.
Bonus tip - Automation
Something I would always encourage is to automate the process of retrieving the localised strings for a given bundle as much as you can. If your app has a lot of screens, you will want to make the process of adding localised strings as easy and streamlined as possible.
A tool I have been using for a while is SwiftGen, which can generate Swift interfaces for all sorts of assets and resources, such as Localizable.strings files.
Creating a build tool plugin which makes use of this executable could make the process of supporting new localisations a lot easier and consistent across features.