Using Cursor in Xcode 27

A native macOS app for App Store Connect that streamlines app updates and releases, making the process faster and easier.
Over the past few months, I have shifted most of the time I spend building features to Cursor when working on client projects, and only really switch back to Xcode when I am doing the last bits of polishing and writing code myself. While this workflow has been making me more productive, I have always enjoyed Xcode as an editor and was really excited to hear about the advances in Agentic Development that Xcode 27 introduced.
When Agentic Development features were first introduced in Xcode 26, I could not fully make the switch back to Xcode because the functionality was a bit limited and only Claude Code and Codex agents were supported. This has now changed in Xcode 27, and aside from first-party support for Claude Code, Codex, and Gemini, you can now bring any agent that complies with the Agent Client Protocol (ACP).
Together with other improvements, such as new embedded skills and an improved agentic experience, I knew I wanted to give Xcode another go, and now I could use Cursor to do so! In this article, I will show you everything you need to do to use Cursor as an agent in Xcode 27.
Installing Cursor’s agent CLI
While you might only know Cursor as an AI-powered IDE, it also has a command-line tool that lets you interact with agents directly from the terminal and have any client connect to its ACP-compliant agent.
The first step to get Cursor’s agent into Xcode is to install the CLI:
curl https://cursor.com/install -fsS | bashAfter following the setup steps, you can verify that the installation was successful by running the following command in your terminal:
agent --versionAdding an ACP-Compliant Agent to Xcode
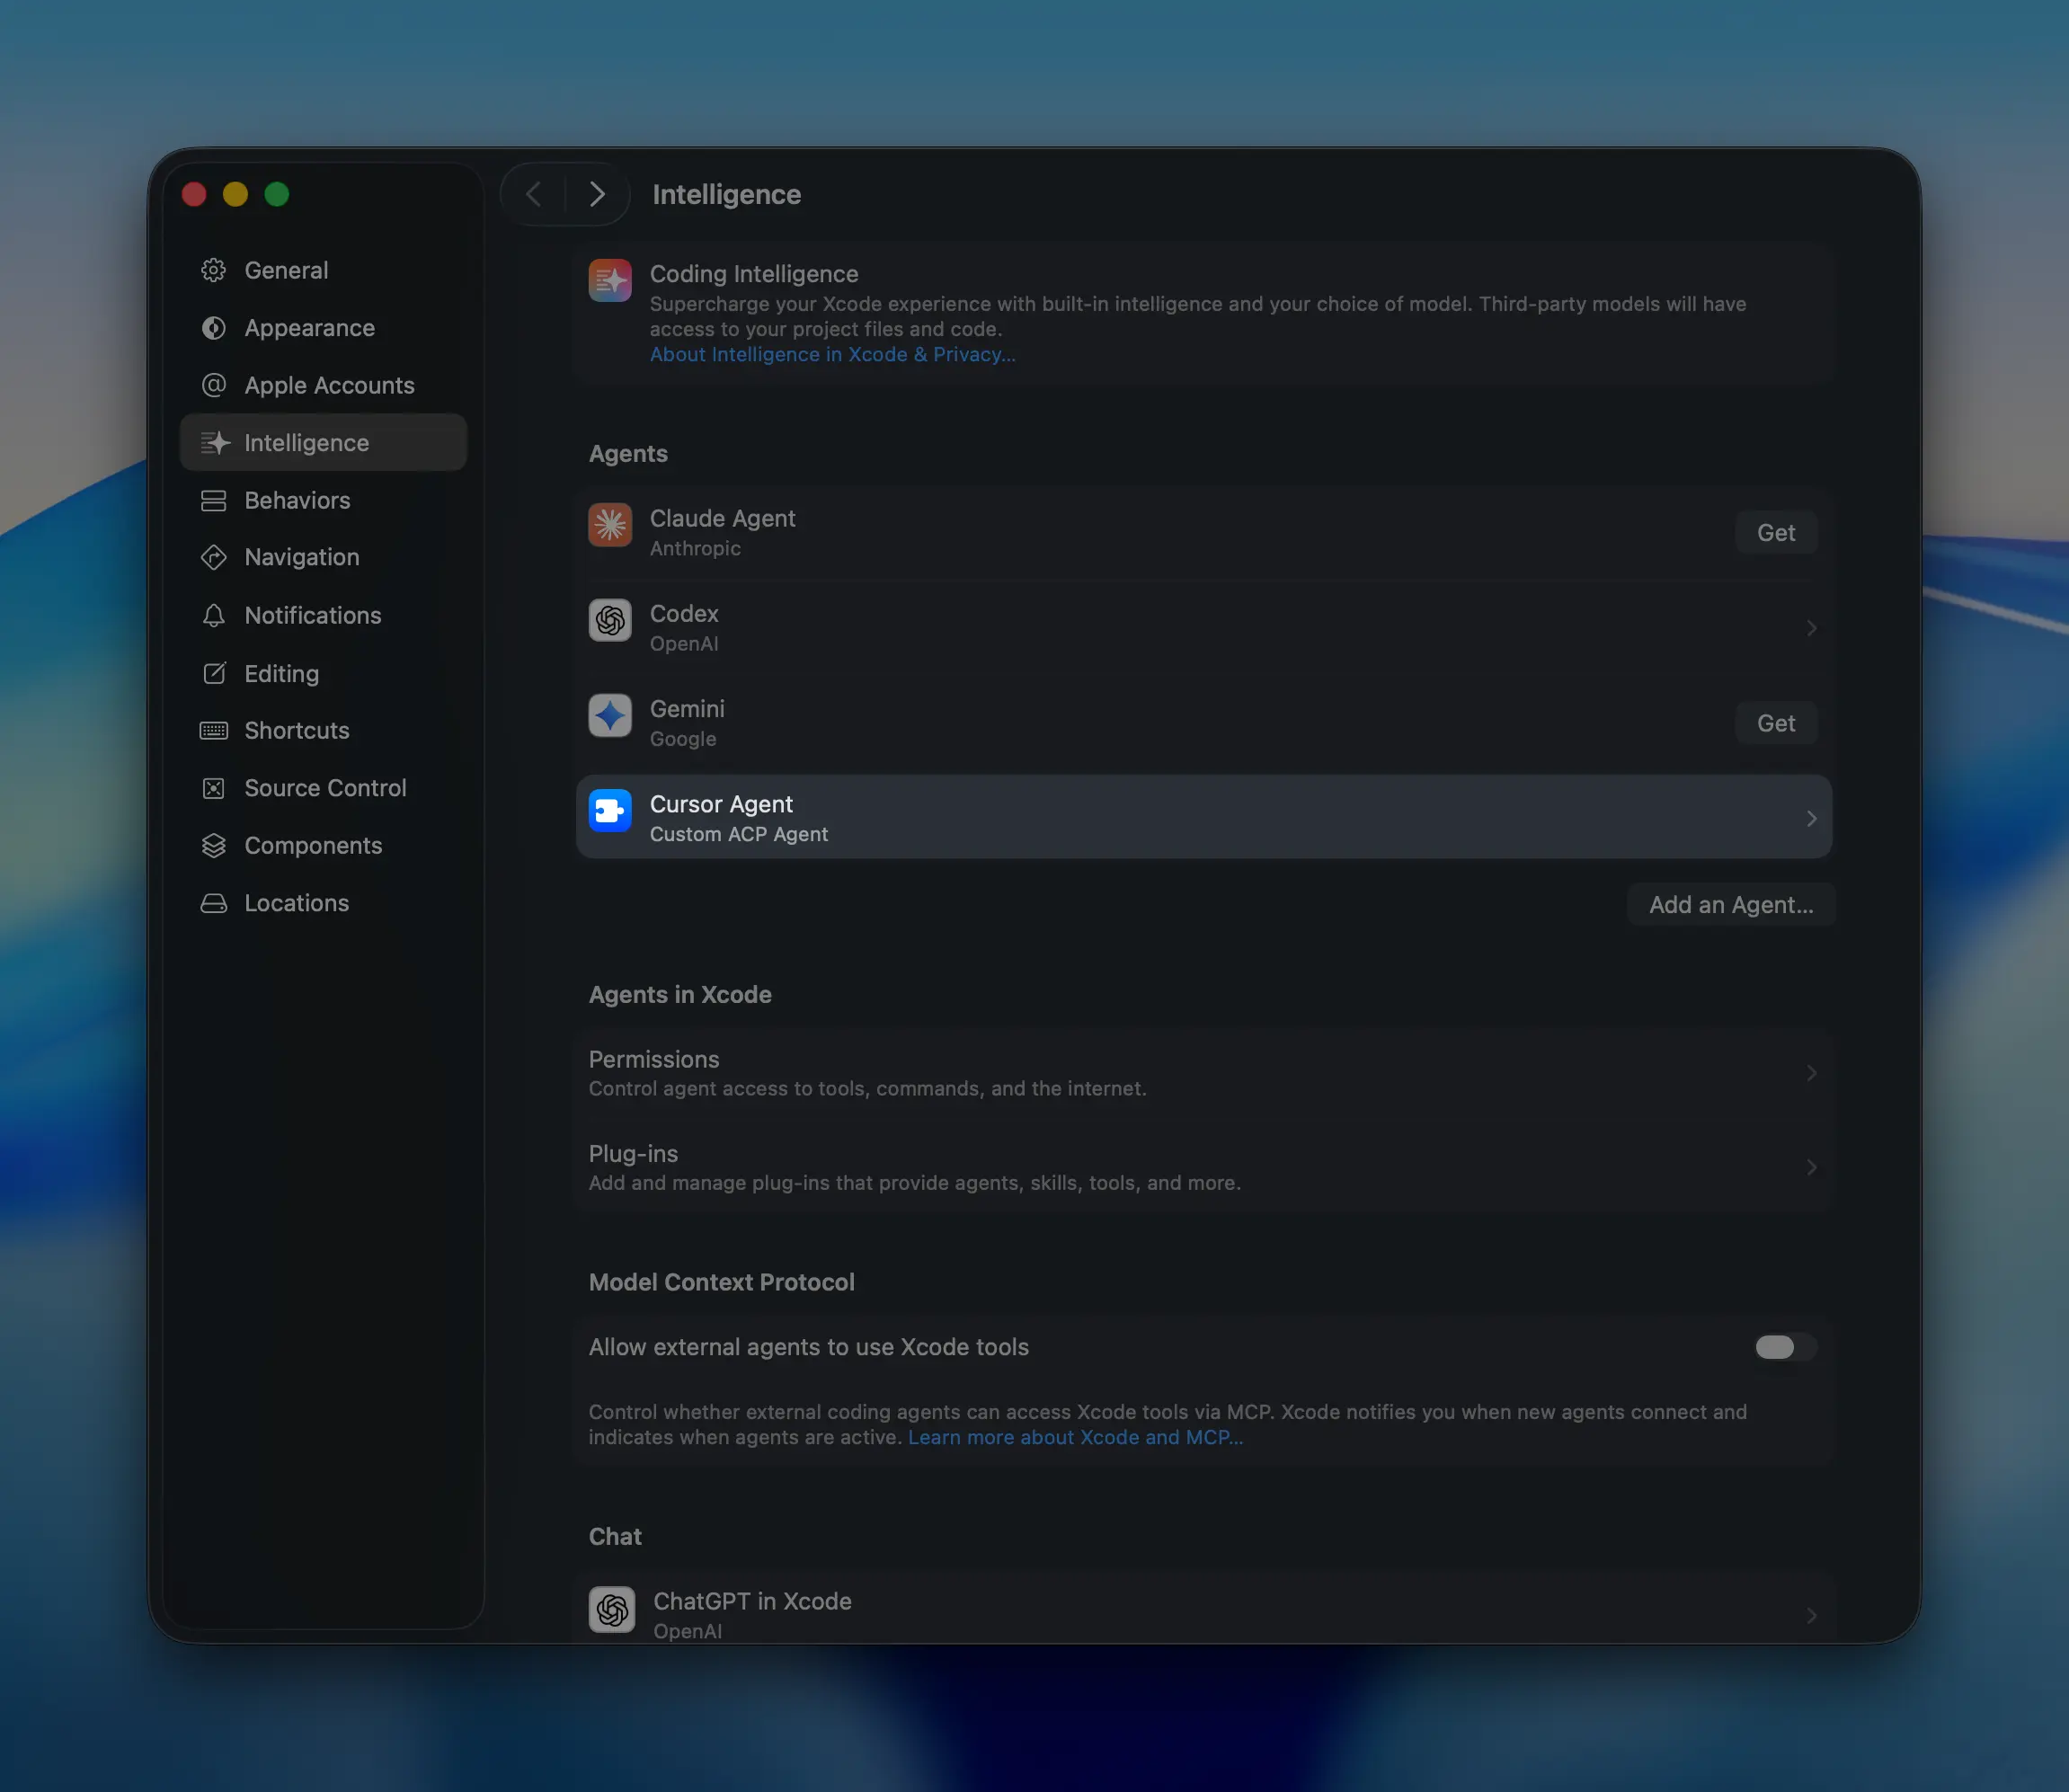
You can configure agents in Xcode by going to the Intelligence tab in the preferences window. To install a custom agent, click the Add an Agent button:

This will launch a new window where you will need to configure the new agent. In this window, you will point Xcode to the CLI that you have just installed and tell it how to run it in an ACP-compliant way:
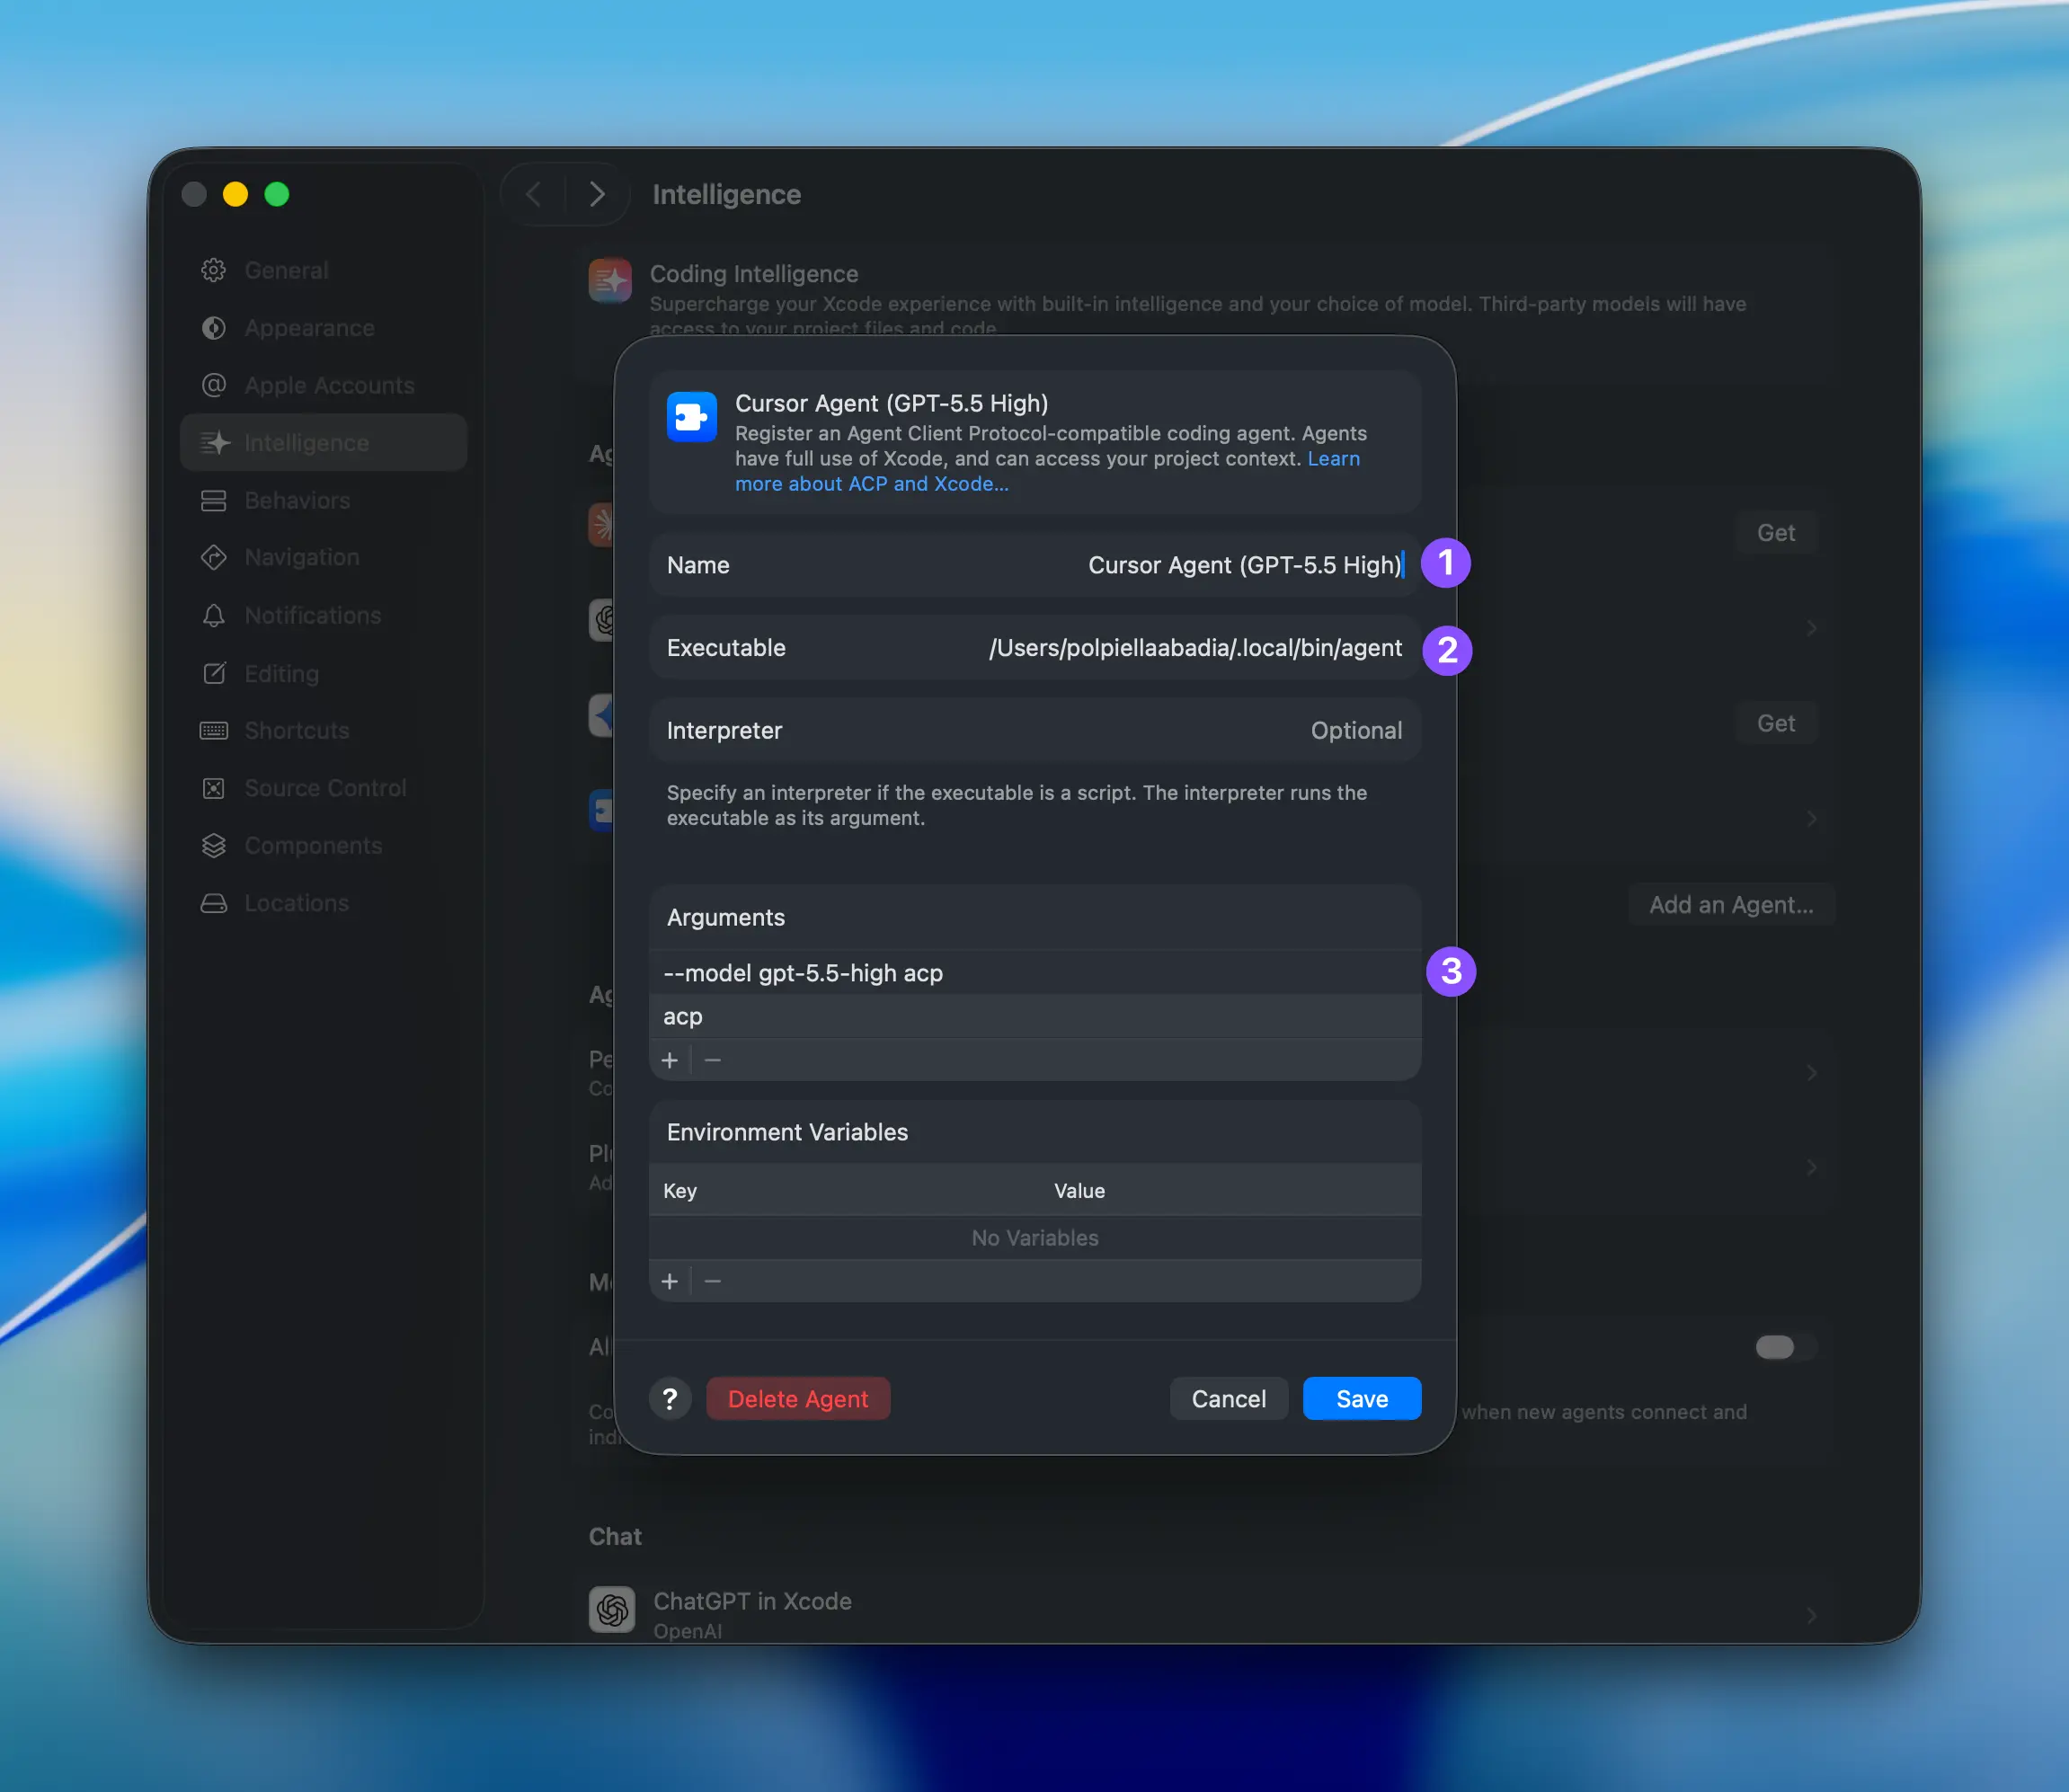
Let’s break down the configuration step by step:
- Name: Add any name you want to identify the agent by.
- Executable: This is the path to the executable file that will be used to run the agent. You can find the path to the Cursor agent executable by running
which agentin your terminal. - Arguments: These are the arguments that will be passed to the executable file when running the agent. You must pass the
acpargument, and you can optionally pass the--modelflag to enforce a specific model.
Tip: Cursor supports many different models. You can find the full list by running
agent --list-modelsand pick the one that best fits your needs.
After you click on the Add button, you should see the new custom agent in the list:
Choosing the agent to use in new conversations
When you start a new conversation in Xcode from the Intelligence tab, you will be prompted to choose the agent you want to use. Make sure you select Cursor from the list:
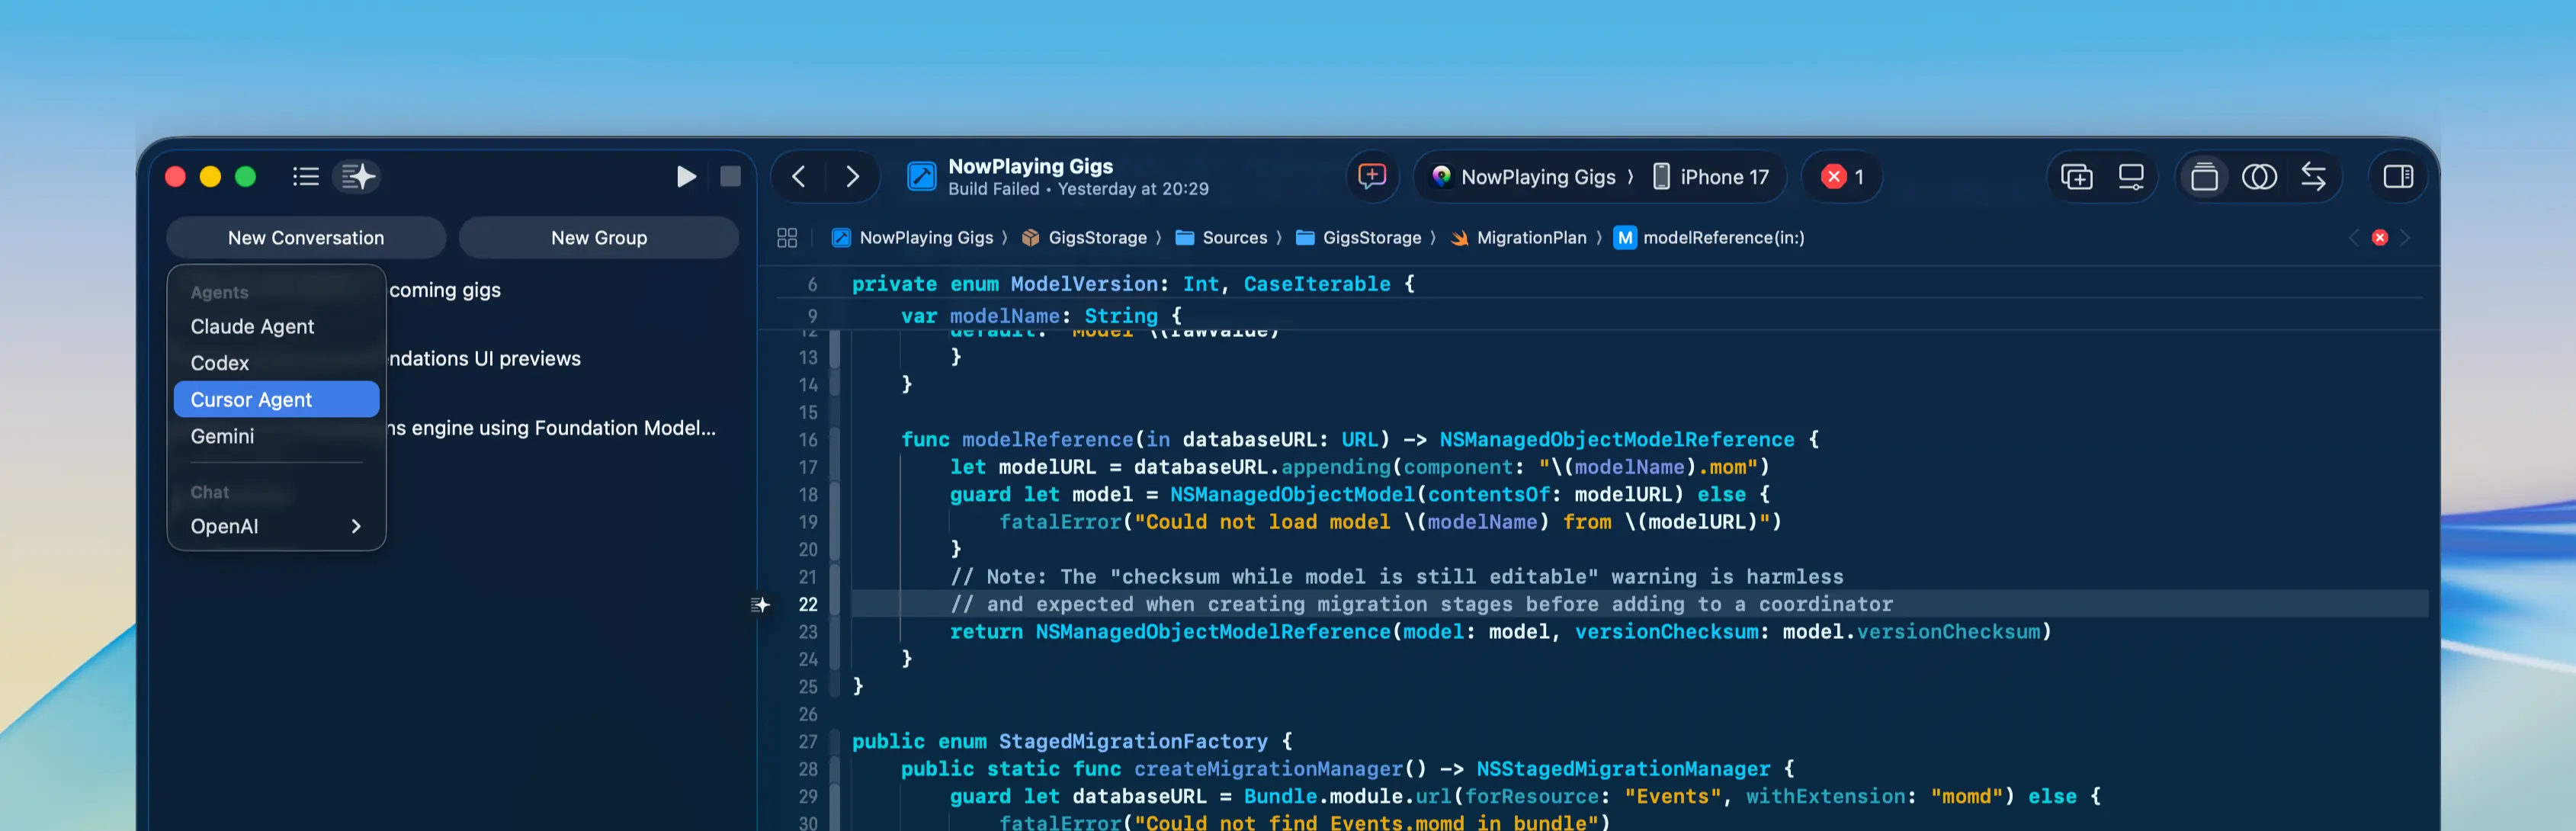
Note: When you press the
New Conversationbutton in the toolbar, it will automatically use the last selected agent and will not prompt you to choose one again.