Scheduled Swift AWS lambdas

Go from confusion to confidence with a step-by-step Swift Concurrency course, helping you smoothly migrate to Swift 6 and fully leverage its features.
A while ago I wrote an article about how I use GitHub Actions scheduled workflows to post a tweet every Friday with a list of that week’s most read articles on my blog. While this approach worked great initially, I quickly faced a limitation with GitHub Actions that broke my automation workflow 😭:
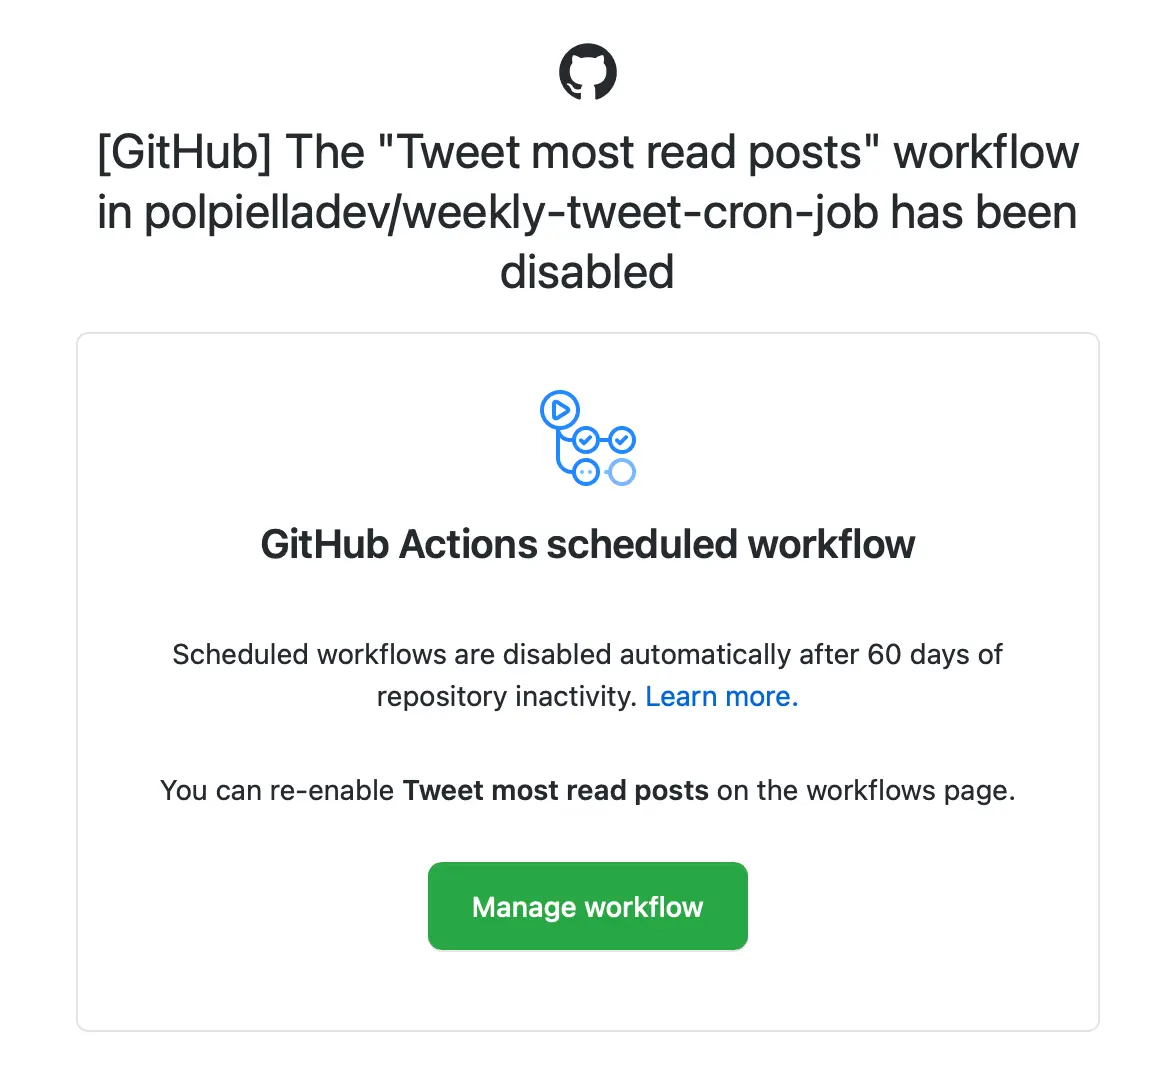
GitHub automatically turns off any scheduled workflows after 60 days of inactivity in a repository and, as my repository’s sole job was to run a workflow on a schedule without committing any code back to the repository, this trick was not really going to work.
I could have changed the workflow to make it commit something back to the repository every time it executed and get past this issue, but I wanted to work on a better solution and learn something new along the way.
For this reason, I decided to put on my serverless hat again, convert my CLI into a Swift AWS lambda and learn how to make it run on a schedule. In this article, I will show you how you can set up an AWS lambda to run on a schedule with very little effort.
Creating an AWS lambda
Let’s first create a new AWS lambda by heading over to the AWS console, searching for the Lambda service and clicking on the Create a new function button:
You will now see a Create function page where you can configure the new lambda:
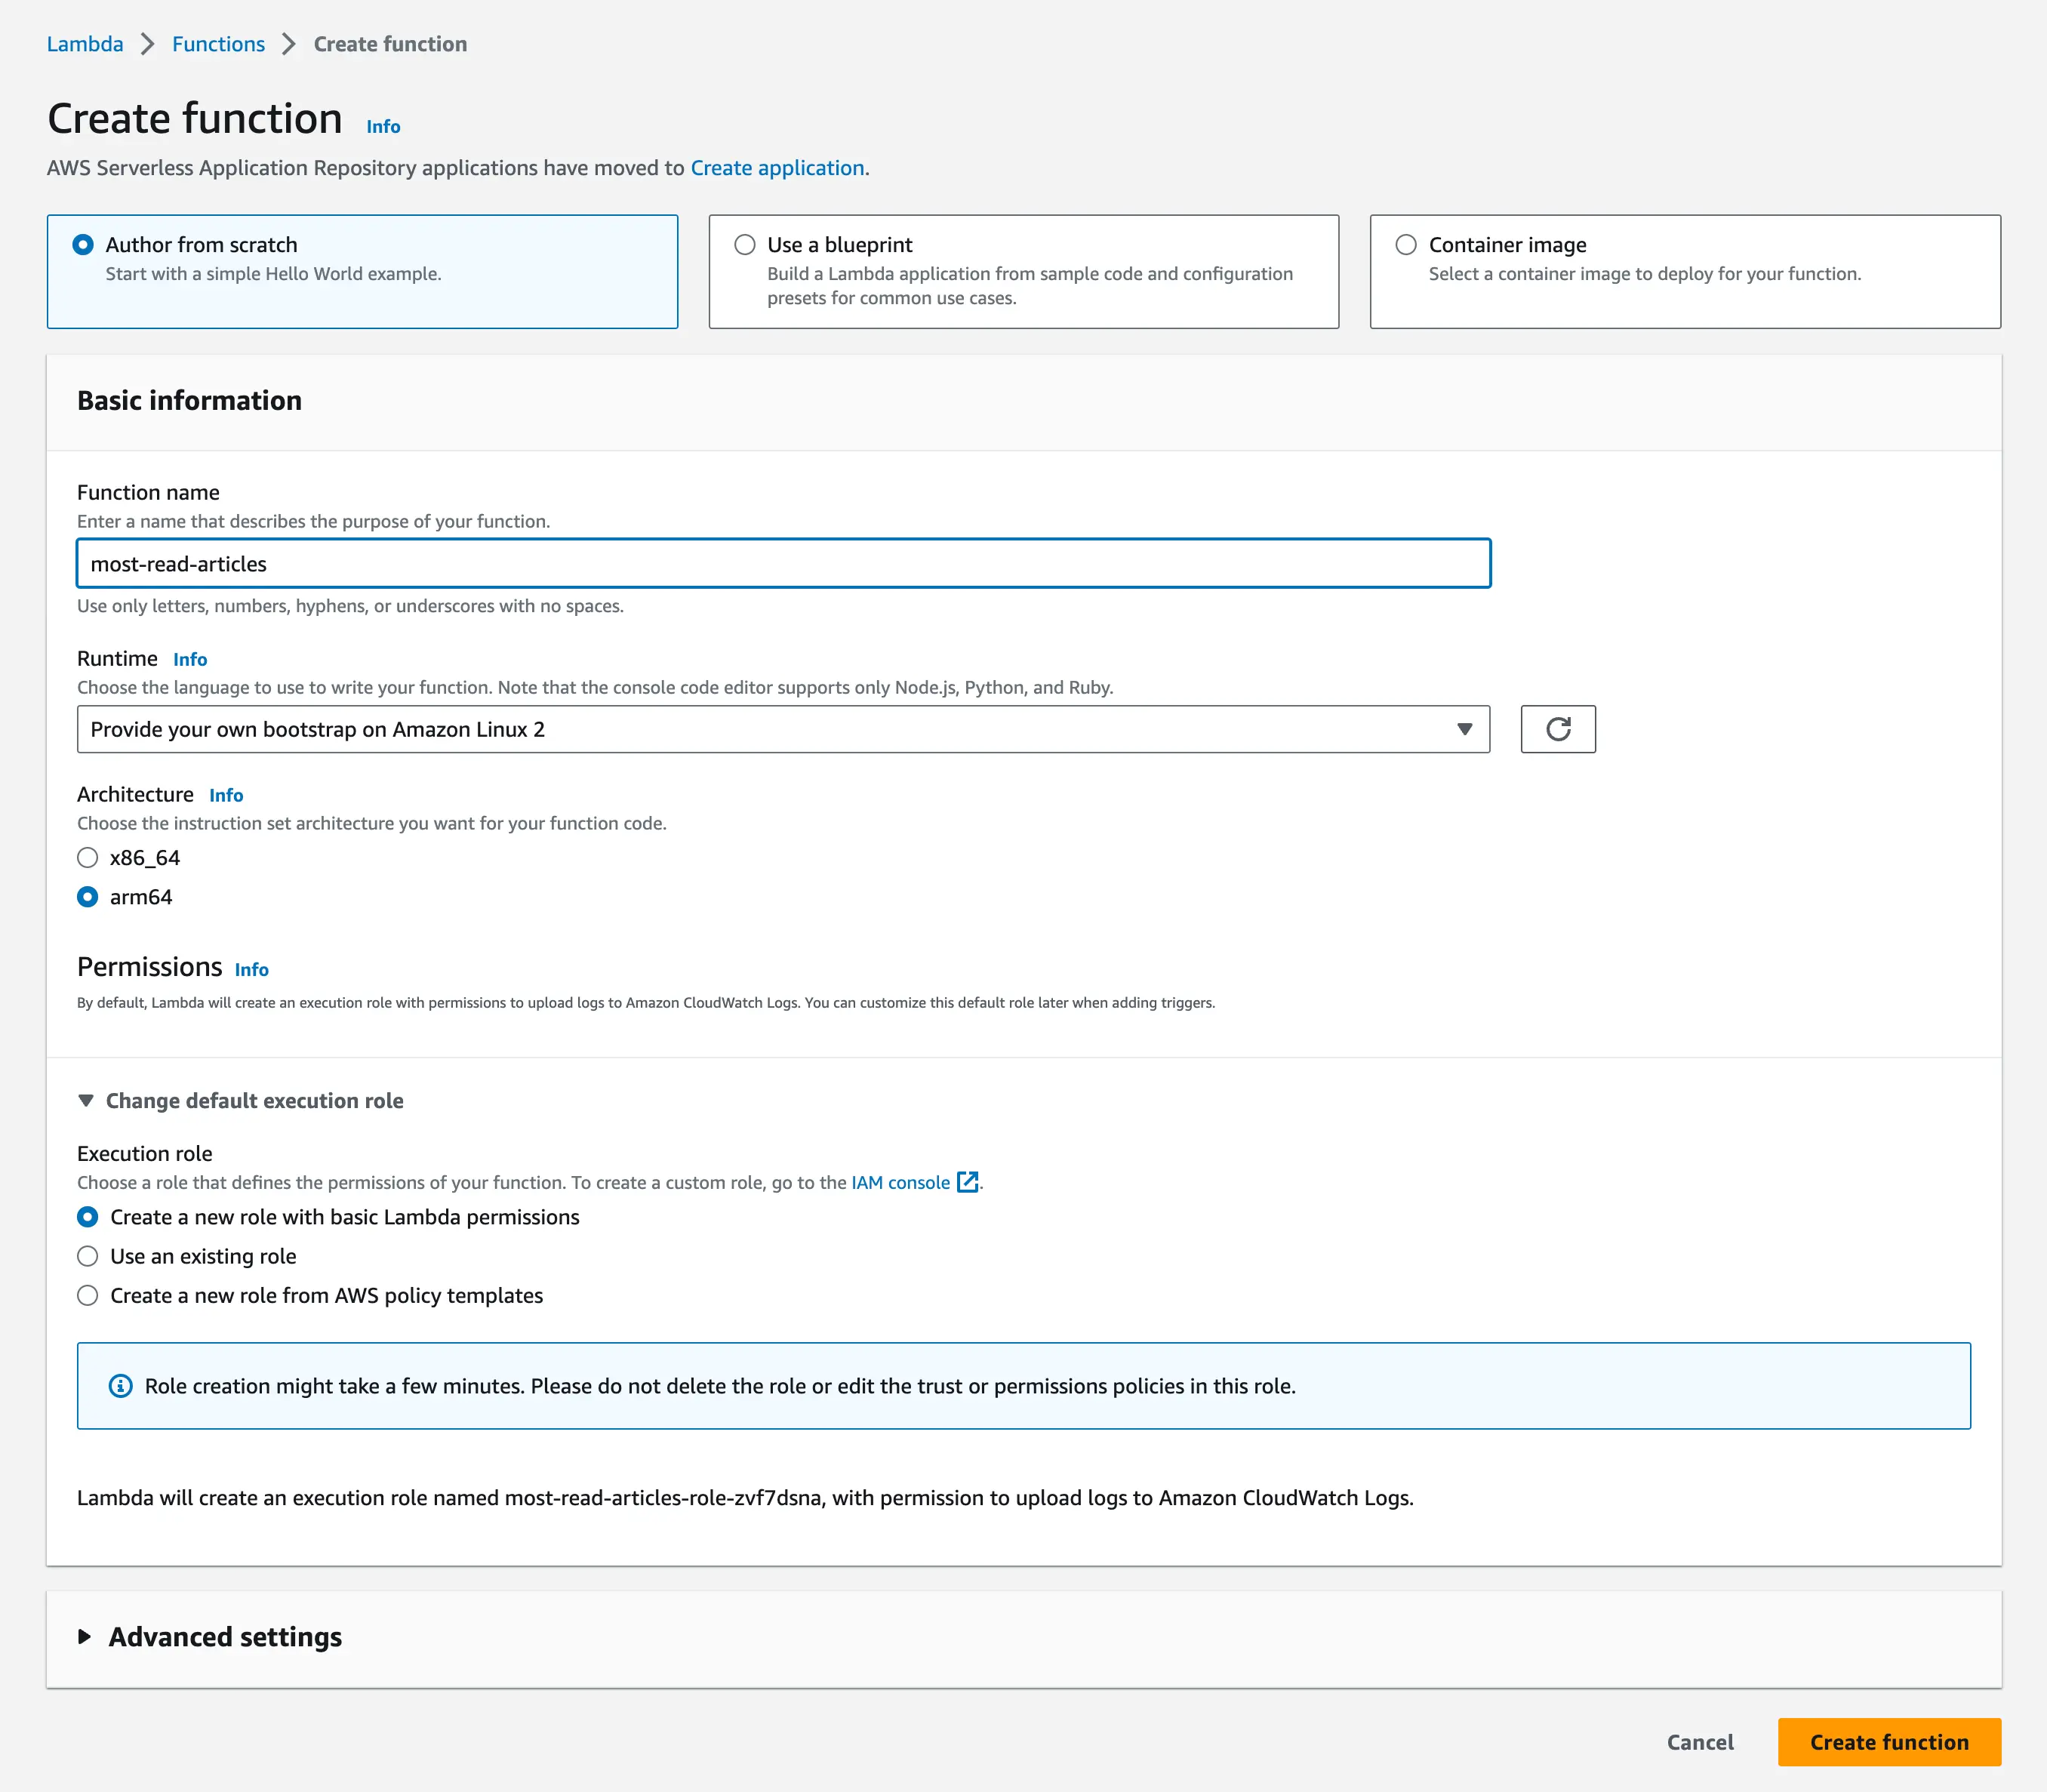
In this page you need to:
- Give the function a name.
- Choose the option to provide your own bootstrap on Amazon Linux 2.
- Use
arm64as the architecture. - Create a new role with basic Lambda permissions if you don’t have one already.
I am not going to show you how to write a Swift AWS lambda or deploy it in this article, but if you want to find out how to do so you can check out both my article on writing modern Swift AWS lambdas and my article on deploying Swift AWS lambdas using CI/CD.
Adding a trigger
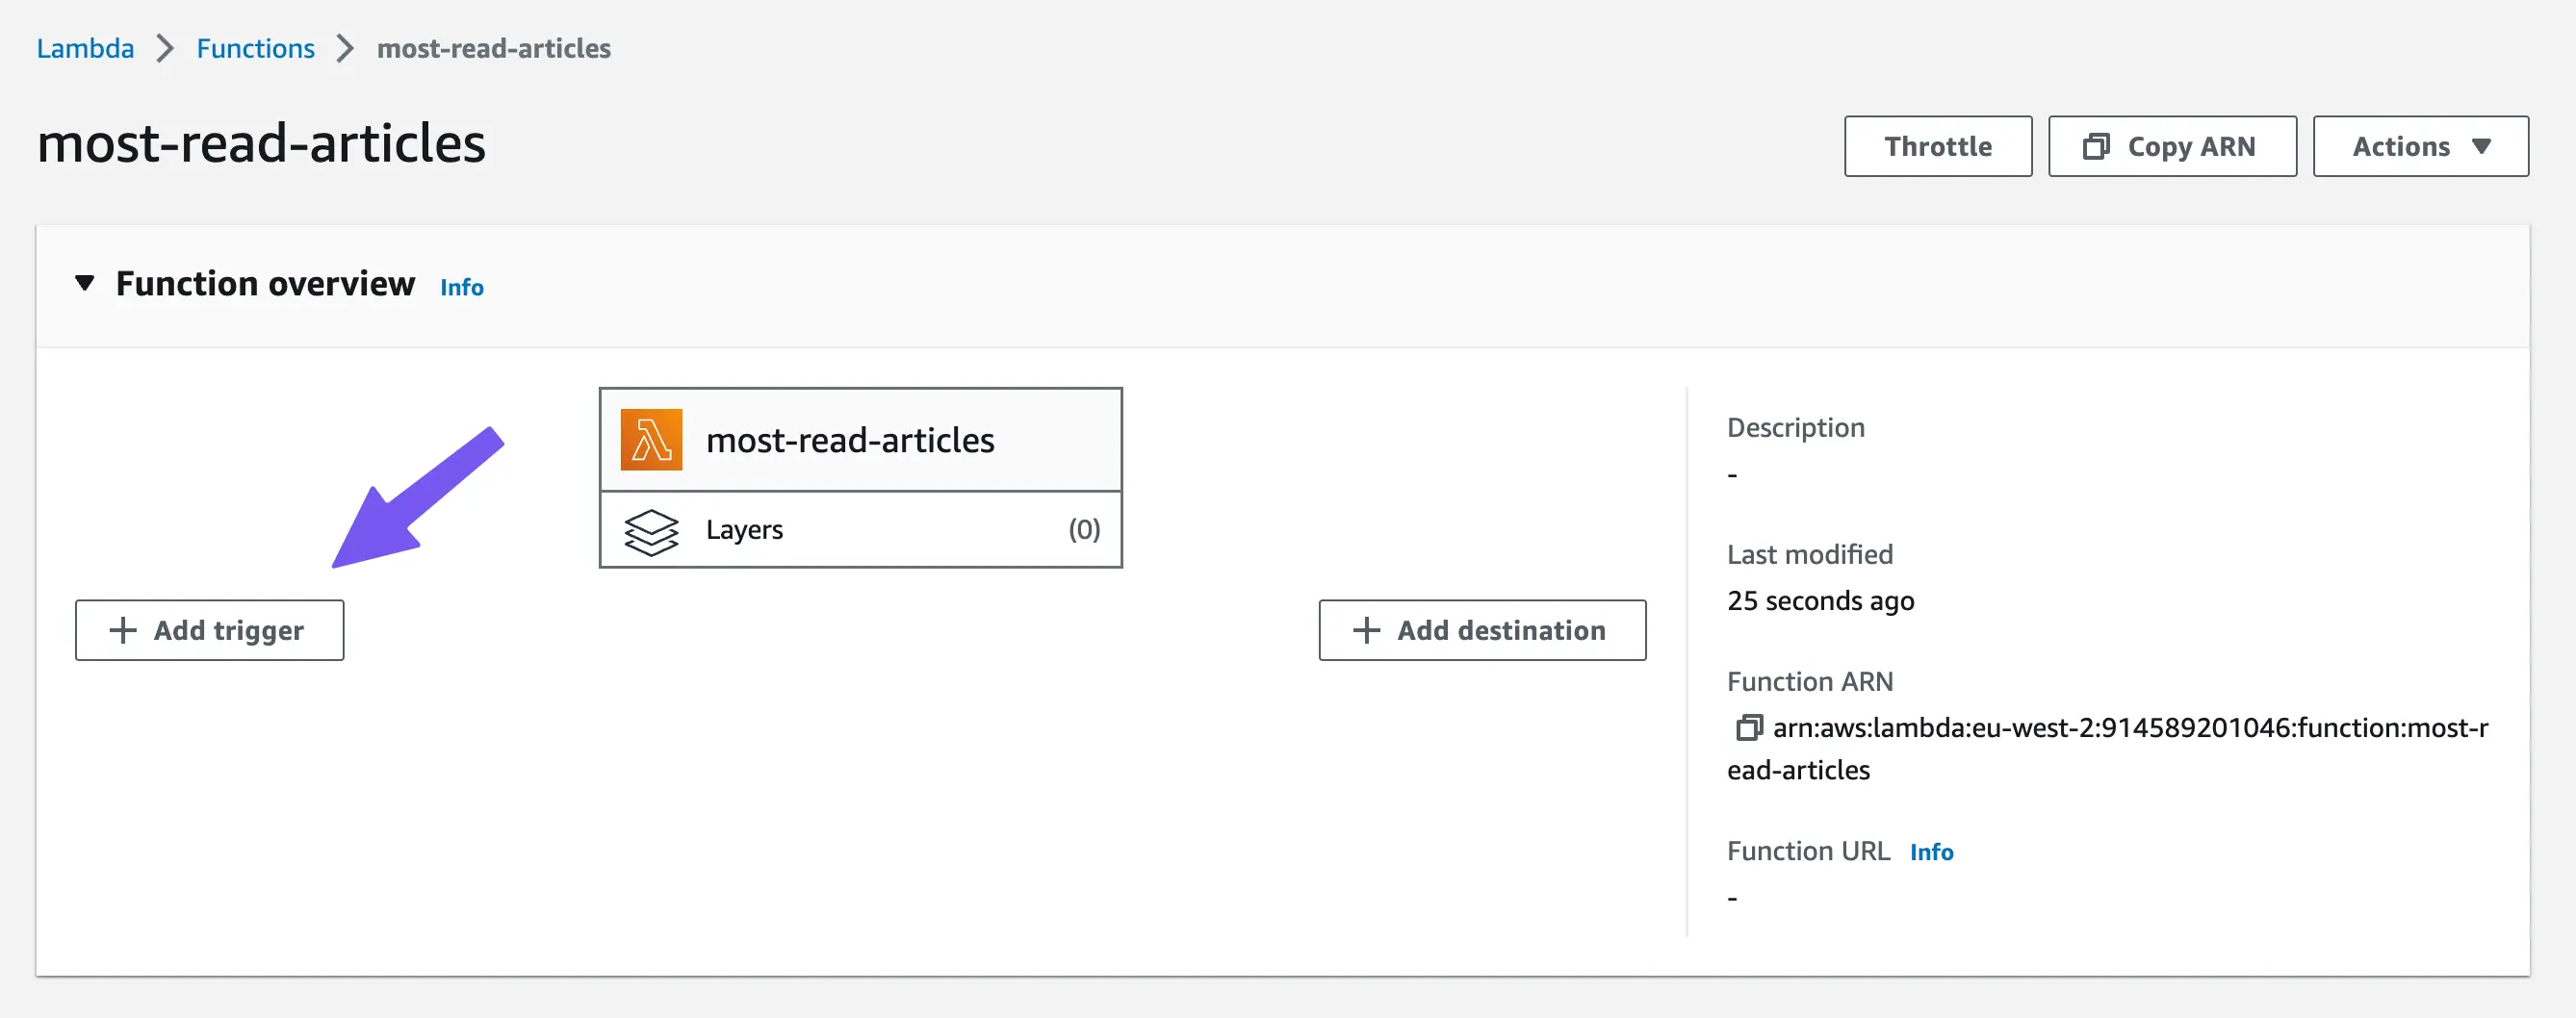
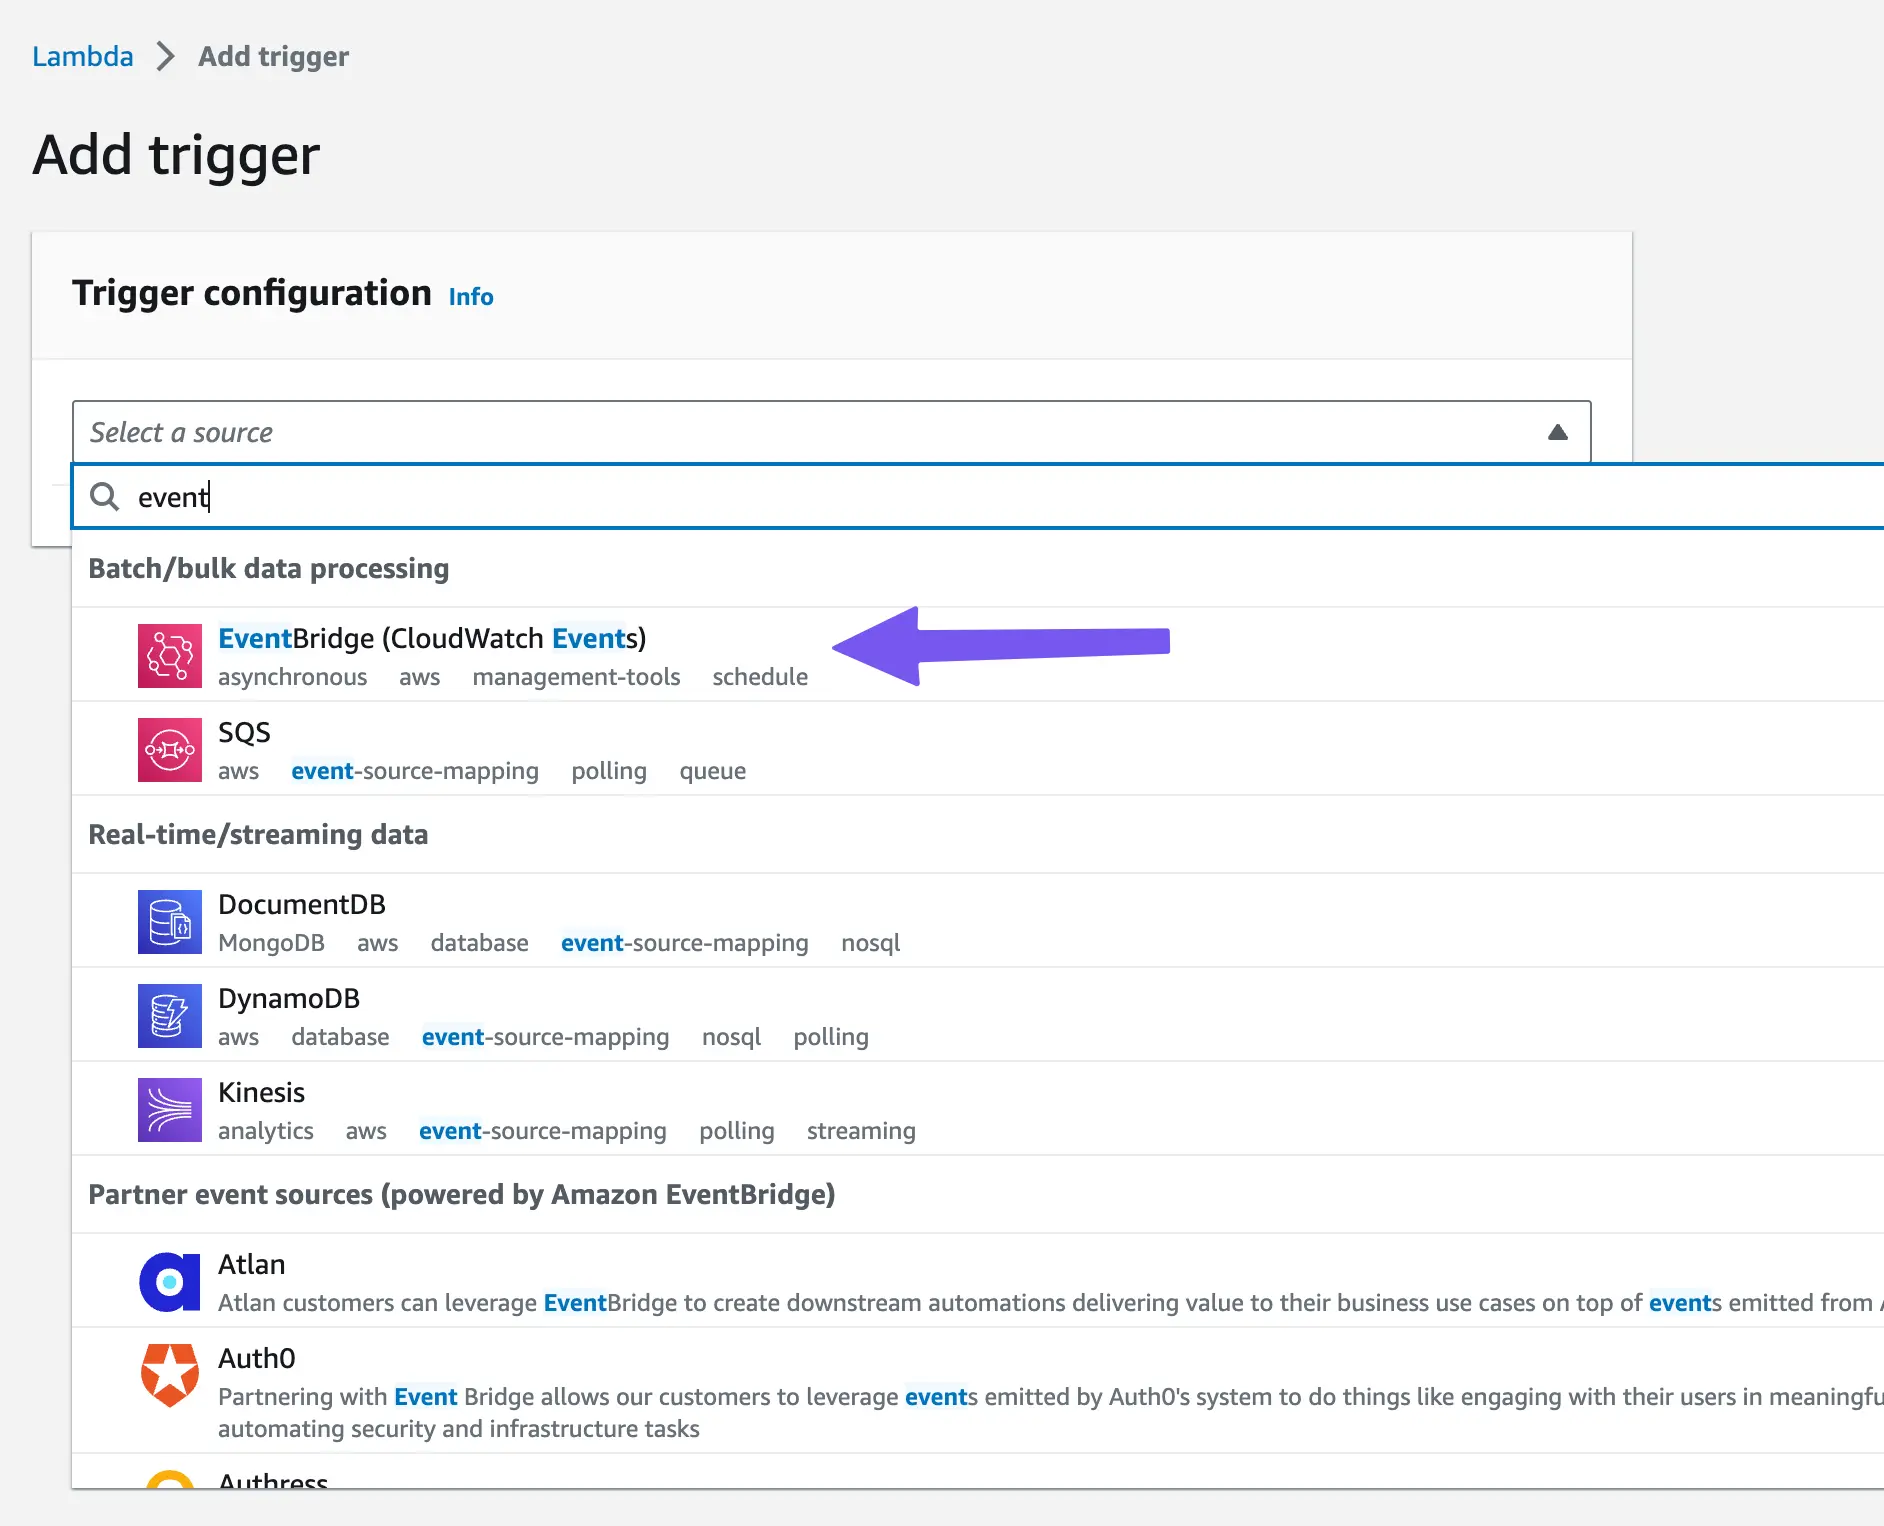
In the function overview page, click on the Add trigger button:
Then, in the Trigger cofiguration page select the EventBridge (CloudWatch Events) service as the trigger condition:
Finally, create a new event rule and configure it:
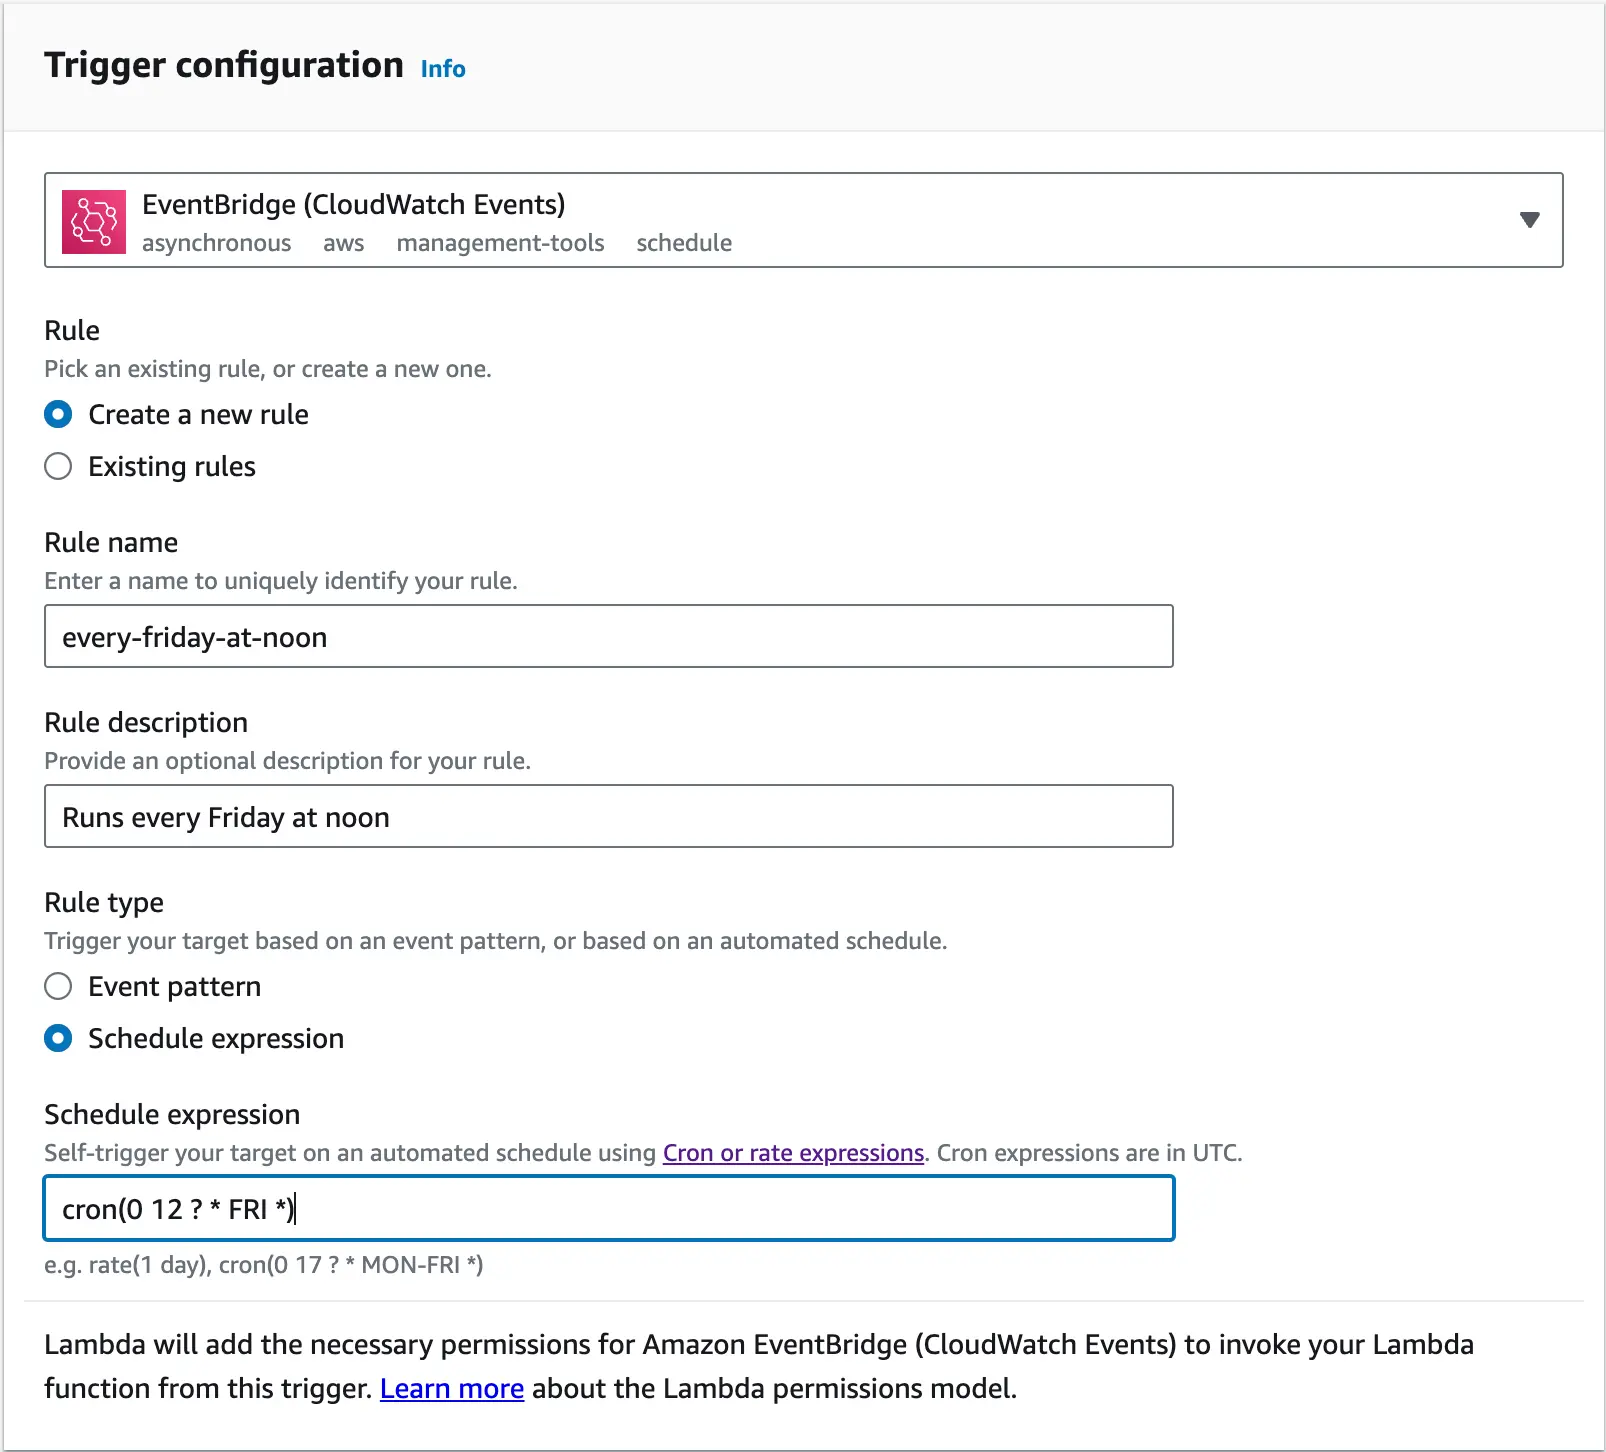
You will need to set up the new rule by:
- Giving it a name and a description.
- Setting up a scheduled expression.
In my case, I wanted the lambda to run every Friday at noon, so I used a cron expression to do exactly that:
cron(0 12 ? * FRI *)In this article I am only covering
cronexpressions but there is another type of expression you can use if it better suits your needs:rate. Rate expressions start as soon as you create the rule and they run repeatedly based on the frequency you specify. For example, if you want your function to run every minute starting from the moment you create the rule, you can write:rate(1 minute).
To set up an Amazon AWS cron expression, you need to provide 6 positional arguments that specify the times you want the function to run at. In order, the arguments are:
- Minutes: Which minute of the hour should the function run at. In the example above, it will run at minute 0 of the specified hour.
- Hour: Which hour of the specified day should the function run at. In the example above, it will run at hour 12 of the specified day.
- Day of the month: Specifies the day of the month the function should run at. In the example above, I used the
?operator to specify that it can be any day of the month. - Month: Which month of the year the function should run at. In the example above I used the
*to tell AWS to run the function every month. - Day of the week: Which day of the week the function should run at. In the example above, I told AWS to run the function on a Friday.
- Year: Which year you want the function to run at. In the example above, I told AWS to run the function every year.
Combining all arguments, the expression will run every Friday of every month and every year at 12:00 pm.
Despite the fact that I have been working with cron expressions for a long time they still cause me a lot of confusion and headaches 😅. For that reason, I thoroughly recommend you use a helper website or app like crontab.guru to make getting cron expressions right a breeze! 💨