How I use GitHub Actions to update my GitHub profile

A native macOS app for App Store Connect that streamlines app updates and releases, making the process faster and easier.
GitHub have recently introduced a way of personalising your GitHub profile to include relevant information and styles to be able to show off your skills and stats when people visit your profile.
While for most cases showing static data might be enough, you might want to fetch data dynamically from an API and update your README accordingly. In my case, I wanted to be able to show the latest articles from my blog, but I was clueless on how I could do so. I started researching and came across a list of examples which inspired to write my own github action to dynamically update content in my profile.
Creating a profile repo
The first thing we need to do before we get started and write any code is to create the repo where your profile will live. In order to do this, you will need to create a repo which has your username as its name, just like I do in the image below:
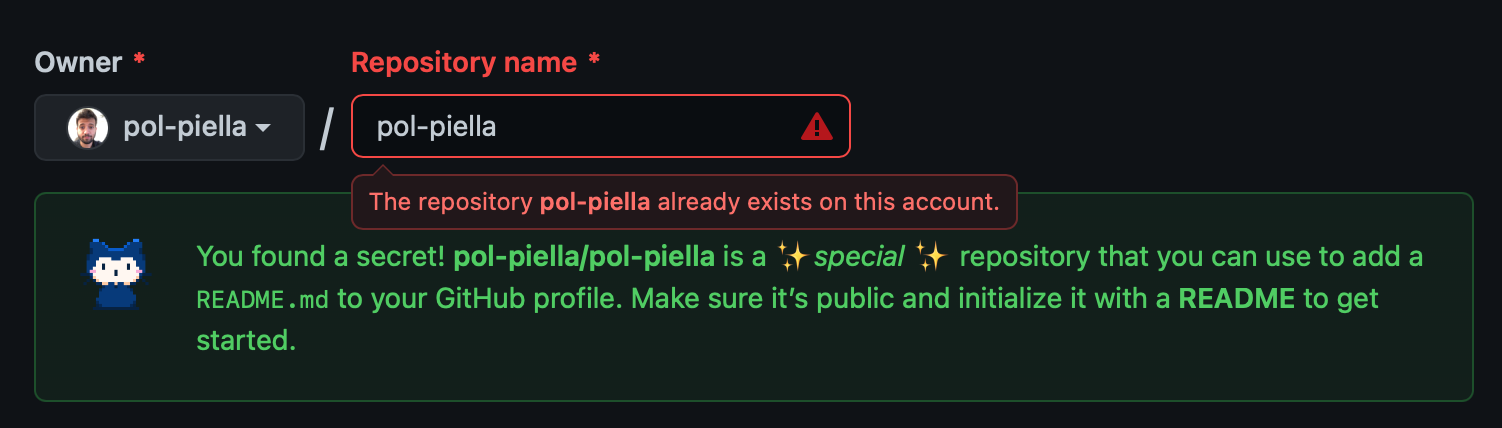
You will then be greeted with a nice little message telling that you have found a secret and by naming the repo in the same way as your username, this will then become your profile. Before clicking create, make sure that you select the Add a README file checkbox. Feel free at this point to stop reading and start writing your README and populating with the content you would like to showcase to others.
Creating the library
The first thing I did when I cloned the project locally was to create a directory called Readme where the library will live and then call swift package init --type executable inside it. This step will generate all the code you need to create a script using Swift, which will have main.swift as its entry point.
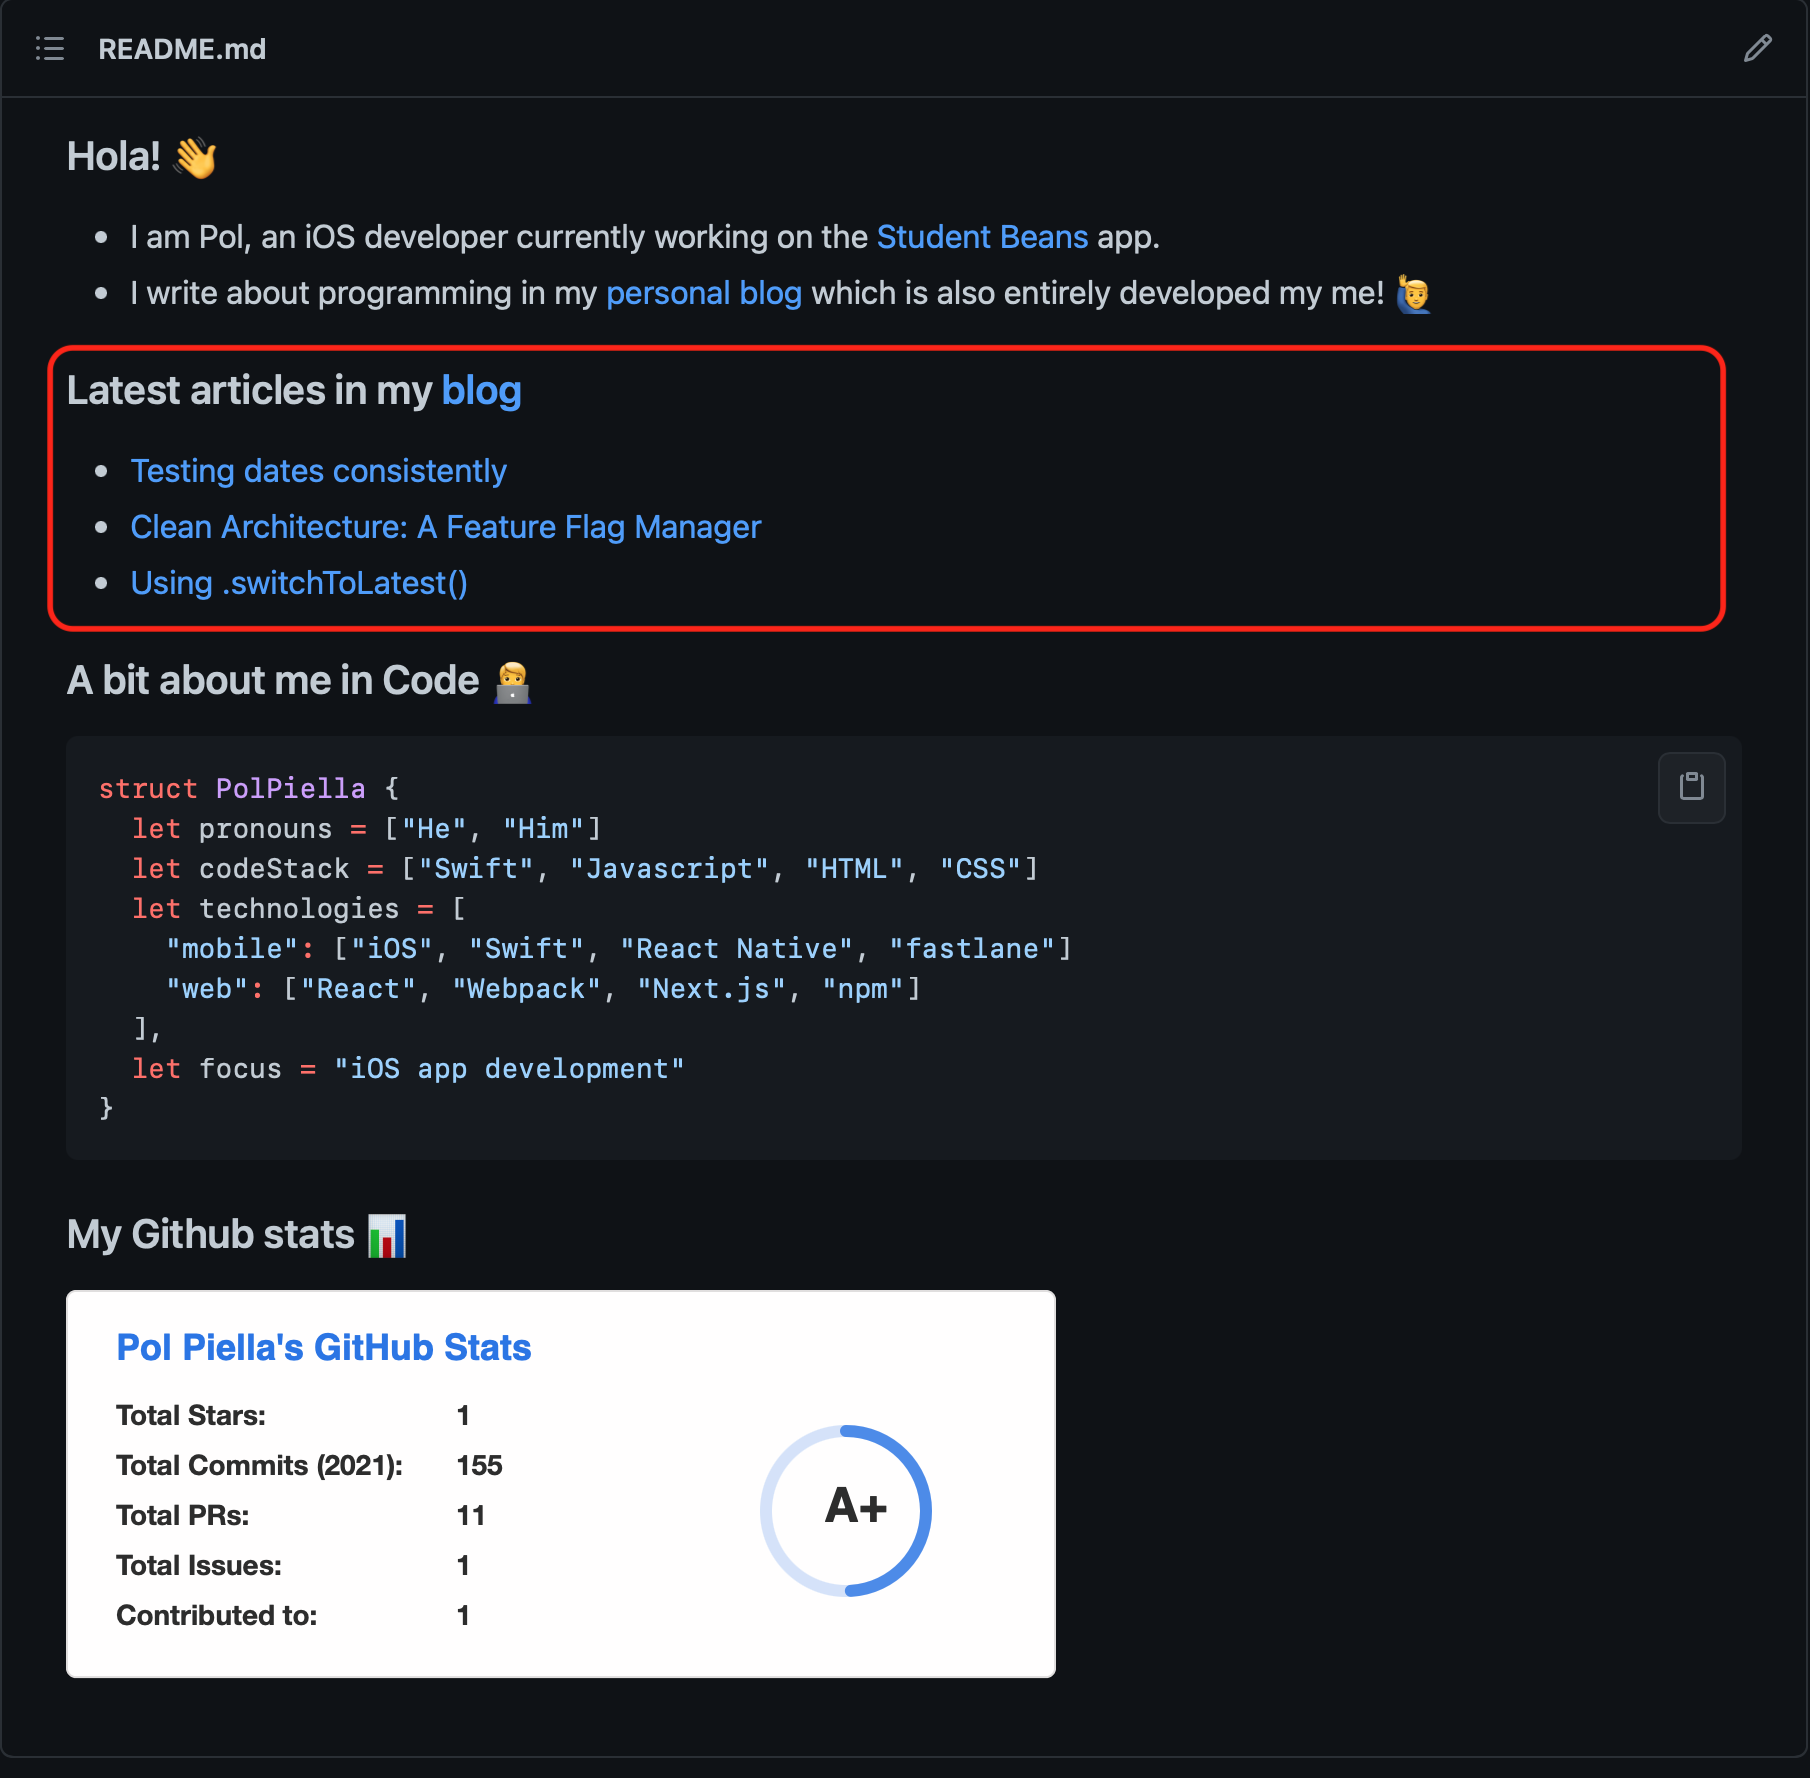
On top of this, I created another directory called templates with a single file inside: README.md.tpl. The contents of this file are the exact same as the README.md I have at the root of the repo but with one exception, I added a new section for the content I will be fetching dynamically with a single placeholder that I can then find and replace in my library:
[...]

### Latest articles in my [blog](https://www.polpiella.codes)

{latest_blogs}

[...]
It is important to note that, from this point onwards, any changes that I want to make to my profile, I will have to make to my template file as the contents of this will override any changes that the README.md has at the root of the repository.
Getting the latest blog posts
Once we have our template sorted, it is time to finally write some code! 🧑💻 Let’s start by writing a function that fetches the latest articles from my website’s RSS feed and parses into markdown that we can then insert into our README file. For the sake of simplicity and as it is a library I find very easy to use, I decided to go with FeedKit as my way of decoding my RSS feed.
I then created a struct that would encapsulate all of the rss feed loading and parsing logic and will return the model needed by the script. Please note that you can use the RSSFeedItem returned by the parsing library, but I decided to create my own Post type that would decouple my model logic from the library’s model implementation:
import FeedKit
import Foundation

protocol PostFeedLoader {
    func load() throws ->  [Post]
}

struct Post {
    let title: String
    let link: String
}

struct RSSFeedLoader {
    let parser: FeedParser

    init(parser: FeedParser = .init(URL: URL(string: "https://polpiella.dev/rss.xml")!)) {
        self.parser = parser
    }
}

extension RSSFeedLoader: PostFeedLoader {
    func load() throws ->  [Post] {
        try parser
            .parse()
            .get()
            .rssFeed?
            .items?
            .compactMap { $0 }
            .prefix(3)
            .map { Post(title: $0.title ?? "", link: $0.link ?? "") } ?? []
    }
}
Writing to the README file
Now that I had fetched my latest blog posts, I needed a way of writing this content to my profile’s README.md. To do this, I started by converting my array of Posts into a Markdown compatible string representation of a list of links:
extension Post {
    var markdown: String { "- [\(title)](\(link))" }
}
Last thing to do after having the content formatted correctly was to create the command itself. I used Apple’s ArgumentParser package to be able to create a command and pass arugments to it from the command line. This allowed me to pass the paths of the template and the output README.md files so that I don’t have to perform any path operations form within the executable itself. You can see the whole script implementation below:
import Foundation
import ArgumentParser

struct Readme: ParsableCommand {
    @Argument(help: "The template file that is to be used to parse and replace content.")
    var template: String

    @Argument(help: "The path of the destination README file.")
    var destination: String

    // This is the code that will be executed by the command
    func run() throws {
        // Load the RSS Feed
        let posts = try RSSFeedLoader().load()
        // Format the model data into a string
        let formattedPosts = MarkdownFormatter.formatPostsToString(posts)
        // Read the string from the template file and replace the placeholder with the posts string
        let newContent = try String(contentsOf: URL(fileURLWithPath: template), encoding: .utf8)
            .replacingOccurrences(of: "{latest_blogs}", with: formattedPosts)
        // Write to the README.md file
        try newContent.write(to: URL(fileURLWithPath: destination), atomically: true, encoding: .utf8)
    }
}

// Invoke the script on the entrypoint `main.swift`
Readme.main()
And just like that, I had all the building blocks of my project. The only thing missing now was to create a workflow to trigger these actions.
Creating a GitHub workflow
I was very surprised to see how easy it is to set up GitHub Actions for any repo you have as the only thing you need to do is create a .github/workflows directory at the root of your repository and then add any workflows as .yml files in such location. You can learn more about these actions in the docs but they are essentially a form of CI/CD, where you provide a bunch of configuration to determine which agent to run your code in as well as specifying any commands you would like to run.
Specifying our requirements
For my project, as I am using Swift, I need to use an agent capable of running it and be able to perform the following requirements:
- The job should run on a nightly basis (I don’t update my blog more than once a day, so running it at mighnight every day would be okay).
- Check out the repository before any other script is run.
- Run the executable.
- If there are any changes to
README.md, commit and push. If not, do nothing.
Translating our requirements into .yml
In order to translate our requirements to something that GitHub can understand, we need to first create a .yml file in the directory mentioned above. Once we have this, let’s start by naming our action and giving it a few triggers:
name: Fetch latest blog posts and update README.md

on:
    push:
        - main
    schedule:
        - cron: "0 0 * * *"
In the code snippet above, we are telling our action what it should be triggered by. In our example, it will run every time we push a new commit to the main branch and whenever the cron specs are met (at minute 0 of hour 0 of every single day). If you are not familiar with cron schedule expressions, I would really recommend this site, which translates your expressions into human-readable times.
Now that we have set the triggers, we need to tell the action what to run and where to run it on. We can do this by adding a build to the jobs property as follows:
jobs:
    build:
        runs-on: macos-latest

        steps:
            - uses: actions/checkout@v2
            - run: cd Readme && swift run Readme $(pwd)/../templates/README.md.tpl $(pwd)/../README.md
            - run: |
                  git config user.name polpielladev
                  git config user.email info@polpiellamusic.com
                  git add README.md
                  git diff --quiet && git diff --staged --quiet || git commit -m "[generated]: Update latest blog posts in `README.md` file"
                  git push origin main
As you can see above, we are telling github to run this action in an macos machine and then we are telling it to perform the action we created earlier as well as the configuring our credentials and pushing to main. And just like that, we have an action that runs every midnight and adds latest posts from an RSS feed to a given section!