How to import Swift macros without using Swift Package Manager
Go from confusion to confidence with a step-by-step Swift Concurrency course, helping you smoothly migrate to Swift 6 and fully leverage its features.
Swift Macros are a powerful new feature introduced in Swift 5.9 that allows developers to generate code at compile time. They are a great way to reduce boilerplate code and help scale your codebase by leveraging the power of metaprogramming.
Due to the way they are implemented and their tight coupling with SPM, Swift macros are usually defined in Swift packages and, as such, they are usually imported into Xcode projects such as iOS apps or frameworks as SPM dependencies.
While this is fine in most cases, there are certain situations where you might not want or be able to import the macro as a Swift package dependency. For example, you might want to use a macro in a CocoaPods library or obfuscate its source code.
In these cases, and as I will show you in this article, you might want to import your macro into your Xcode project as a binary instead and not as an SPM dependency.
Prior art and resources
Before getting started with this week’s topic, I wanted to give credit to and share a few resources that helped me get this working and that showed me this was possible in the first place 👏:
- Integrating Swift Macros with Xcodeproj native blocks by Pedro Piñera: In this article, Pedro goes through how Tuist uses SPM to resolve dependencies and then immediately maps them into Xcode targets and how, with a series of steps not too dissimilar to what I will show you in this article, you can use this principle to add a macro to your Tuist project.
- Swift Forums thread: This thread on the Swift forums has a lot of useful information on the process of importing a binary macro into an Xcode project.
Creating a Swift macro
First things first, how do you create a Swift macro? Well, there are two easy ways to do it: using Xcode or calling swift package from the command line tool.
Both methods eventually yield the same result and create a Swift package with a ready-to-use example macro called #stringify.
// swift-tools-version: 5.9

import PackageDescription
import CompilerPluginSupport

let package = Package(
    name: "Stringify",
    platforms: [.macOS(.v10_15), .iOS(.v13), .tvOS(.v13), .watchOS(.v6), .macCatalyst(.v13)],
    products: [
        .library(
            name: "Stringify",
            targets: ["Stringify"]
        ),
        .executable(
            name: "StringifyClient",
            targets: ["StringifyClient"]
        ),
    ],
    dependencies: [
        .package(url: "https://github.com/apple/swift-syntax.git", from: "509.0.0"),
    ],
    targets: [
        .macro(
            name: "StringifyMacros",
            dependencies: [
                .product(name: "SwiftSyntaxMacros", package: "swift-syntax"),
                .product(name: "SwiftCompilerPlugin", package: "swift-syntax")
            ]
        ),
        .target(name: "Stringify", dependencies: ["StringifyMacros"]),
        .executableTarget(name: "StringifyClient", dependencies: ["Stringify"])
    ]
)
By default, the structure for a Swift macro usually consists of three targets:
- A
librarytarget (Stringify) that exposes the macro definition as part of its public API to its consumers. - A
macrotarget (StringifyMacros) that contains the list and implementation of all macros defined in the package. - Optional An
executabletarget (StringifyClient) that allows you to test the macro in the same way its consumers will. This target is optional and you can use unit tests to validate the macro’s behavior instead if you prefer.
Alongside these targets, you will usually have two products defined in the package’s manifest:
- A
libraryproduct associated with thelibrarytarget that consumers of this package will use to import the macro into their projects when using Swift Package Manager. - Optional An
executableproduct associated with theexecutabletarget that provides a way to test and run the macro in a standalone environment.
Using Xcode
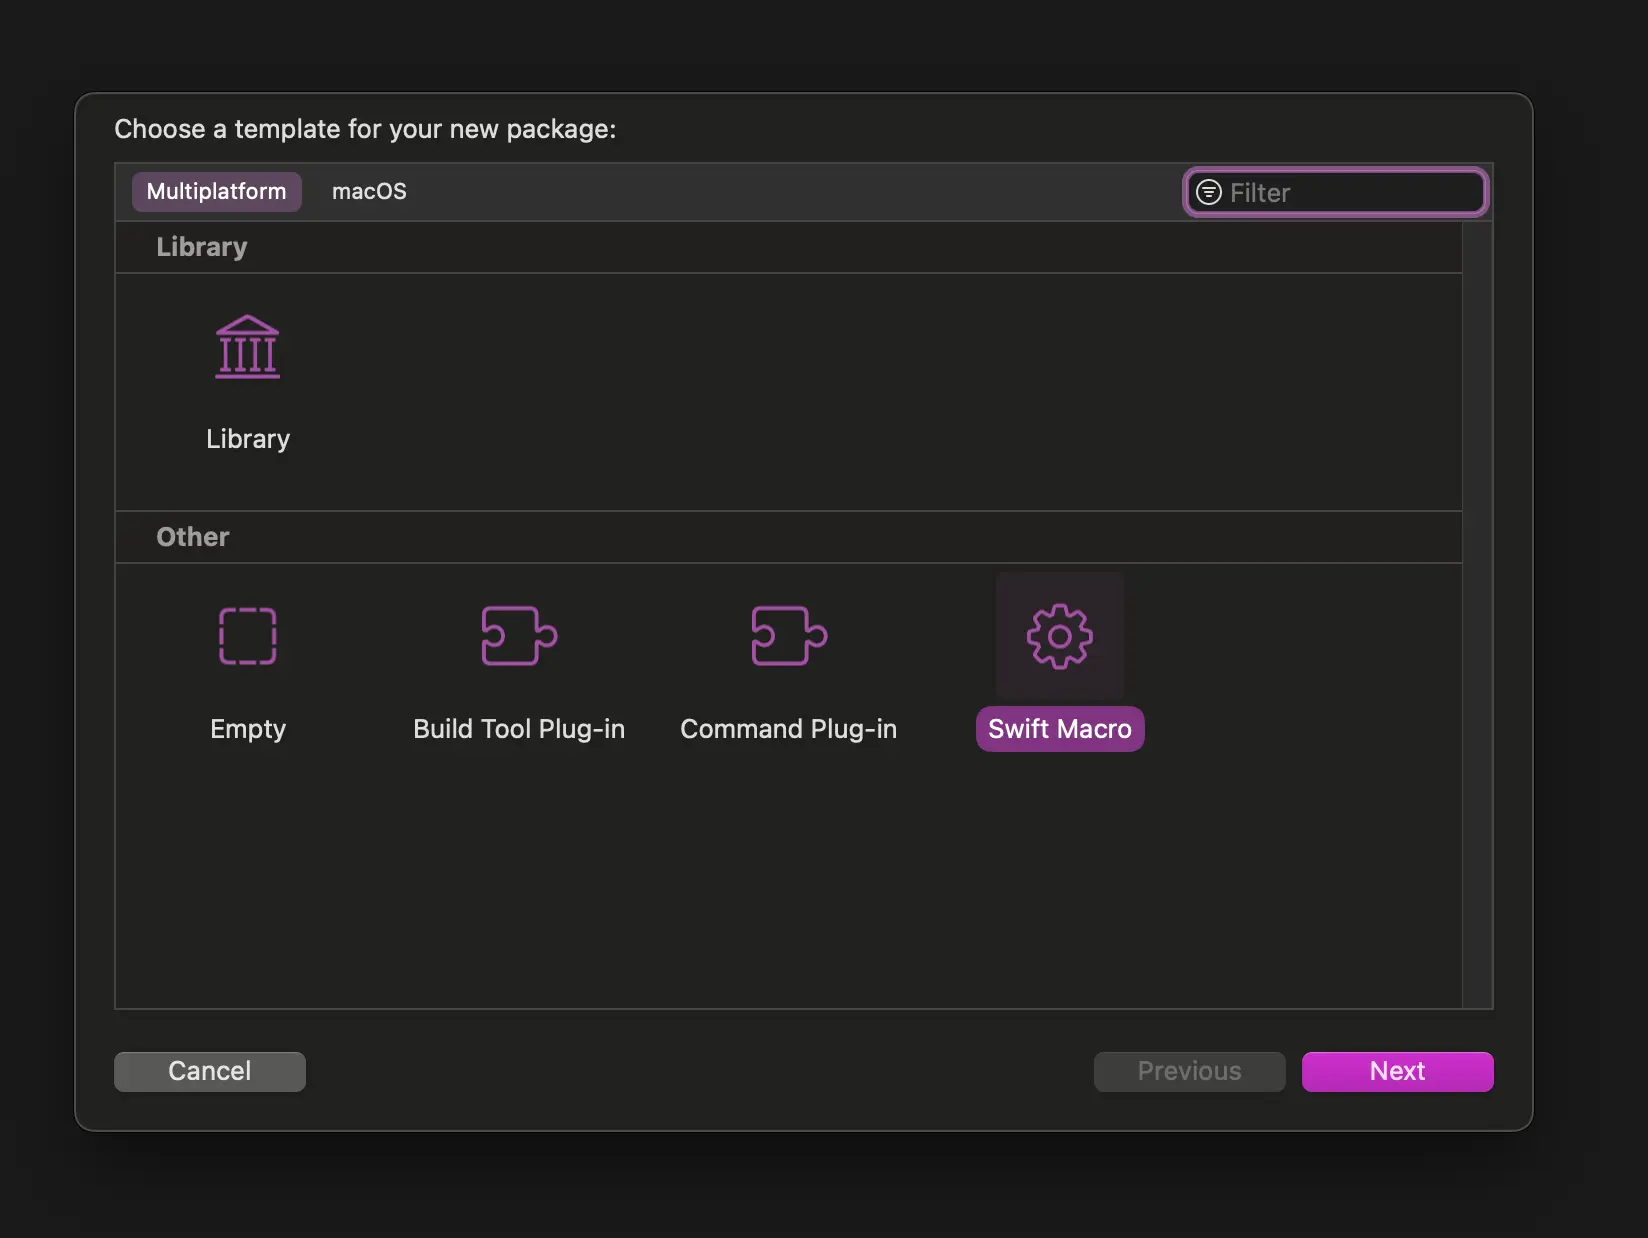
If you’d like to create a Swift macro using Xcode, you first need to create a new Swift package by clicking on File > New > Swift Package... menu and then selecting the Macro template from the list:
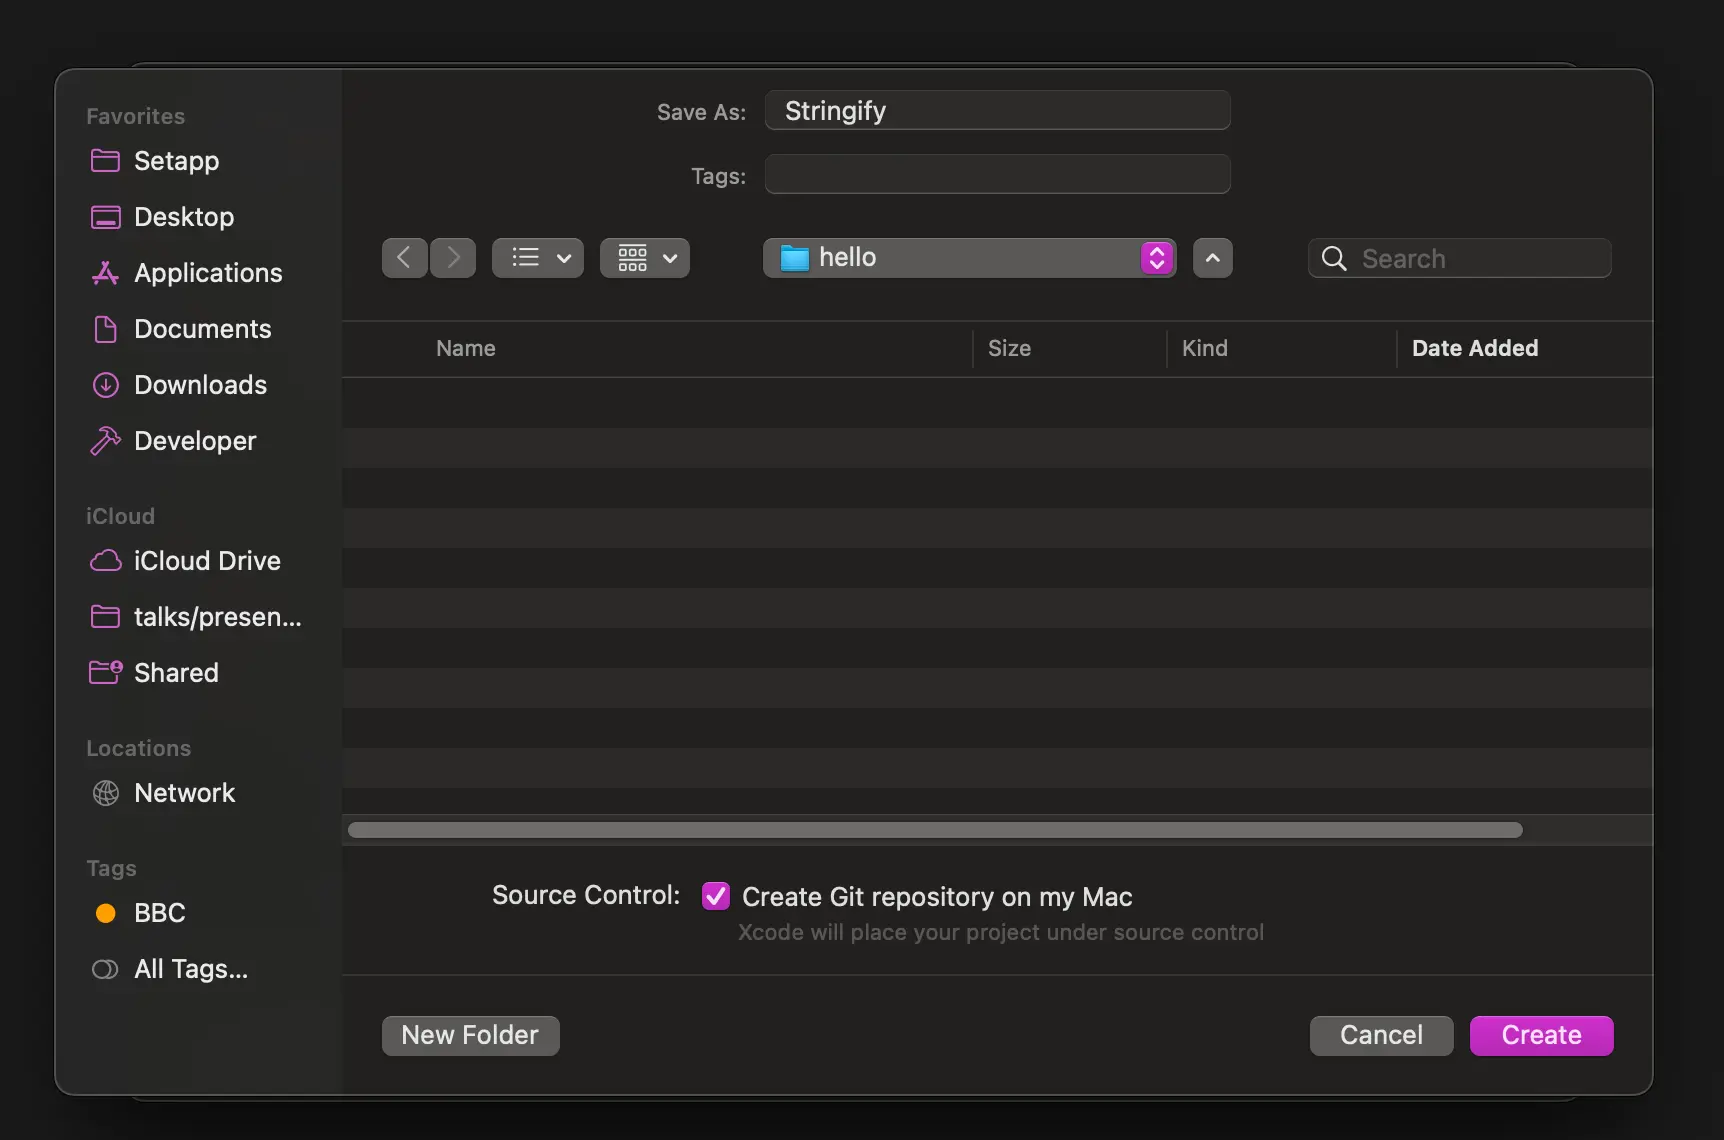
Next, you must give the package a name and select a location where you want to save it:
Using swift package init
You can also create a macro directly from the terminal in two simple steps.
First, create a new directory for your macro and navigate into it:
mkdir stringify-macro
cd stringify-macro
Next, use the swift command line tool to create a new Swift package using the package init command and setting the --type flag to macro:
swift package init --name Stringify --type macroCompiling a macro into a binary
As I mentioned at the beginning of this article, there might be situations where you might not want or be able to import the macro into your project as a Swift package dependency. In that case, you can compile the macro into a binary and import it directly into your Xcode.
To do so, navigate into the package directory and call the swift build command with the release configuration:
cd stringify-macro

swift build -c release
Contrary to what you might think, even though the .macro target (StringifyMacros) is not declared as an executable product, a binary will still be generated for it by SPM so that it can be implicitly used by consumers of the macro when importing the package.
This is the binary you are interested in as it contains the macro definitions and implementations and is the only piece of the package that you need for this use case to work. You will need to do what SPM is most likely doing under the hood to explicitly import the macro implementation into your Xcode project.
To find the binary, navigate to the .build > release directory and you should see a file named after the .macro target in your package manifest (e.g. StringifyMacros).
Importing the macro binary into your target
Now that you have the binary ready, you can import it into your project by making a couple of changes to the target where you want to use your new macro.
First, drag and drop the binary you created in the last section into the directory where your project lives. I would recommend moving it into the root directory of the project (next to the .xcodeproj file) and creating a new directory called Macros to keep things tidy.
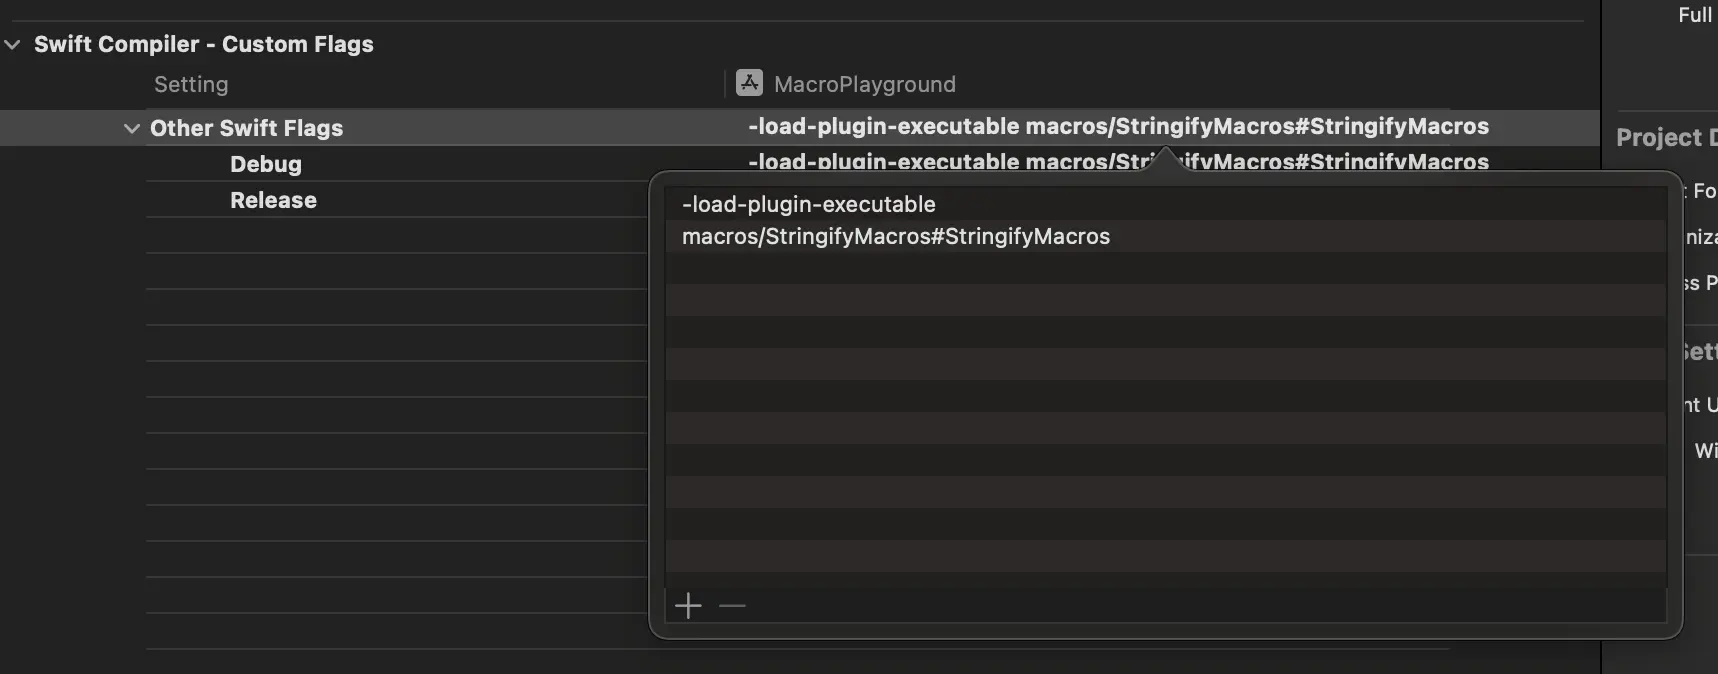
Next, go to the target’s Build Settings in Xcode and look for the Other Swift Flags settings under the Swift Compiler - Custom Flags section. You will need to add a flag called -load-plugin-executable and set it to a string composed by the path to the binary you just created and the name of the .macro target in your package manifest joined by a hash symbol (e.g. macros/StringifyMacros#StringifyMacros):
Finally, as you’re no longer using the Swift package’s library product with the macro definition, you will need to declare it in your target’s source files to start using it.
To do so, create a new Swift file and copy the macro definition from the Swift package over:
@freestanding(expression)
public macro stringify<T>(_ value: T) -> (T, String) = #externalMacro(module: "StringifyMacros", type: "StringifyMacro")
That’s it! You are now ready to use your new macro in your project 🎉.
Does the macro even need to be a macro target? Or a Swift Package? 🤪
Considering you don’t need the macro definition library for this to work, I tried to replace it with a single executable product associated with the macro target to see if I could still get the same binary output but, as soon as I did, Xcode started crashing! 🤪
This made me think that the macro target is probably doing something special under the hood to make a special binary for consumers to use but then I remembered that Pedro mentioned in his article that to get macros to work in a Tuist project you just need to create a macOS executable target with the right code in it, so I decided to give it a go in my Swift Package.
I removed all targets and products from the package manifest and replaced them with a single executable target called StringifyMacros containing the same code as the original .macro target:
// swift-tools-version: 5.9

import PackageDescription

let package = Package(
    name: "Stringify",
    platforms: [.macOS(.v10_15), .iOS(.v13), .tvOS(.v13), .watchOS(.v6), .macCatalyst(.v13)],
    products: [
        .executable(name: "StringifyMacros", targets: ["StringifyMacros"])
    ],
    dependencies: [
        .package(url: "https://github.com/apple/swift-syntax.git", from: "509.0.0"),
    ],
    targets: [
        .executableTarget(
            name: "StringifyMacros",
            dependencies: [
                .product(name: "SwiftSyntaxMacros", package: "swift-syntax"),
                .product(name: "SwiftCompilerPlugin", package: "swift-syntax")
            ]
        ),
    ]
)
I compiled the package again and imported the resulting binary into my Xcode project and, to my surprise, it worked!
This means that you don’t need to have a macro target or even a Swift package to create and use a Swift macro in your project, which opens the door to a lot of interesting use cases and possibilities.