How to create an App Clip for your app
A native macOS app for App Store Connect that streamlines app updates and releases, making the process faster and easier.
An App Clips is a reduced version of your app that allows users to perform specific tasks without having to download the full app. They are lightweight as they are limited to 15MB in size and they are meant to be fast and intuitive to use.
App Clips can be launched by scanning an App Clip code generated with the camera type or by tapping your phone against an App Clip code generated with the NFC type. They can also be launched from Safari, Maps and even Messages.
In this article, I will show you how to create an App Clip for your app and how to generate codes you can share with your users to launch said App Clip.
Creating an App Clip target
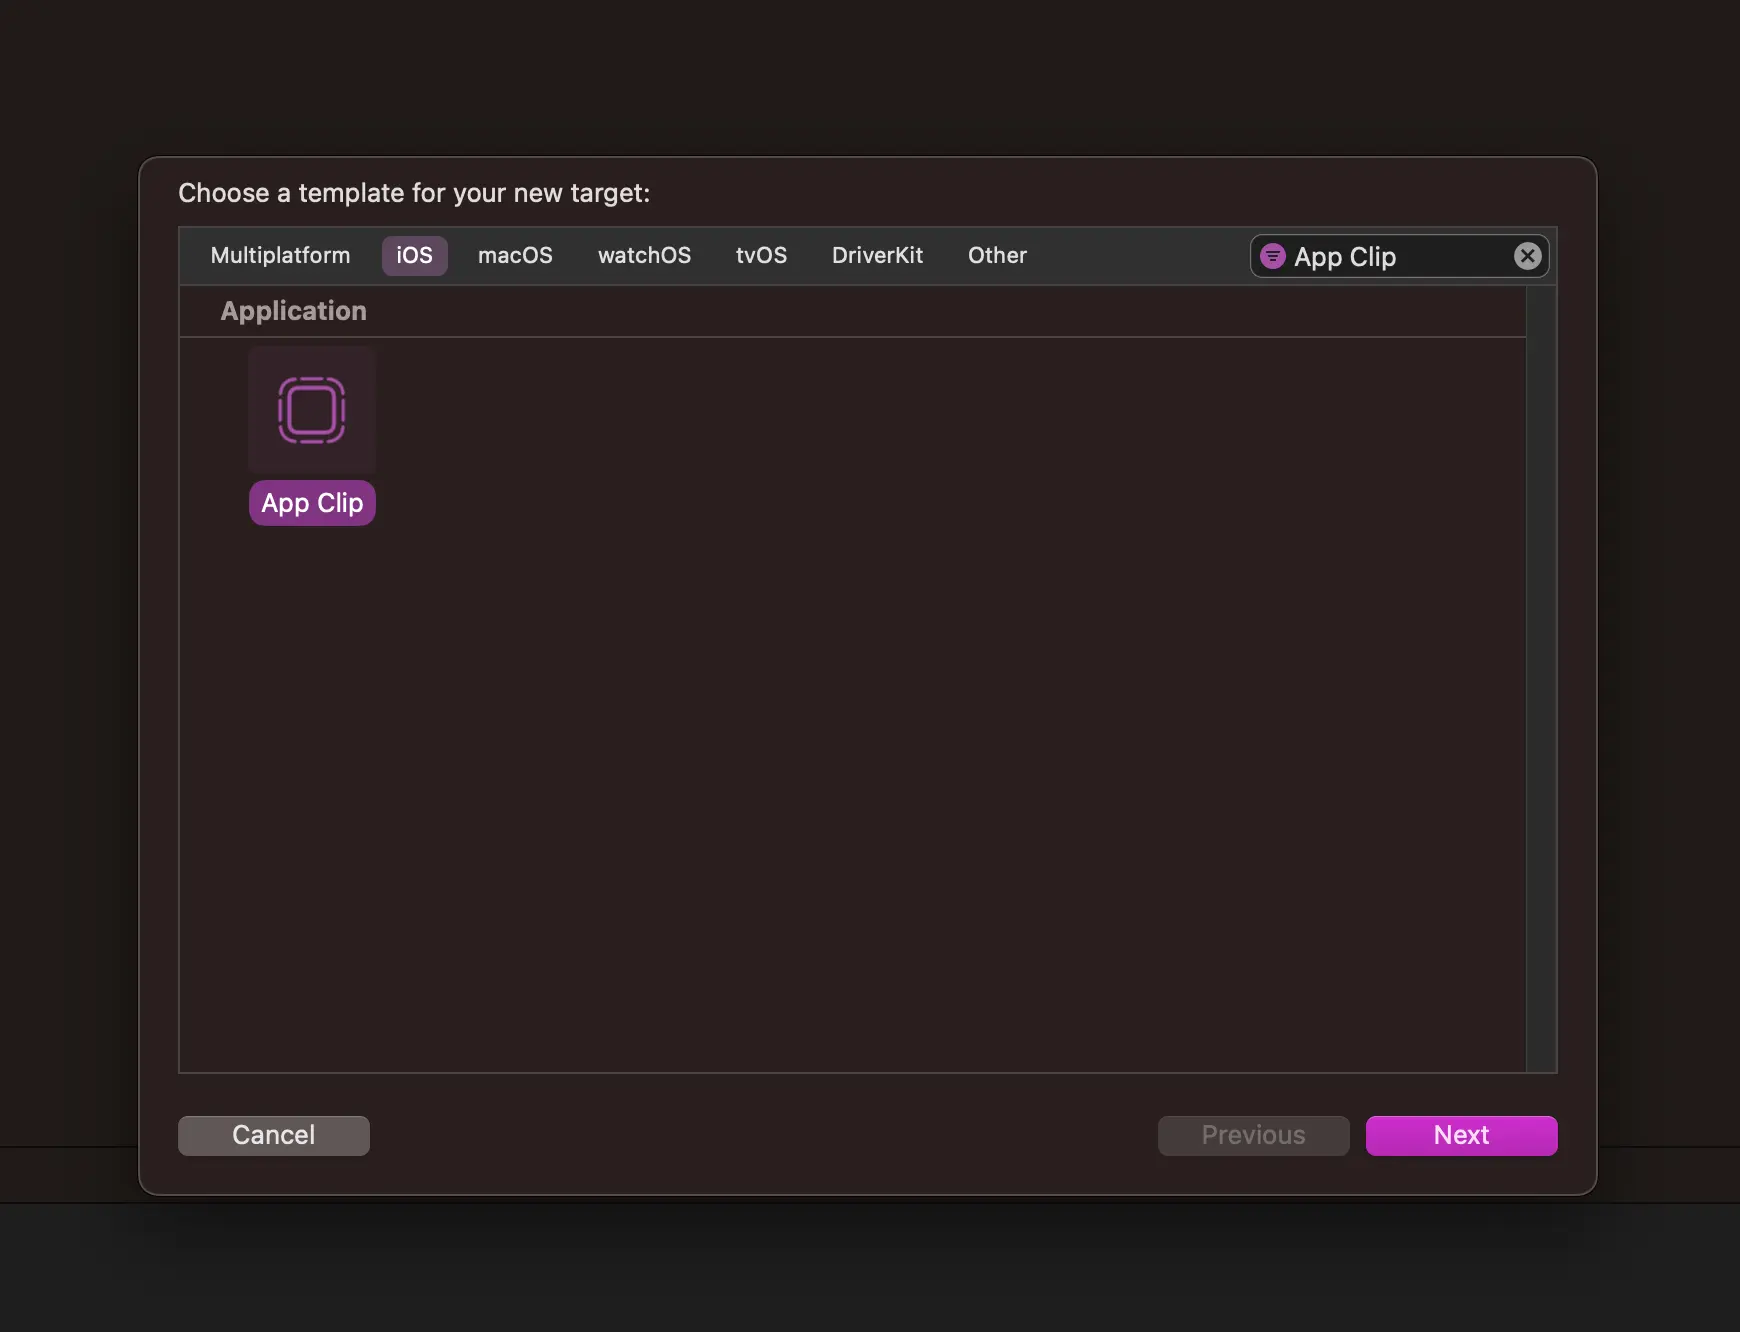
You can create an App Clip target by selecting File > New > Target... and choosing the App Clip template from the iOS section:
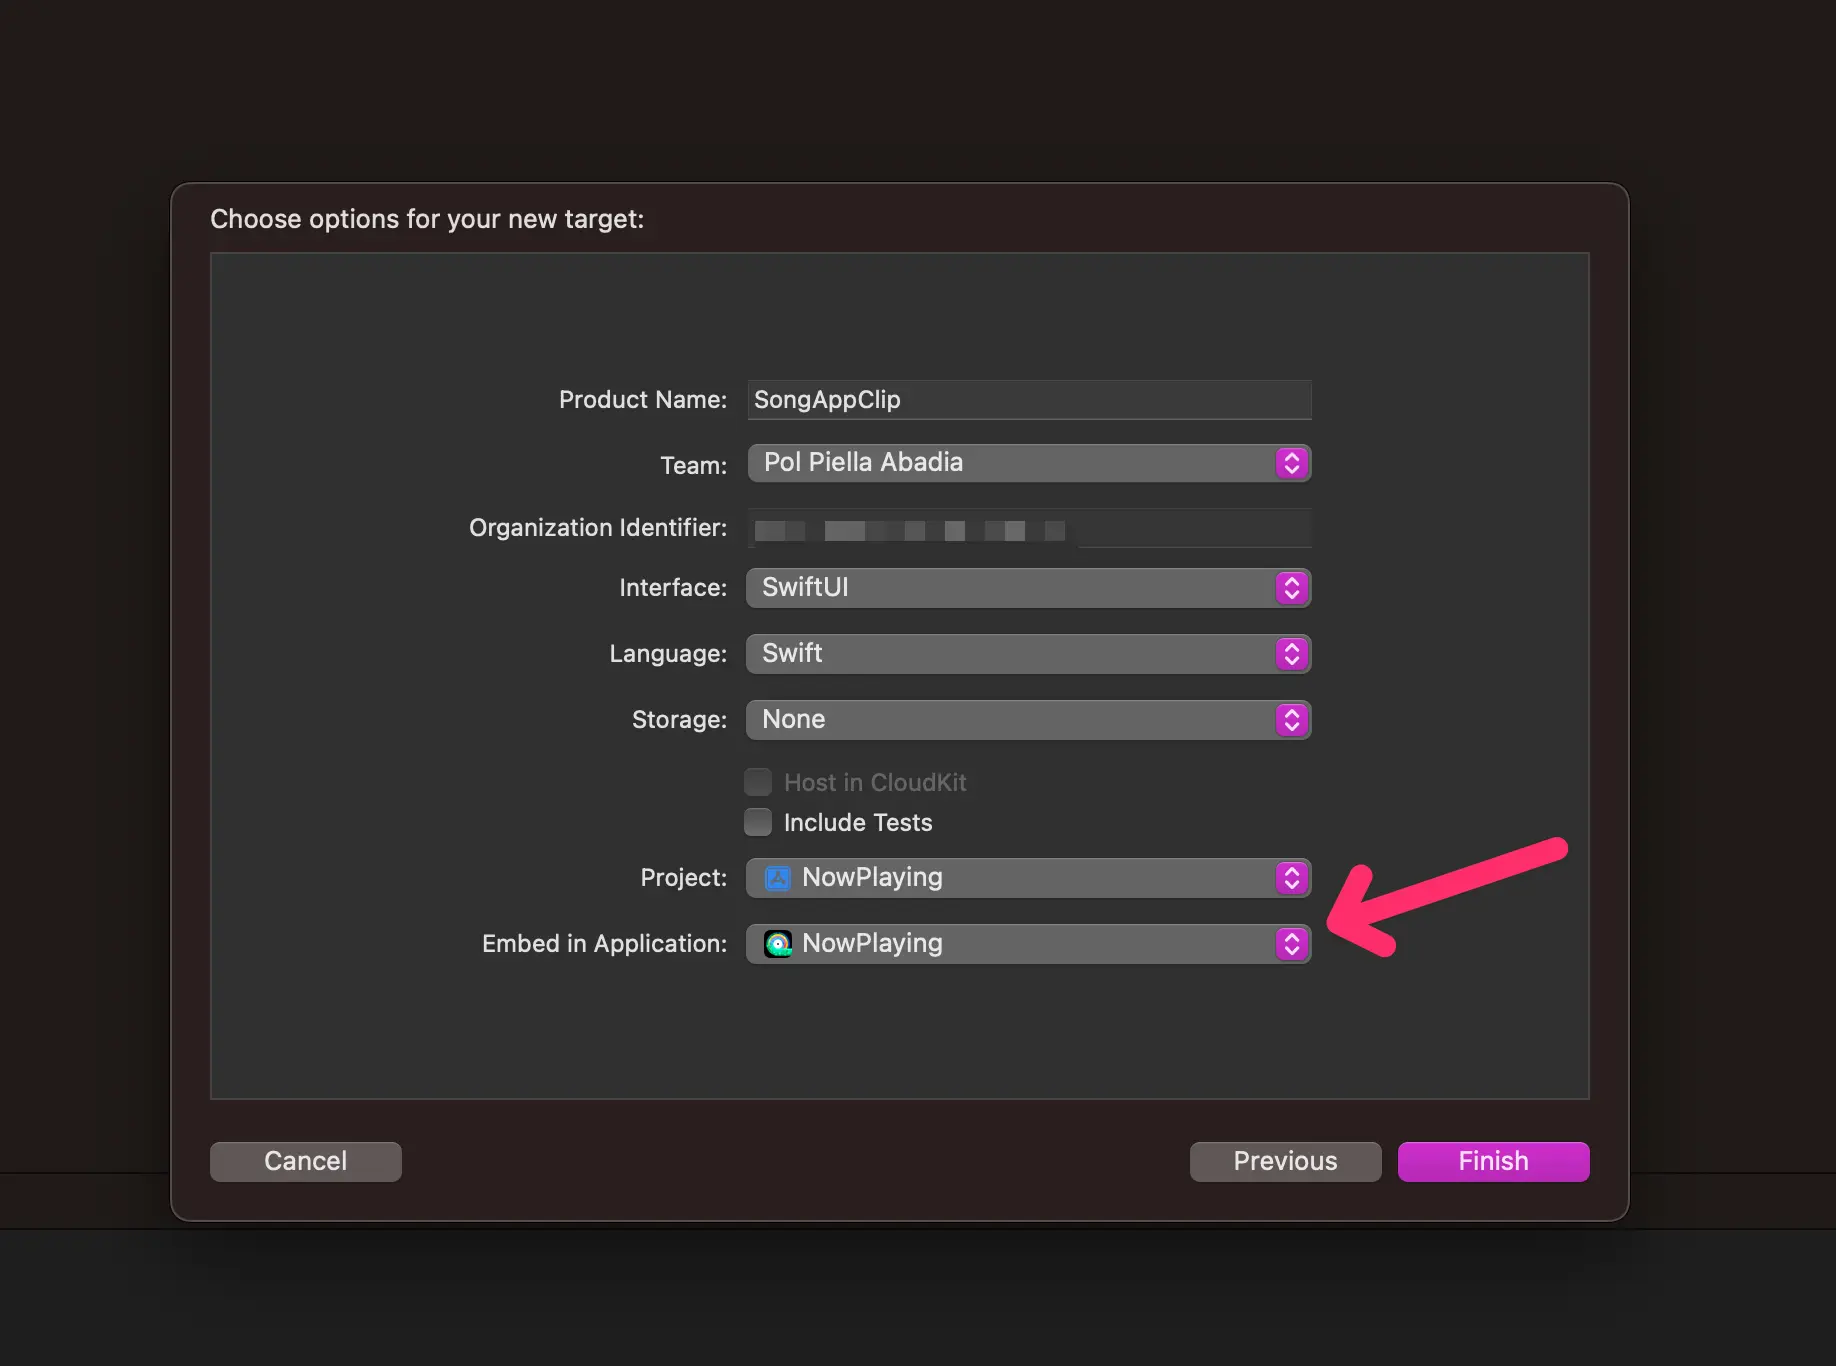
When you configure the new target, make sure that you select the target for the iOS app you want to create an App Clip for in the Embed in Application section:
Now that you have a new App Clip target, you can select its scheme and run it on a device or simulator as if it were a regular app target. As I mentioned in the introduction, App Clips are just a small version of an app, so you can write code in the same way you would for a regular iOS app.
Reusing code from your app
You will likely want to reuse some of the code you already have in your app to build your App Clip’s UI.
You can do so in one of three ways:
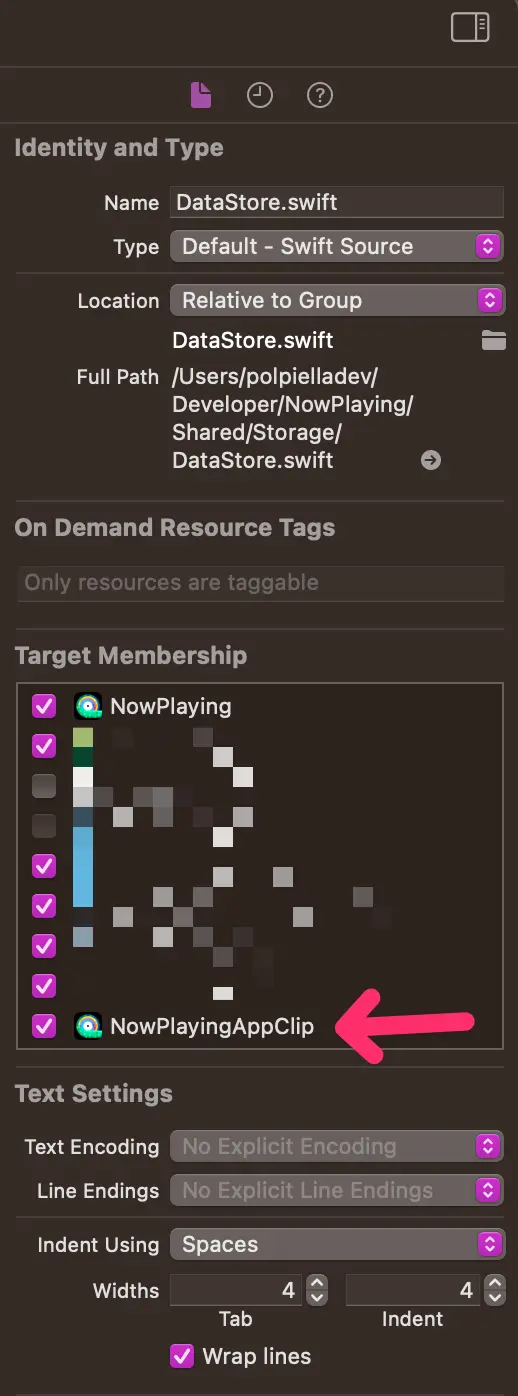
- (Easiest) Add the files you want to reuse to your App Clip target. You can do so by selecting the files in the Project Navigator and checking the App Clip target in the Target Membership section of the file inspector.
- (My favourite one) Move the code you want to reuse to a Swift package and add it as a dependency to both your app and your App Clip target.
- (Not recommended) Copy the files you want to use to your App Clip target. I don’t recommend this approach as it will make it harder to maintain your code in the future.
Active compilation flags
While App Clip targets are almost identical to app targets, they have some limitations. For example, you are not allowed to ask the user for MusicKit permissions and have a total binary size limitation of 15MB.
To help you deal with these limitations while reusing your existing code at the same time, Apple suggests you add an active compilation flag to your App Clip target to allow you to exclude certain logic.
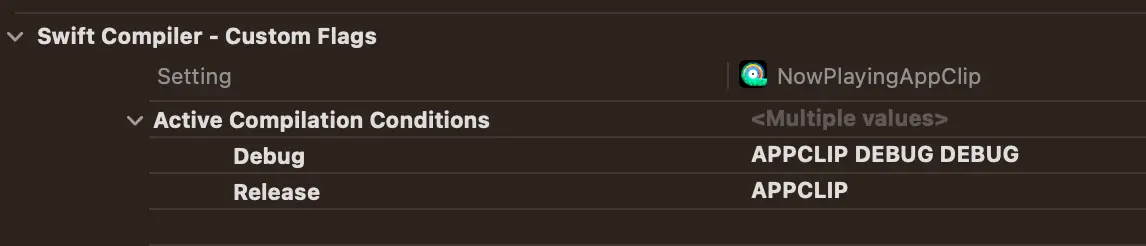
You can give this flag any name you want as long as it does not clash with any other flag either you or Xcode have defined and you can create it in the Active Compilation Conditions section of your App Clip target’s build settings:
This compilation flag can then be used to conditionally compile code that needs to be included or excluded from your App Clip target:
#if !APPCLIP
let musicAuthorizationStatus = await MusicAuthorization.request()
#endif
If you have set things up correctly, every time you switch to your App Clip scheme, Xcode 15 will gray out the code that is not being compiled 🌟.
Creating an App Clip code
Now that you have an App Clip target, you can create an App Clip code that allows you to launch it. You can do so either directly from App Store Connect or using Apple’s App Clip Code Generator command-line tool.
In this article I am only going to cover developing App Clip experiences locally and, for that reason, I am going to use the command-line tool.
If you are interested in learning how to set up App Clip experiences for a version of your app on App Store Connect, check out this brilliant document by Apple.
Using the command-line tool
The first thing you need to do is download the App Clip Code Generator command-line tool from your Apple Developer account.
Once you have gone through the install process, you can run the following command to ensure the foreground and background colours you have picked for your code are valid. If they are, you’ll get a single line of output displaying the colours you have picked:
AppClipCodeGenerator suggest --foreground FFFFFF --background 000000

# Output
# Foreground: FFFFFF Background: 000000
On the other hand, if there is something wrong with the colours you have picked, you will get a list of suggestions you can use instead:
AppClipCodeGenerator suggest --foreground FFFFFF --background FFFFFF

# Output
# Foreground: 000000 Background: FFFFFF
# Foreground: BB8888 Background: FFFFFF
# Foreground: FF4400 Background: FFFFFF
# Foreground: 111111 Background: FFFFFF
# Foreground: 443344 Background: FFFFFF
# Foreground: FF7700 Background: FFFFFF
# Foreground: 888888 Background: FFFFFF
# Foreground: 222222 Background: FFFFFF
Now that you have two colours you can use, you can generate an App Clip code by running the generate command:
AppClipCodeGenerator generate \
    --url 'https://nowplaying.page/?p=QM72823682' \
    --type cam \
    --foreground FFFFFF \
    --background 000000 \
    --output output.svg
Let’s break down the command above and go through what each of its arguments does:
--url: The URL that will be opened when the App Clip code is scanned.--type: The type of App Clip code you want to generate. You can choose betweencamandnfc.--foreground: The foreground colour of the App Clip code.--background: The background colour of the App Clip code.--output: The path where the App Clip code will be saved.
If everything goes well, the command above will generate an SVG file like this one:

App Clip codes are limited in the amount of information they can contain and the algorithm used to generate them treats certain words more efficiently than others. If you run into any issues with the size of the URLs you are using (I did 😅), I would recommend you read this document from Apple that contains some great advice and examples on how to structure your URLs to get the best results.
Setting up a local experience
If you have your App Clip target installed on your device and try to scan the App Clip code you generated in the previous section, you will notice that nothing happens. The camera app detects the code but shows a message saying ‘No usable data found’:
The reason for this is that, as you have not yet submitted your App Clip experience to App Store Connect, your device does not know what to launch when it scans the code.
Thankfully, there is a way to test your App Clip experiences locally. On your device, go to Settings > Developer and navigate to Local Experiences. In the Local Experiences page, tap on Register Local Experience and add the URL you used to generate your App Clip code, the bundle identifier of your App Clip target and the information you’d want to show in the App Clip card:
Now that you have set up the local experience, you can go back and scan the App Clip code again. If you have the app clip target installed on your device, you will see the App Clip card appear at the bottom of the screen:
Handling the user activity
Last but not least, you need to add some code to your App Clip target to retrieve data from the user activity and perform the action the user is expecting.
In our case, the URL contains a single query parameter in the form of an ISRC code for a song, with key p and value QM72823682.
The continueUserActivity modifier with type NSUserActivityTypeBrowsingWeb allows you to retrieve the URL from the App Clip and get its query parameter:
struct ContentView: View {
    var body: some View {
        VStack {
            Image(systemName: "globe")
                .imageScale(.large)
                .foregroundStyle(.tint)
            Text("Hello, world!")
        }
        .padding()
        .onContinueUserActivity(NSUserActivityTypeBrowsingWeb, perform: handleUserActivity(_:))
    }

    private func handleUserActivity(_ activity: NSUserActivity) {
        guard let url = activity.webpageURL,
              let components = URLComponents(url: url, resolvingAgainstBaseURL: true),
              let isrc = components.queryItems?.first(where: { $0.name == "p" })?.value else { return }

        print(isrc)
    }
}
Now, next time you scan the code you generated and tap on the Open button in the App Clip card, you will see the ISRC code printed in Xcode’s console 🎉.