Custom Core Data migrations

Go from confusion to confidence with a step-by-step Swift Concurrency course, helping you smoothly migrate to Swift 6 and fully leverage its features.
It is natural for your app to evolve. As your app and your user base grow, you will need to add new features, remove other ones and change the way your app works. This is a natural consequence of the software development lifecycle that we should embrace.
And as your app evolves, so does your data model. You will need to change the way your data is structured to accommodate new features while ensuring users don’t lose any data across different versions. If you use Core Data to persist information in your app, this is where Core Data migrations come into play.
What is a Core Data migration?
A Core Data migration is the process of updating your data model from one version to another due to changes in the shape of your data (e.g. adding or removing a new attribute).
In most cases, Core Data will handle the migration process for you automatically. However, there are cases where you will need to customize the migration process by providing a mapping model that tells Core Data exactly how to migrate each attribute and entity from the source model to the destination one.
There are even use cases where a mapping model won’t be enough, and you will need to write a custom migration policy to handle specific scenarios. This is the case that I will focus on in this article.
The example
Let’s consider an app that stores objects that represent music tracks in a Core Data stack. The model is very simple and contains only one entity: Track:
import Foundation
import CoreData

@objc(Track)
public class Track: NSManagedObject, Identifiable {
    @nonobjc public class func fetchRequest() -> NSFetchRequest<Track> {
        return NSFetchRequest<Track>(entityName: "Track")
    }

    @NSManaged public var imageURL: String?
    @NSManaged public var json: String?
    @NSManaged public var lastPlayedAt: Date?
    @NSManaged public var title: String?
    @NSManaged public var artistName: String?
}
The Track entity above has five attributes:
imageURL: A string that represents the URL of the track’s cover image.json: A string that represents the raw JSON data response from the server.lastPlayedAt: A date that represents the last time the track was played.title: A string that represents the title of the track.artistName: A string that represents the name of the artist.
The Core Data stack does not sync with iCloud and has the following setup:
import CoreData

struct PersistenceController {
    static let shared = PersistenceController()

    let container: NSPersistentContainer

    init(inMemory: Bool = false) {
        container = NSPersistentContainer(name: "CustomMigration")
        if inMemory {
            container.persistentStoreDescriptions.first!.url = URL(fileURLWithPath: "/dev/null")
        }

        container.viewContext.automaticallyMergesChangesFromParent = true
        if let description = container.persistentStoreDescriptions.first {
            description.shouldMigrateStoreAutomatically = true
            description.shouldInferMappingModelAutomatically = false
        }

        container.loadPersistentStores(completionHandler: { (storeDescription, error) in
            if let error = error as NSError? {
                fatalError("Unresolved error \(error), \(error.userInfo)")
            }
        })
    }
}
If you pay close attention to the example above, you will notice that we are telling Core Data to migrate the store automatically, as we do not want to do progressive migrations which are orders of magnitude slower and more complex, and we are also telling Core Data not to infer the mapping model automatically, which means that we will have to provide a mapping model file for each migration and will allow us to customize the process.
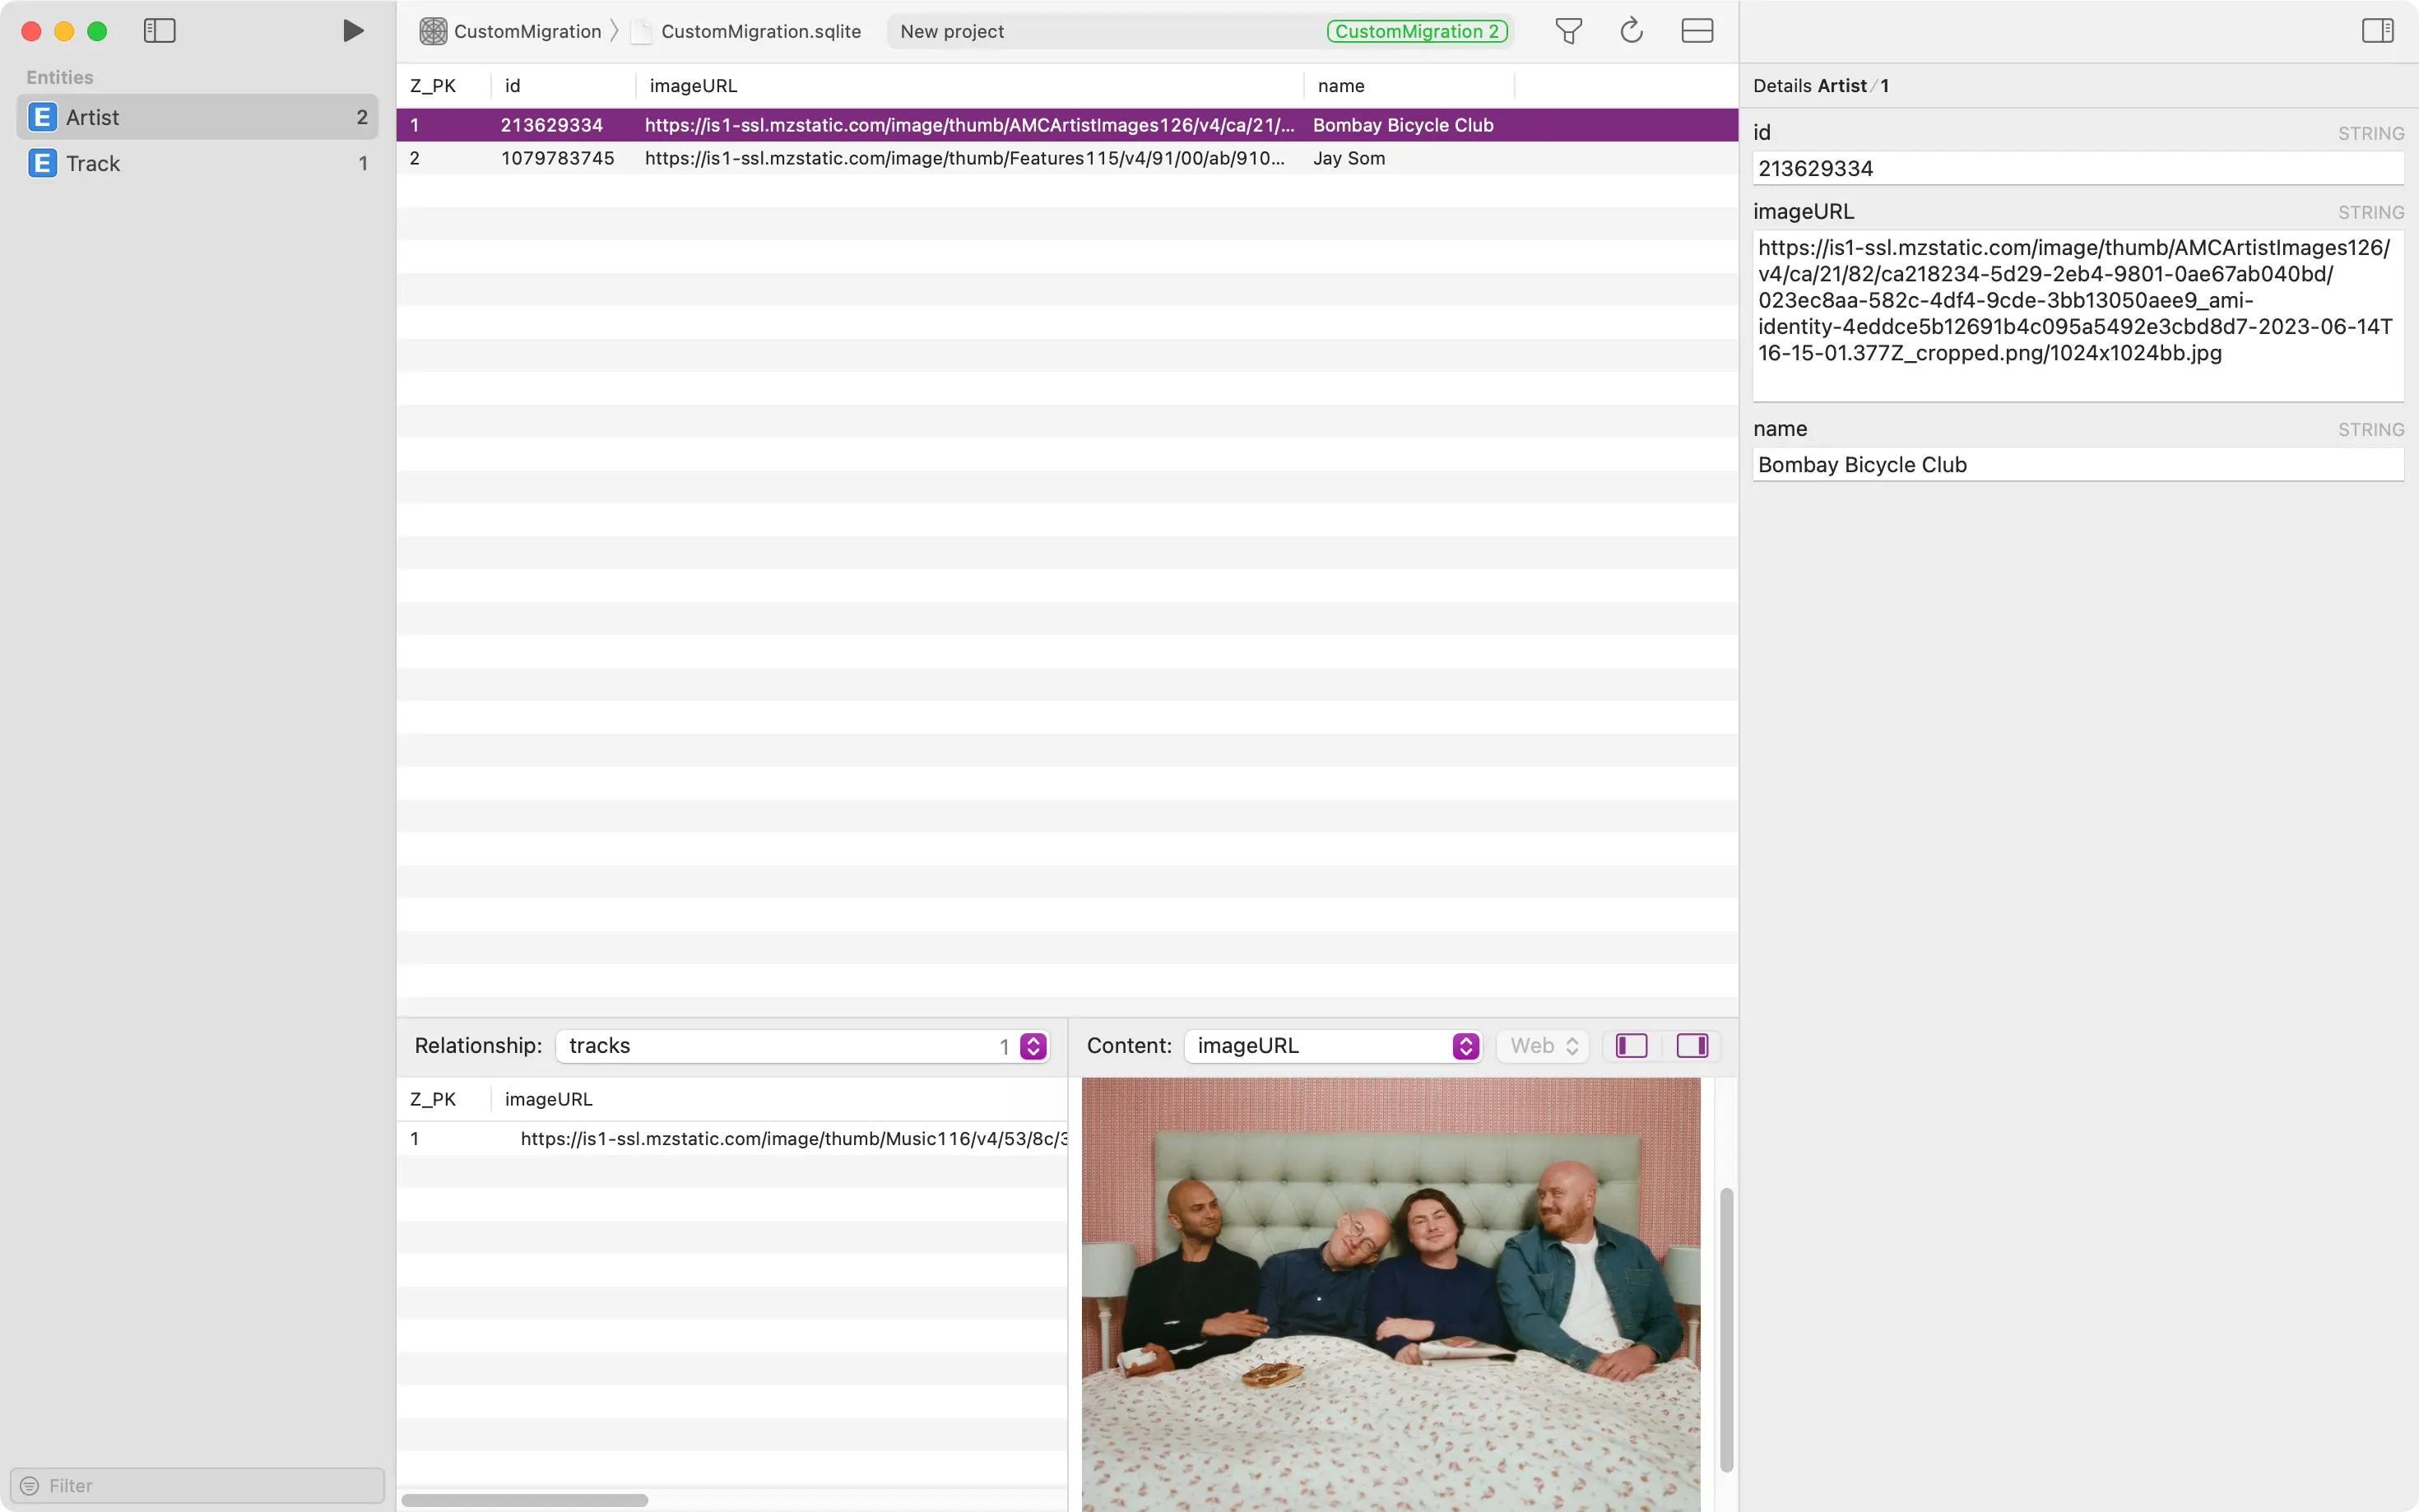
After persisting a song and inspecting the database with Core Data Lab, we can see that the attributes are being saved accordingly:
Core Data Lab is a macOS app that allows you to easily view, edit and analyze data from SQLite-based Core Data and SwiftData apps.
Updating the model
The current version of the model has a couple of scalability issues:
- The model only allows for one artist per track, whereas in reality, a track can have multiple artists.
- The model stores a raw JSON string that represents the track’s data, which is not very efficient and can lead to performance issues when the app has to parse the JSON string to display the track’s data to get a list of artists.
To address these issues, let’s remove the artistName and json attributes in favor of a new Artist entity that will have a one-to-many relationship with the Track entity.
The Artist entity will have a name attribute that represents the name of the artist and an id and imageURL attributes that we will get from the raw JSON string.
Creating a new model version
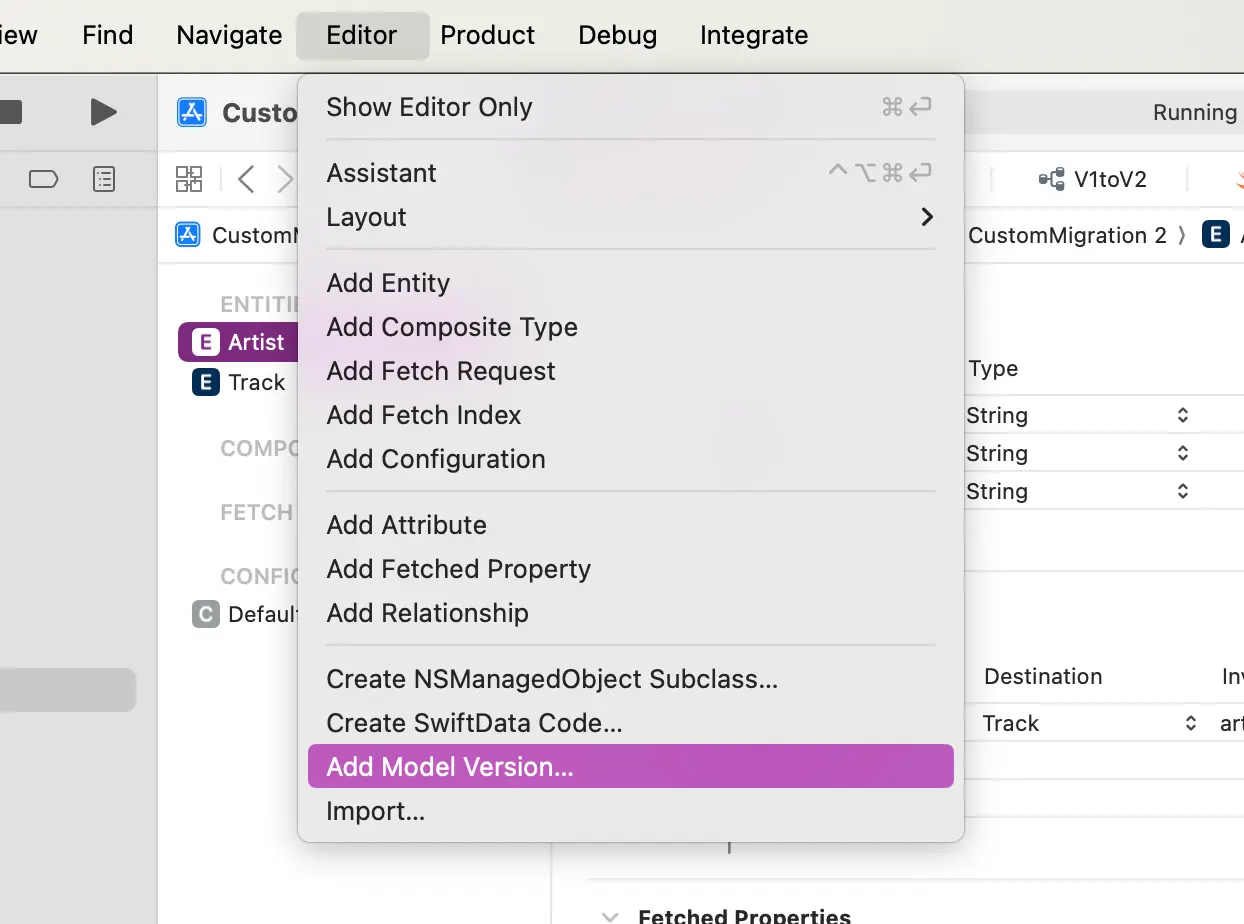
Let’s first create a new model version by selecting the .xcdatamodeld file and selecting Editor > Add Model Version... from the menu bar.
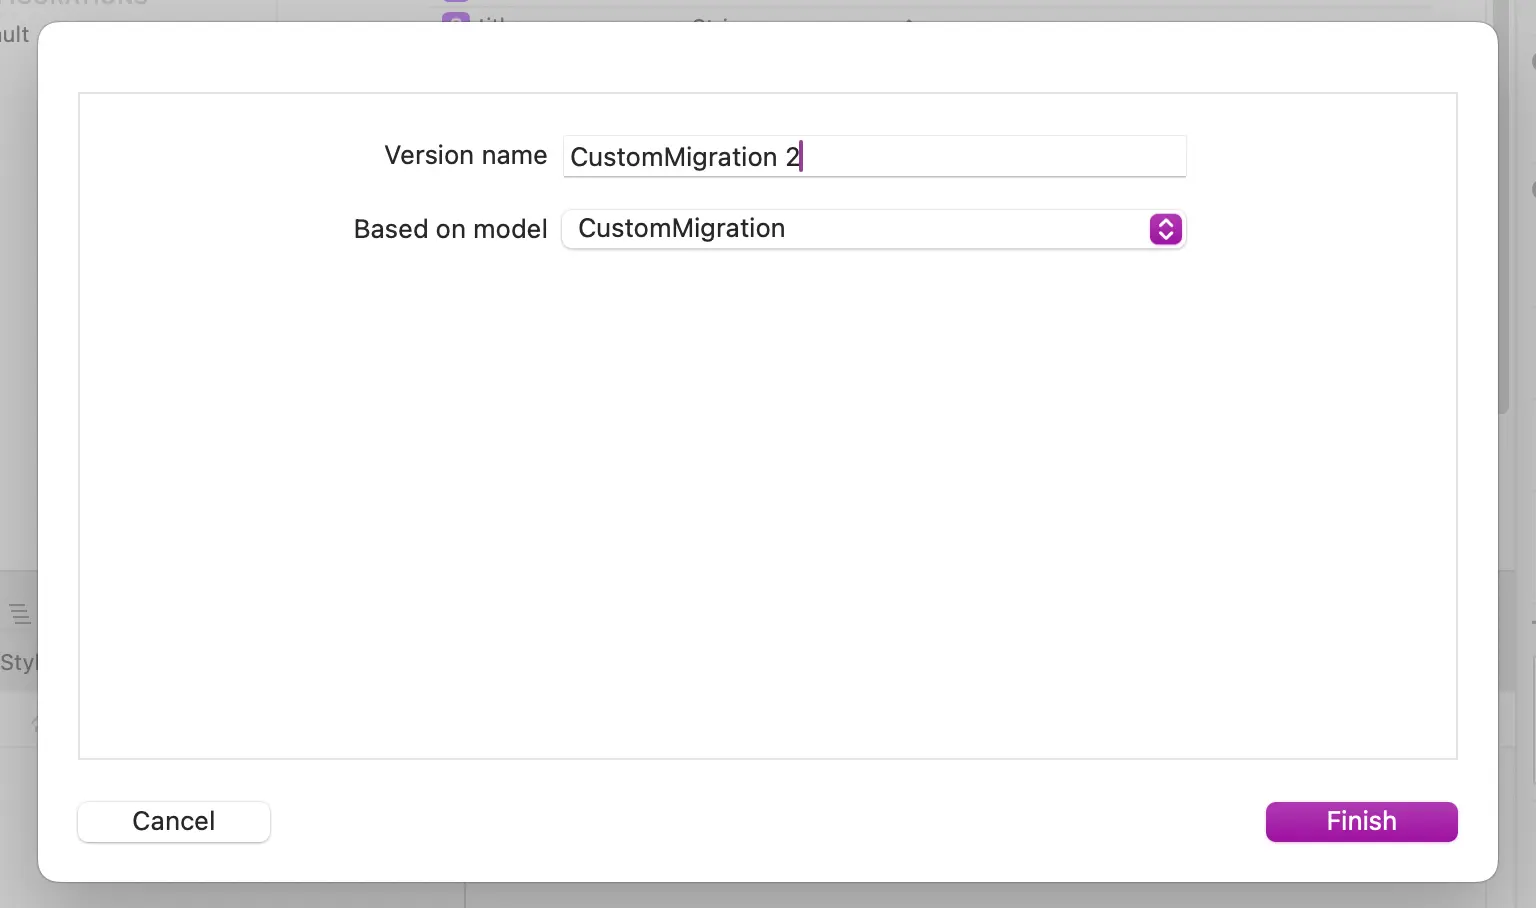
Let’s give it a name and base it on the first model version:
Now, let’s create the Artist entity and add all fields:
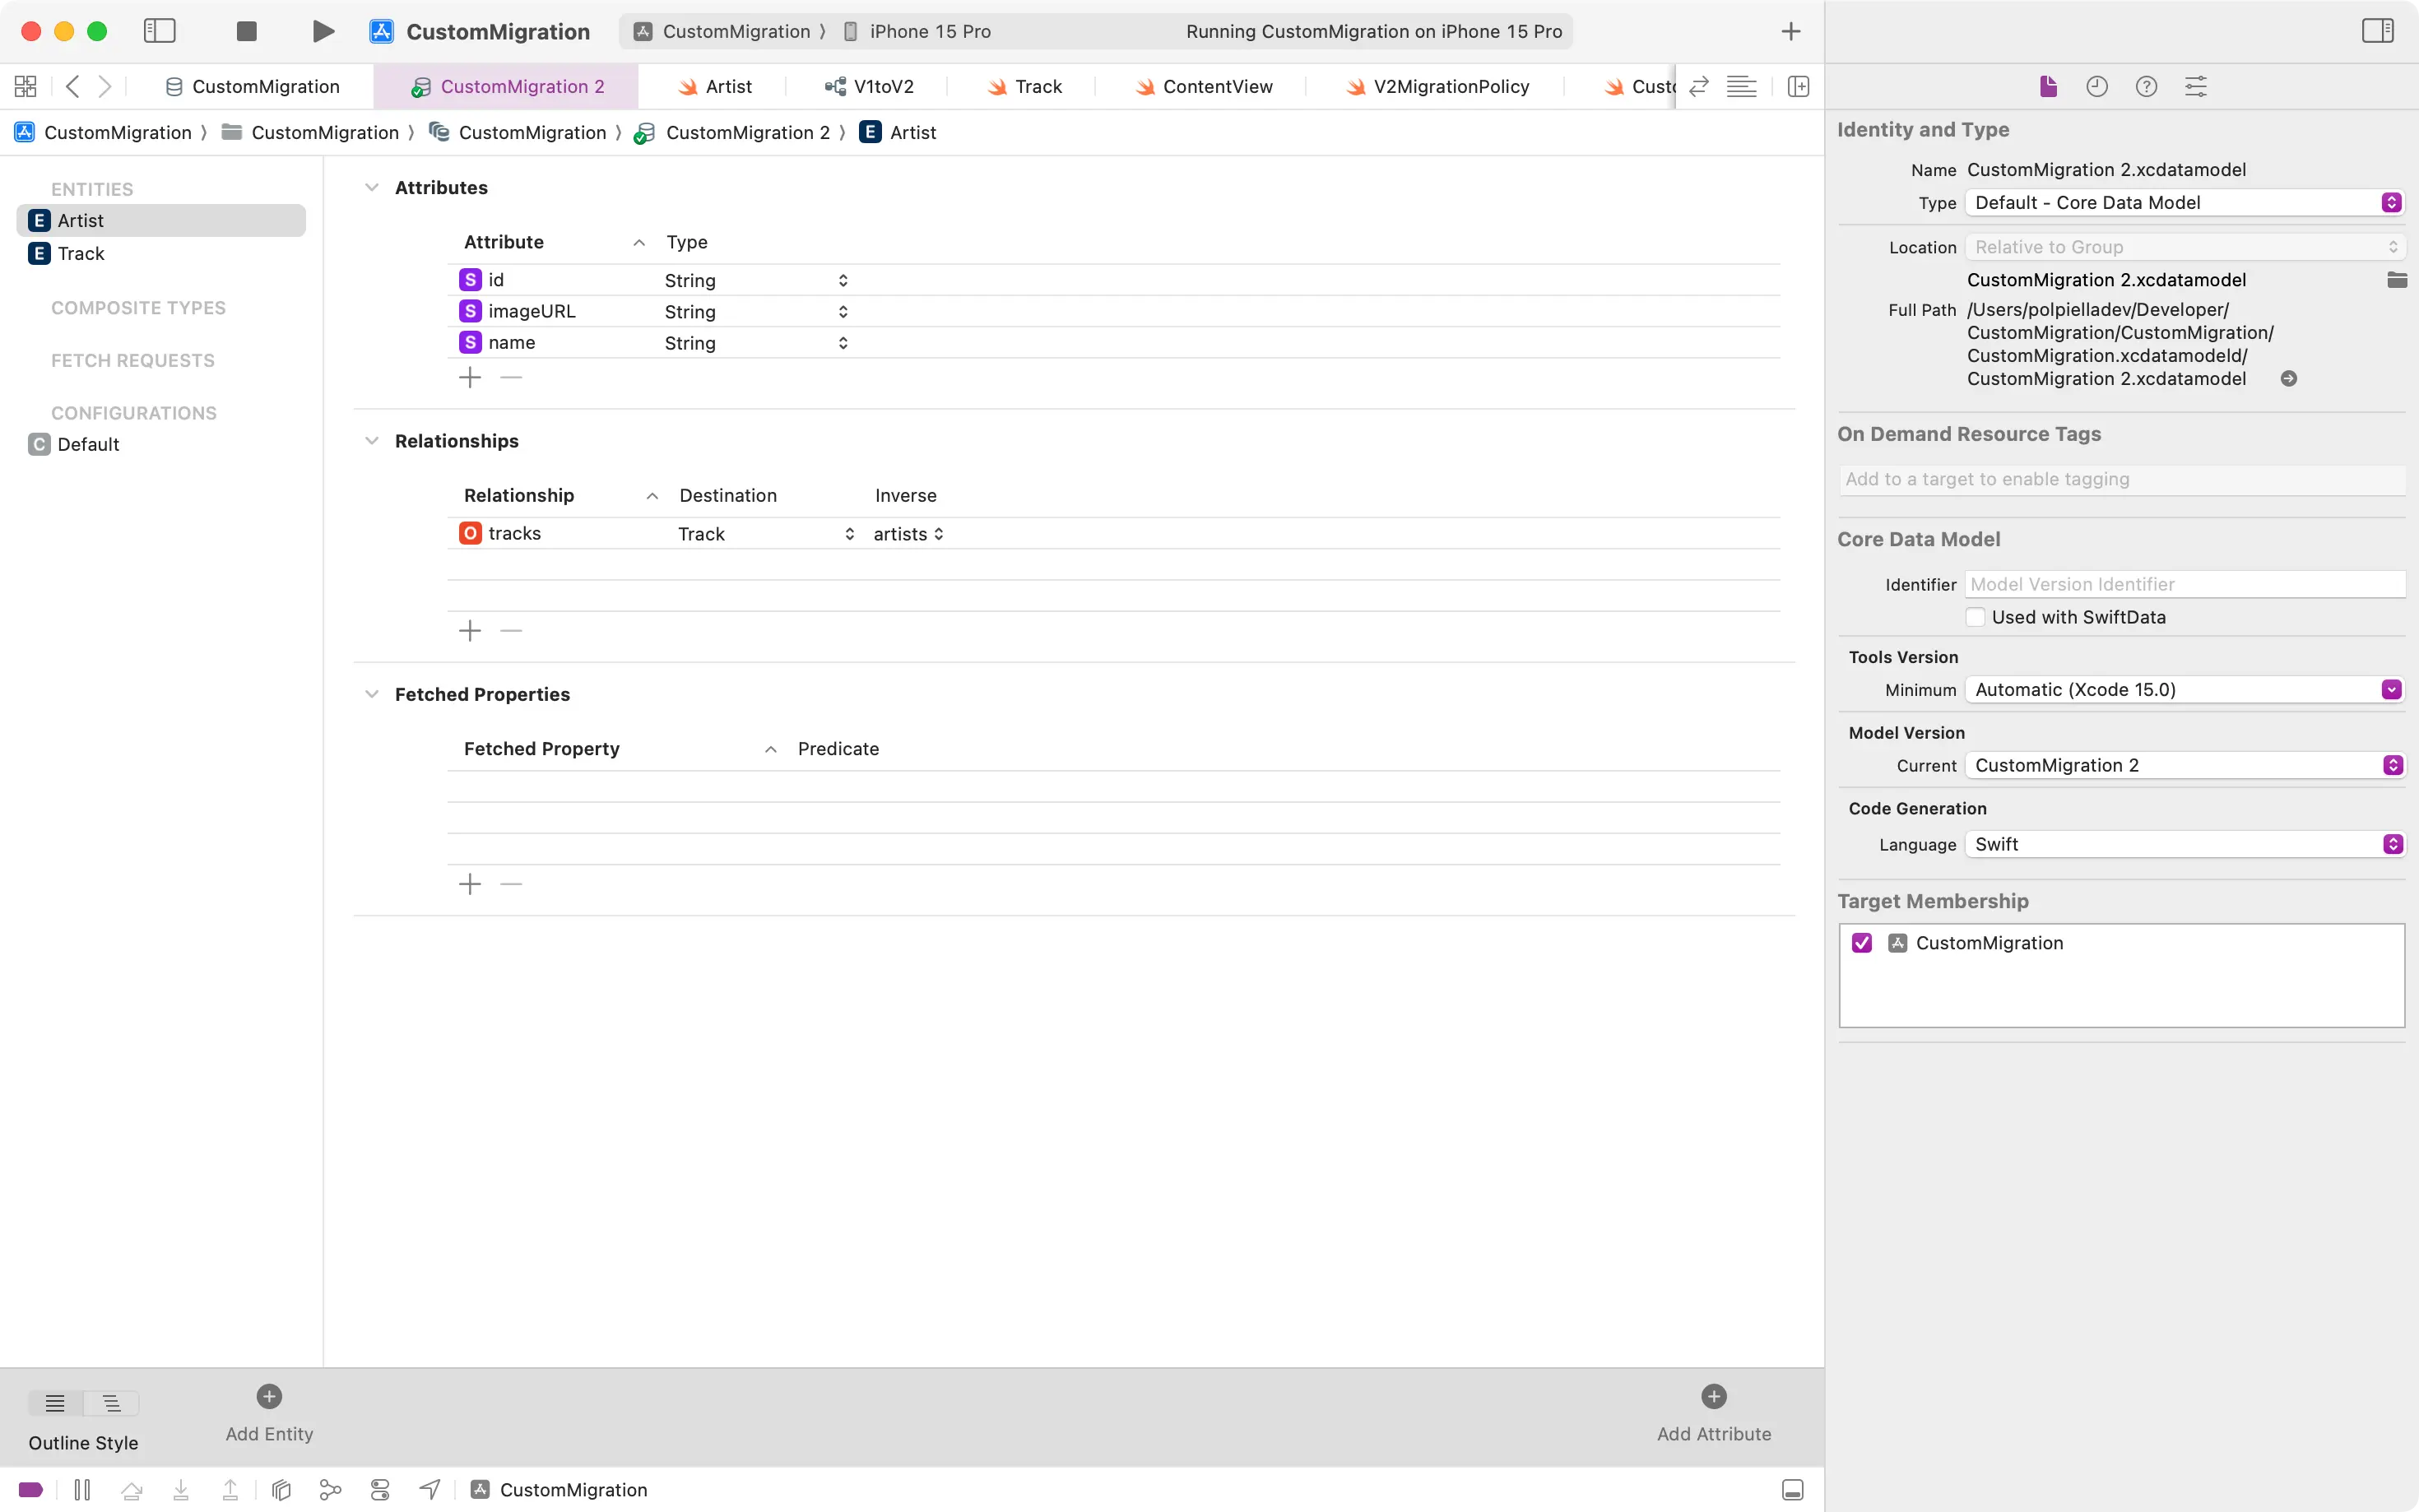
Let’s also create the NSManagedObject subclass for the new Artist entity:
import Foundation
import CoreData

@objc(Artist)
public class Artist: NSManagedObject, Identifiable {
    @nonobjc public class func fetchRequest() -> NSFetchRequest<Artist> {
        return NSFetchRequest<Artist>(entityName: "Artist")
    }

    @NSManaged public var name: String?
    @NSManaged public var id: String?
    @NSManaged public var imageURL: String?
    @NSManaged public var tracks: NSSet?

    @objc(addTracksObject:)
    @NSManaged public func addToTracks(_ value: Track)

    @objc(removeTracksObject:)
    @NSManaged public func removeFromTracks(_ value: Track)

    @objc(addTracks:)
    @NSManaged public func addToTracks(_ values: NSSet)

    @objc(removeTracks:)
    @NSManaged public func removeFromTracks(_ values: NSSet)
}
As you can see in the example above, in the same way that we’re going to add a to-many artists relationship to the Track entity, we’re also going to add an inverse to-many tracks relationship to the Artist entity.
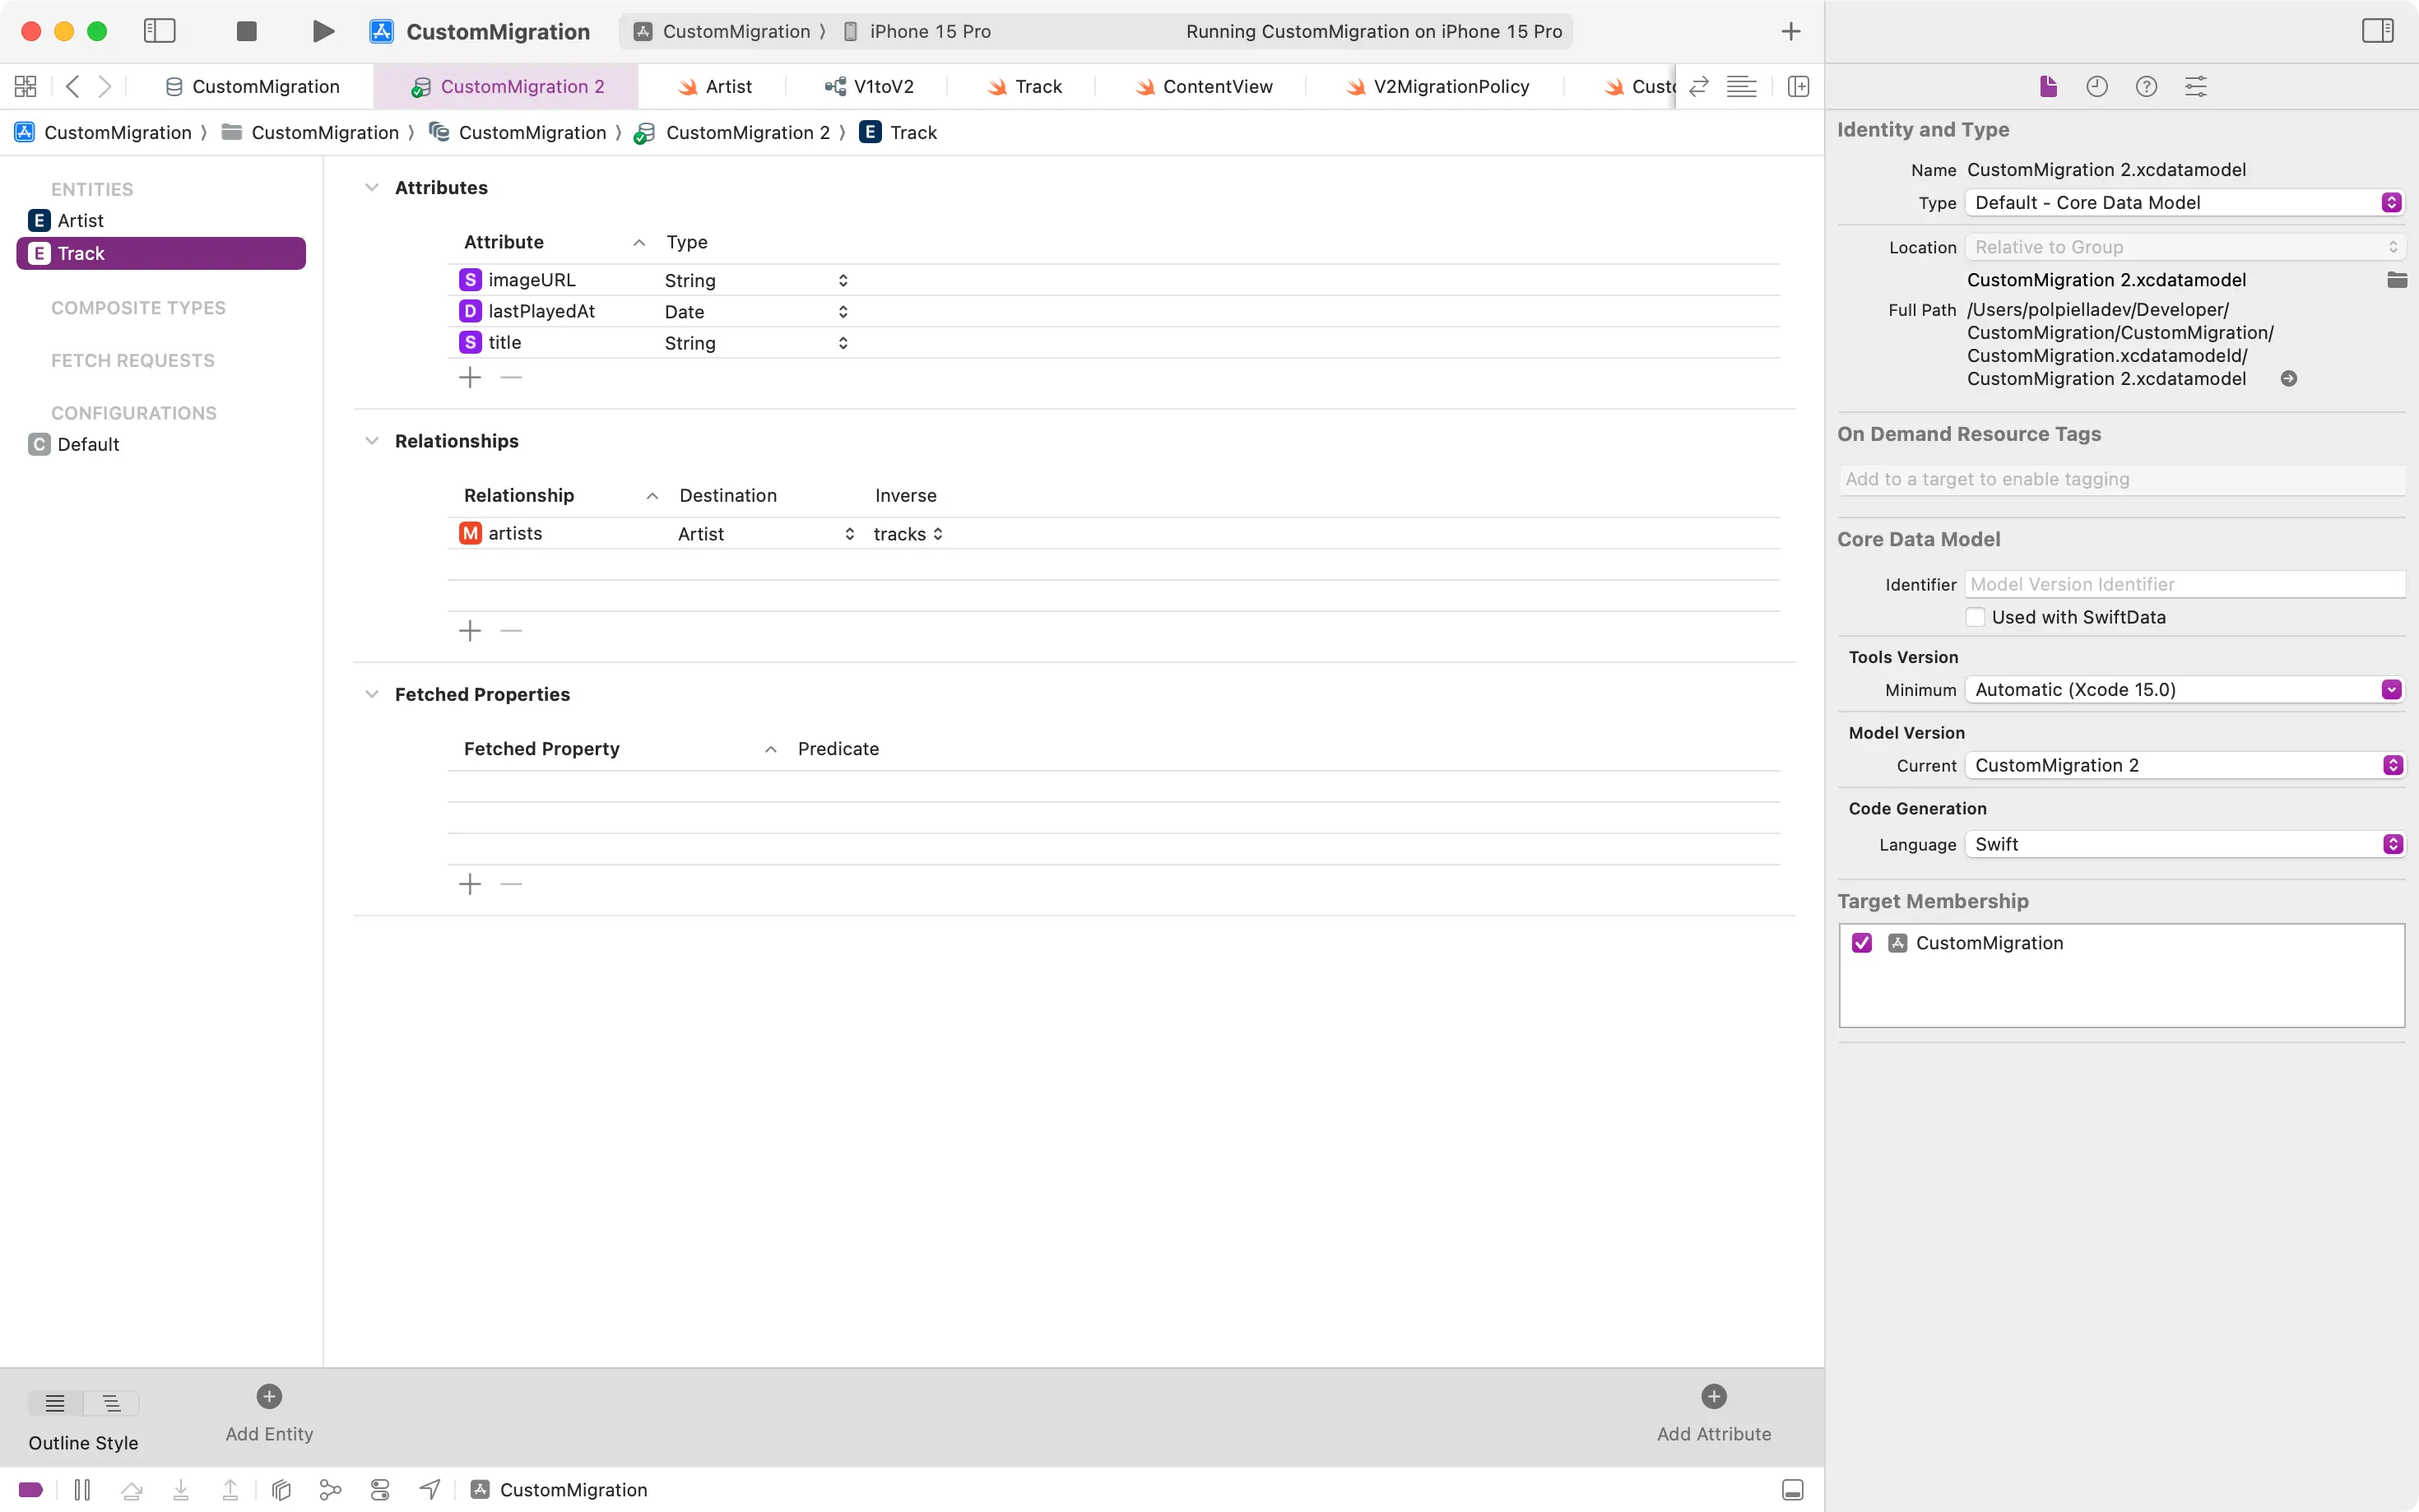
Let’s now add the missing relationship to the Track entity and remove the artistName and json attributes:
And update the NSManagedObject subclass to reflect the changes:
import Foundation
import CoreData
@objc(Track)
public class Track: NSManagedObject, Identifiable {
@nonobjc public class func fetchRequest() -> NSFetchRequest<Track> {
return NSFetchRequest<Track>(entityName: "Track")
}
@NSManaged public var imageURL: String?
@NSManaged public var lastPlayedAt: Date?
@NSManaged public var title: String?
@NSManaged public var artists: NSSet?
@objc(addArtistsObject:)
@NSManaged public func addToArtists(_ value: Artist)
@objc(removeArtistsObject:)
@NSManaged public func removeFromArtists(_ value: Artist)
@objc(addArtists:)
@NSManaged public func addToArtists(_ values: NSSet)
@objc(removeArtists:)
@NSManaged public func removeFromArtists(_ values: NSSet)
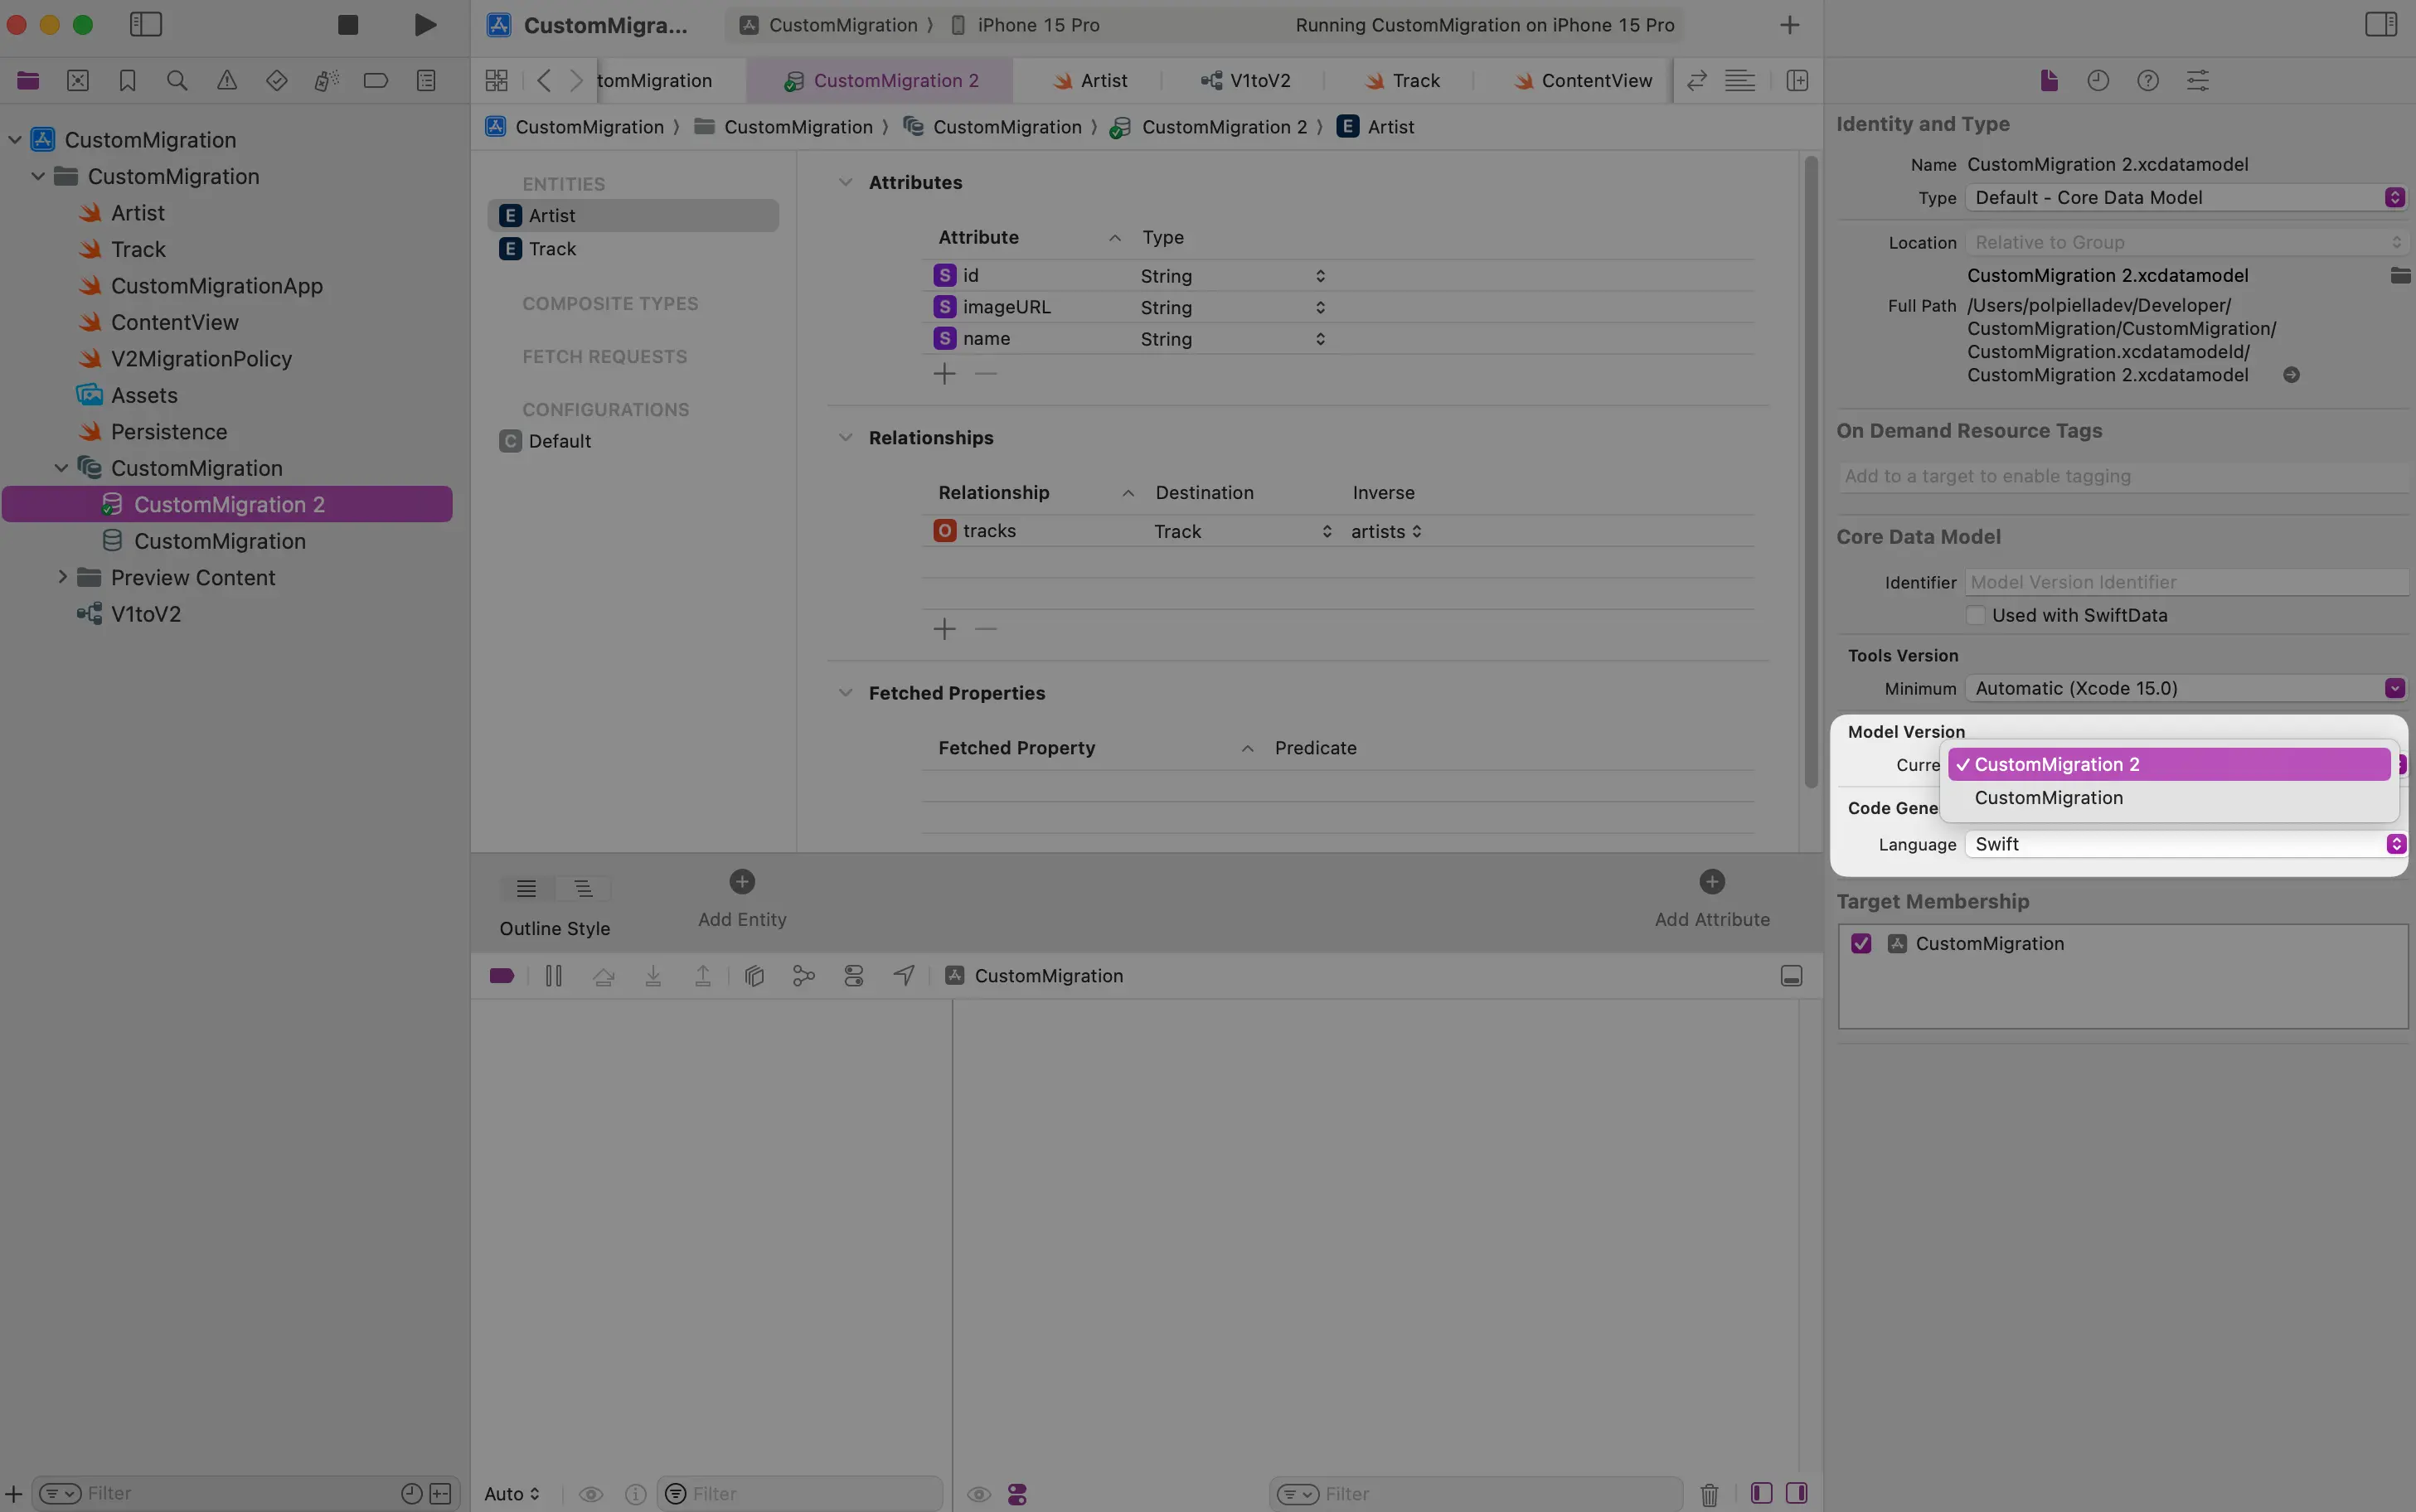
}Last but not least, let’s set the new model as the current one from the .xcdatamodeld file:
Creating a mapping model
As we’ve told Core Data not to infer mapping models automatically, we will have to create a mapping model file to bridge between the two versions.
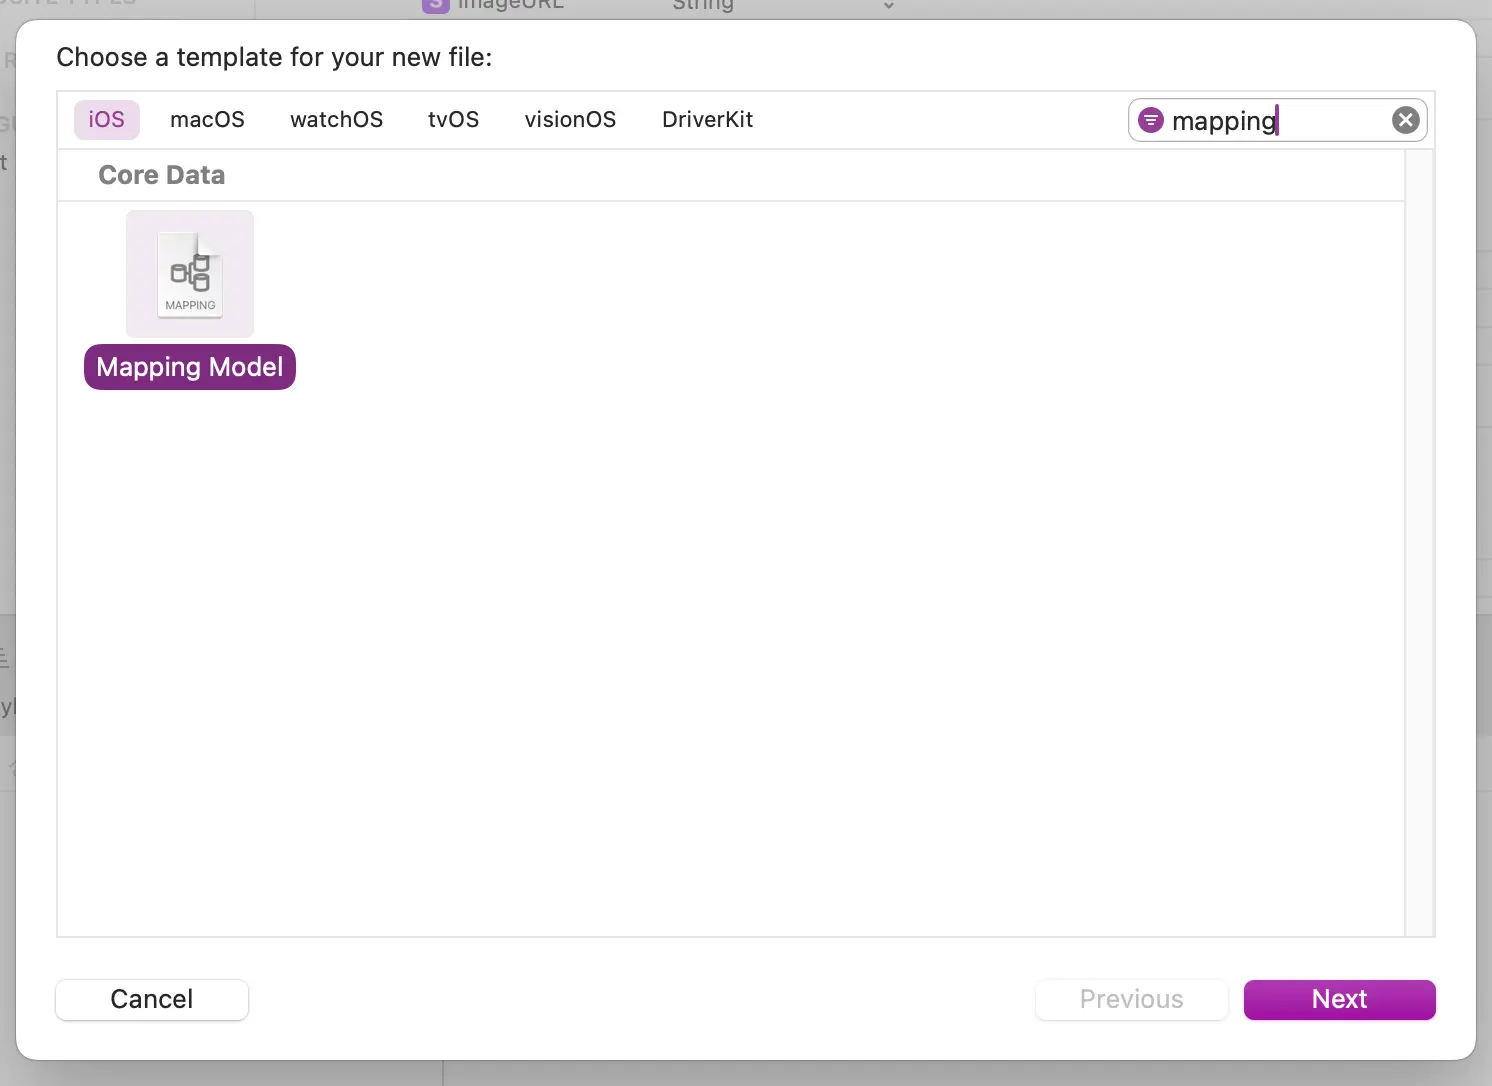
Select File > New > File... from the menu bar and select Mapping Model.
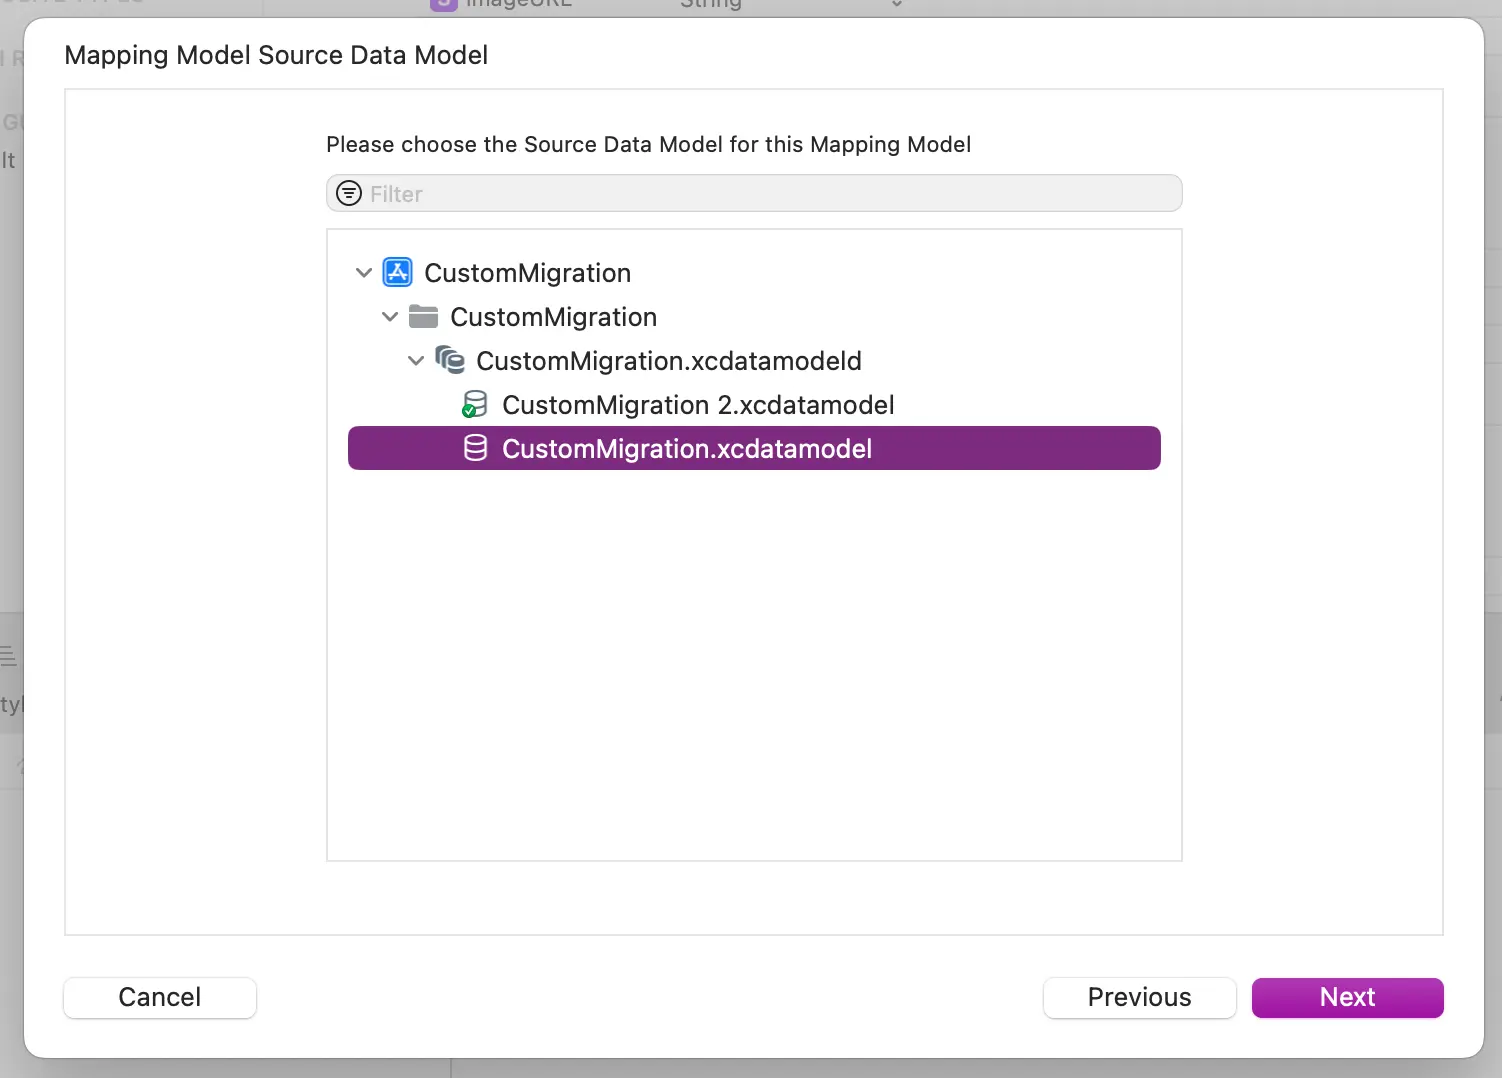
Then, select the source model:
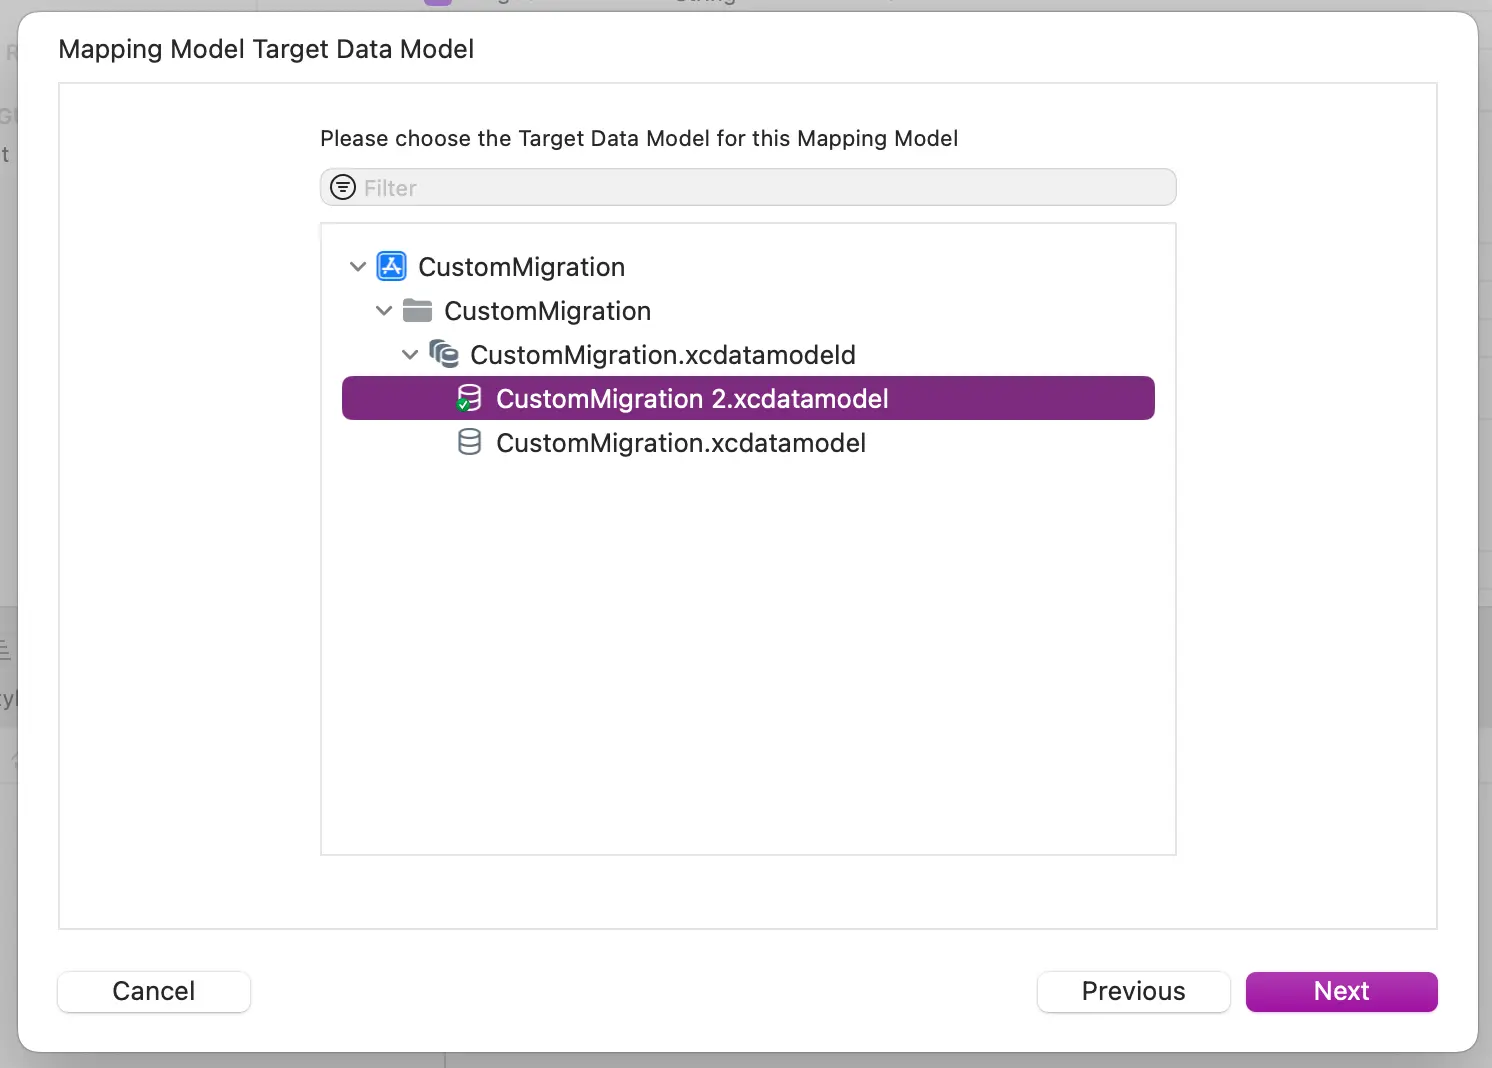
Finally, select the destination model:
Writing a custom migration policy
By default, Core Data will do its best to map the attributes and most of the work will be done for us (including the removed properties).
However, as we have created a new entity and we want to preserve existing data, we will need to tell Core Data how to migrate.
We will do this by creating a new class that inherits from NSEntityMigrationPolicy and creates and links a new relationship on the old Track entity to the new Artist entity:
import CoreData

struct Song: Decodable {
    let artists: [Artist]

    struct Artist: Decodable {
        let id: String
        let name: String
        let imageURL: String
    }
}

class V2MigrationPolicy: NSEntityMigrationPolicy {
    private let decoder = JSONDecoder()

    override func createDestinationInstances(forSource sInstance: NSManagedObject, in mapping: NSEntityMapping, manager: NSMigrationManager) throws {
        // 1
        let sourceKeys = sInstance.entity.attributesByName.keys
        let sourceValues = sInstance.dictionaryWithValues(forKeys: sourceKeys.map { $0 as String })

        // 2
        let destinationInstance = NSEntityDescription.insertNewObject(forEntityName: mapping.destinationEntityName!, into: manager.destinationContext)
        let destinationKeys = destinationInstance.entity.attributesByName.keys.map { $0 as String }

        // 3
        for key in destinationKeys {
            if let value = sourceValues[key] {
                destinationInstance.setValue(value, forKey: key)
            }
        }

        if let jsonString = sInstance.value(forKey: "json") as? String {
            // 3
            let jsonData = Data(jsonString.utf8)
            let object = try? decoder.decode(Song.self, from: jsonData)
            // 4
            let artists: [NSManagedObject] = object?.artists.map { jsonArtist in
                // 5
                let request = Artist.fetchRequest()
                request.fetchLimit = 1
                request.predicate = NSPredicate(format: "name == %@", jsonArtist.name)
                // Do not add duplicates to the list...
                if let matchedArtists = try? manager.destinationContext.fetch(request), let matchedArtist = matchedArtists.first {
                    return matchedArtist
                }
                // 6
                let artist = NSEntityDescription.insertNewObject(forEntityName: "Artist", into: manager.destinationContext)

                artist.setValue(jsonArtist.name, forKey: "name")
                artist.setValue(jsonArtist.imageURL, forKey: "imageURL")
                artist.setValue(jsonArtist.id, forKey: "id")

                return artist
            } ?? []

            // 7
            destinationInstance.setValue(Set<NSManagedObject>(artists), forKey: "artists")
        }

        // 8
        manager.associate(sourceInstance: sInstance, withDestinationInstance: destinationInstance, for: mapping)
    }
}
Let’s break down the code above step by step:
- Get the source entity’s attribute names and values.
- Create a brand new destination entity of the same type as the source one.
- Copy the source entity’s attribute values to the destination entity.
- If the source entity has a
jsonattribute, parse it into aSongobject. - To avoid duplicates, check if the artist already exists in the destination context.
- If the artist does not exist, create a new
Artistentity, insert it into the context and set its attributes. - Set the new
artistsrelationship on the destination entity. - Associate the source and destination instances.
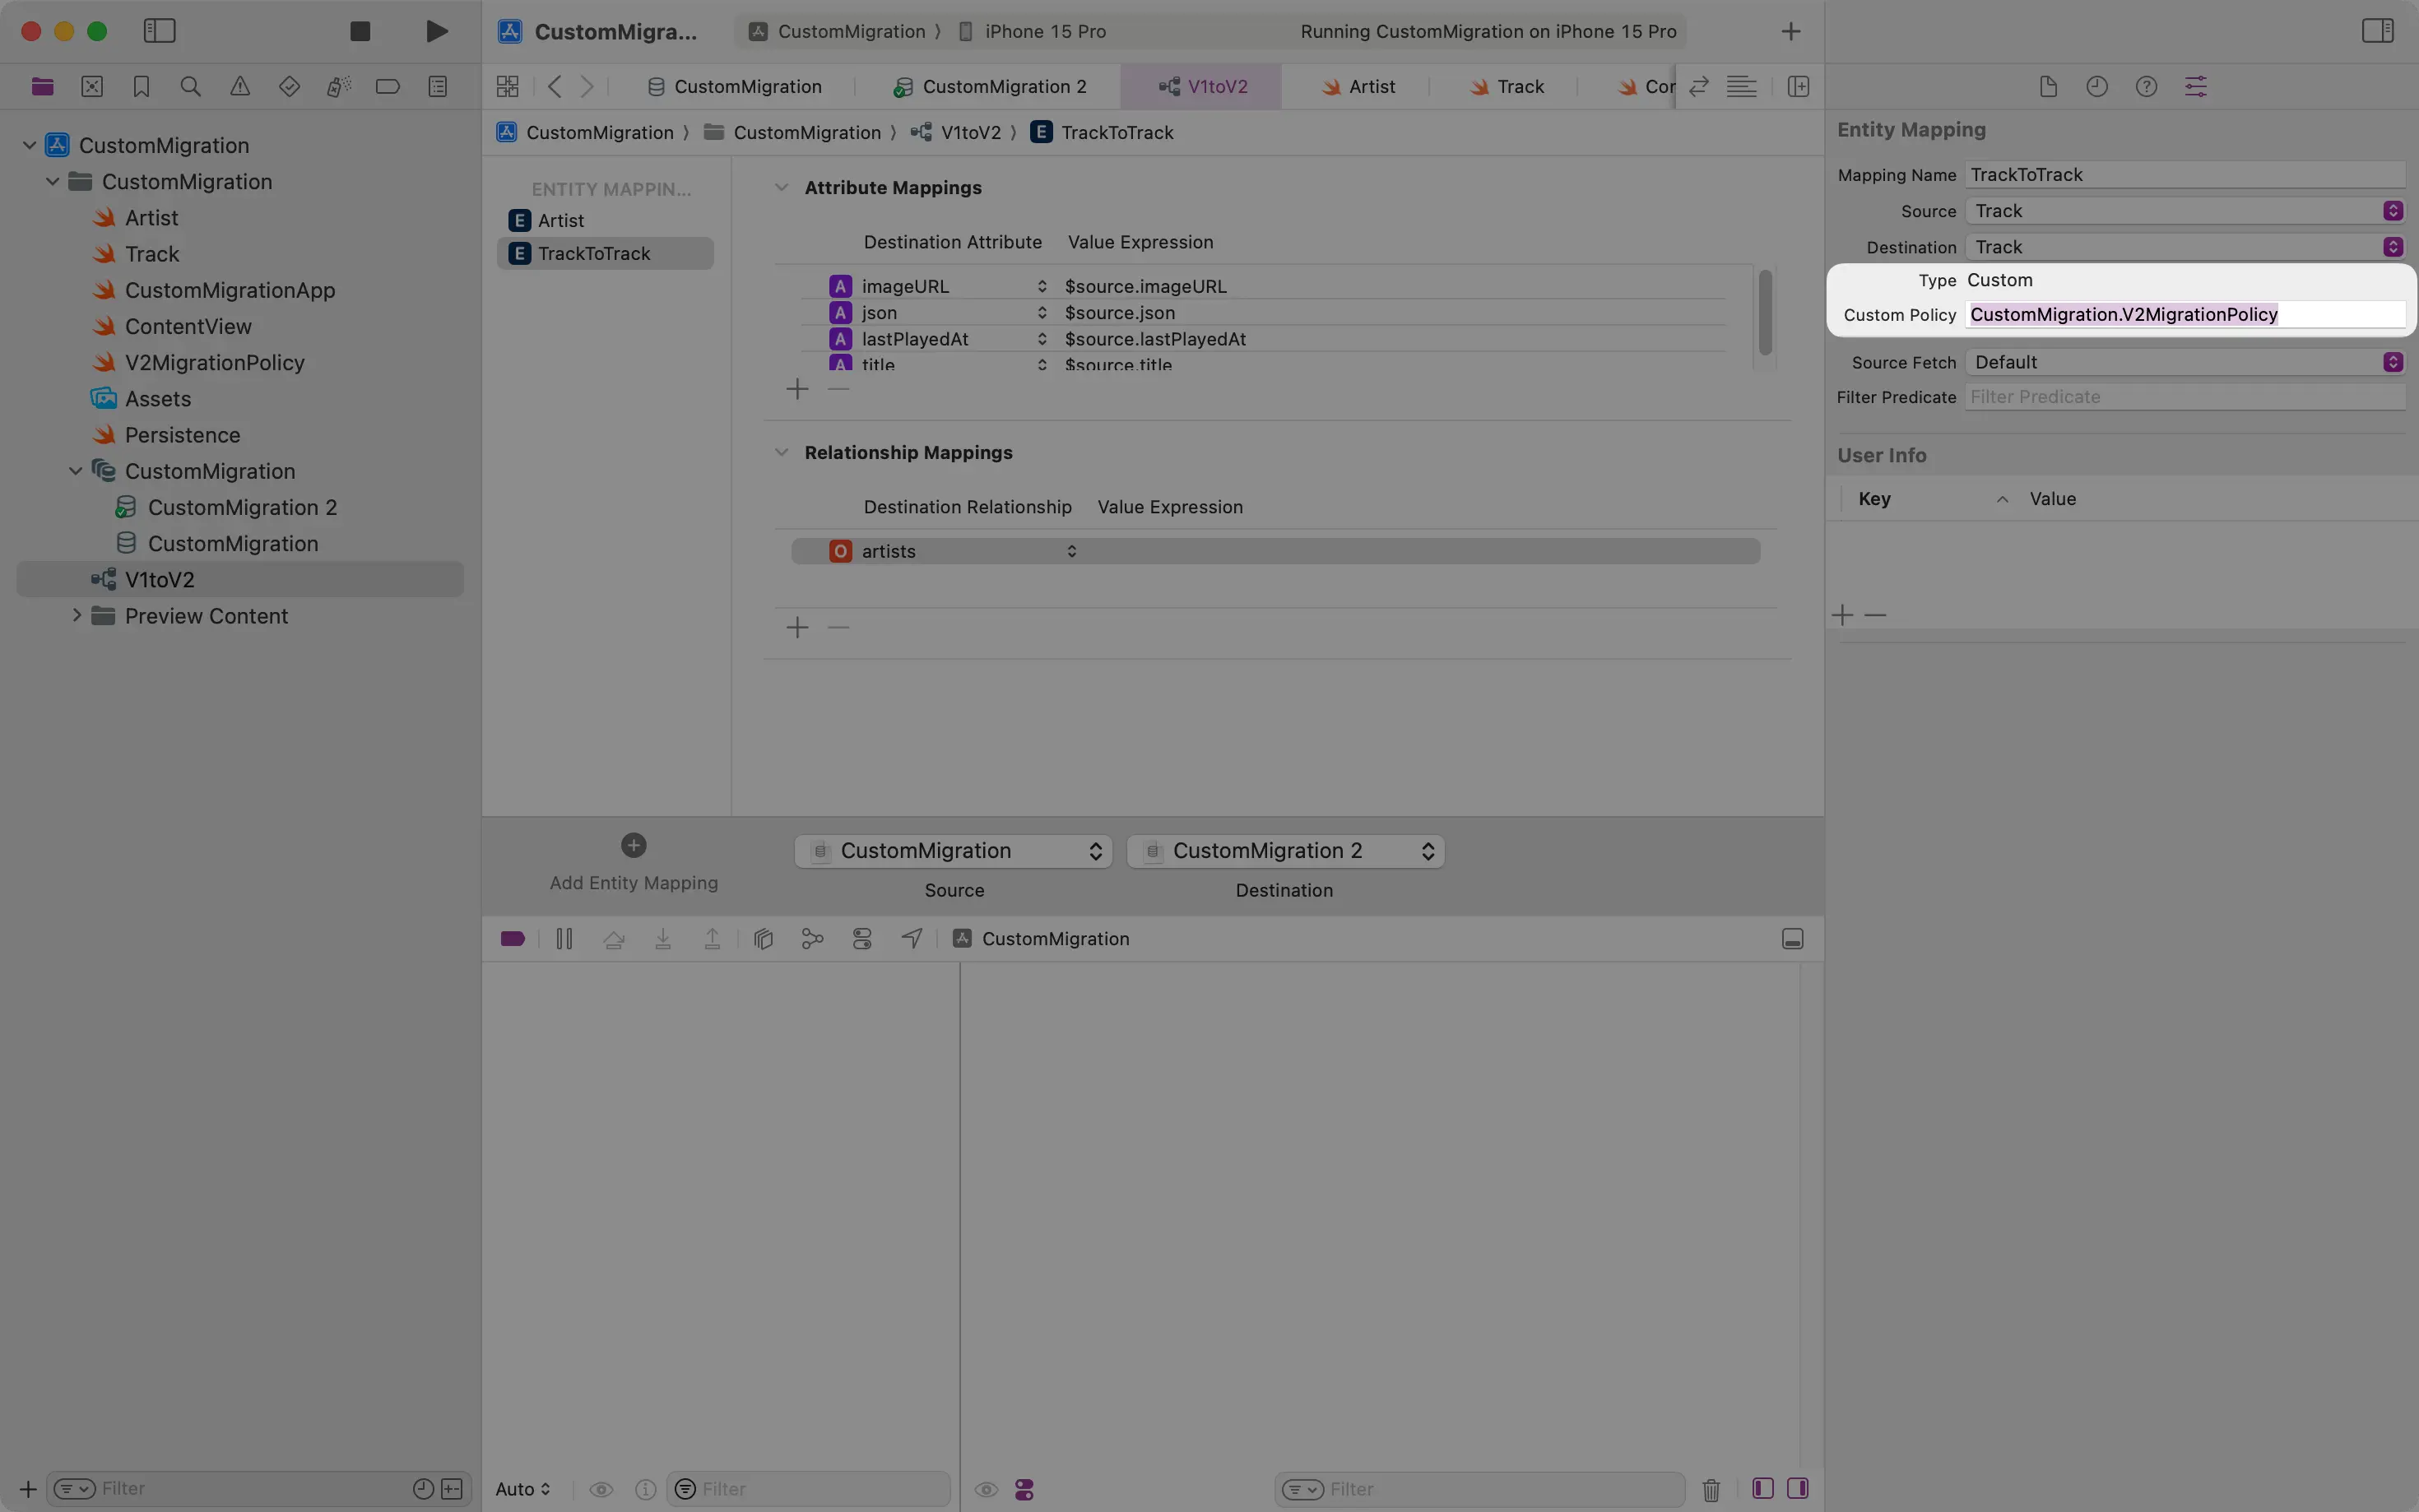
Finally, let’s add this custom policy to the mapping model:
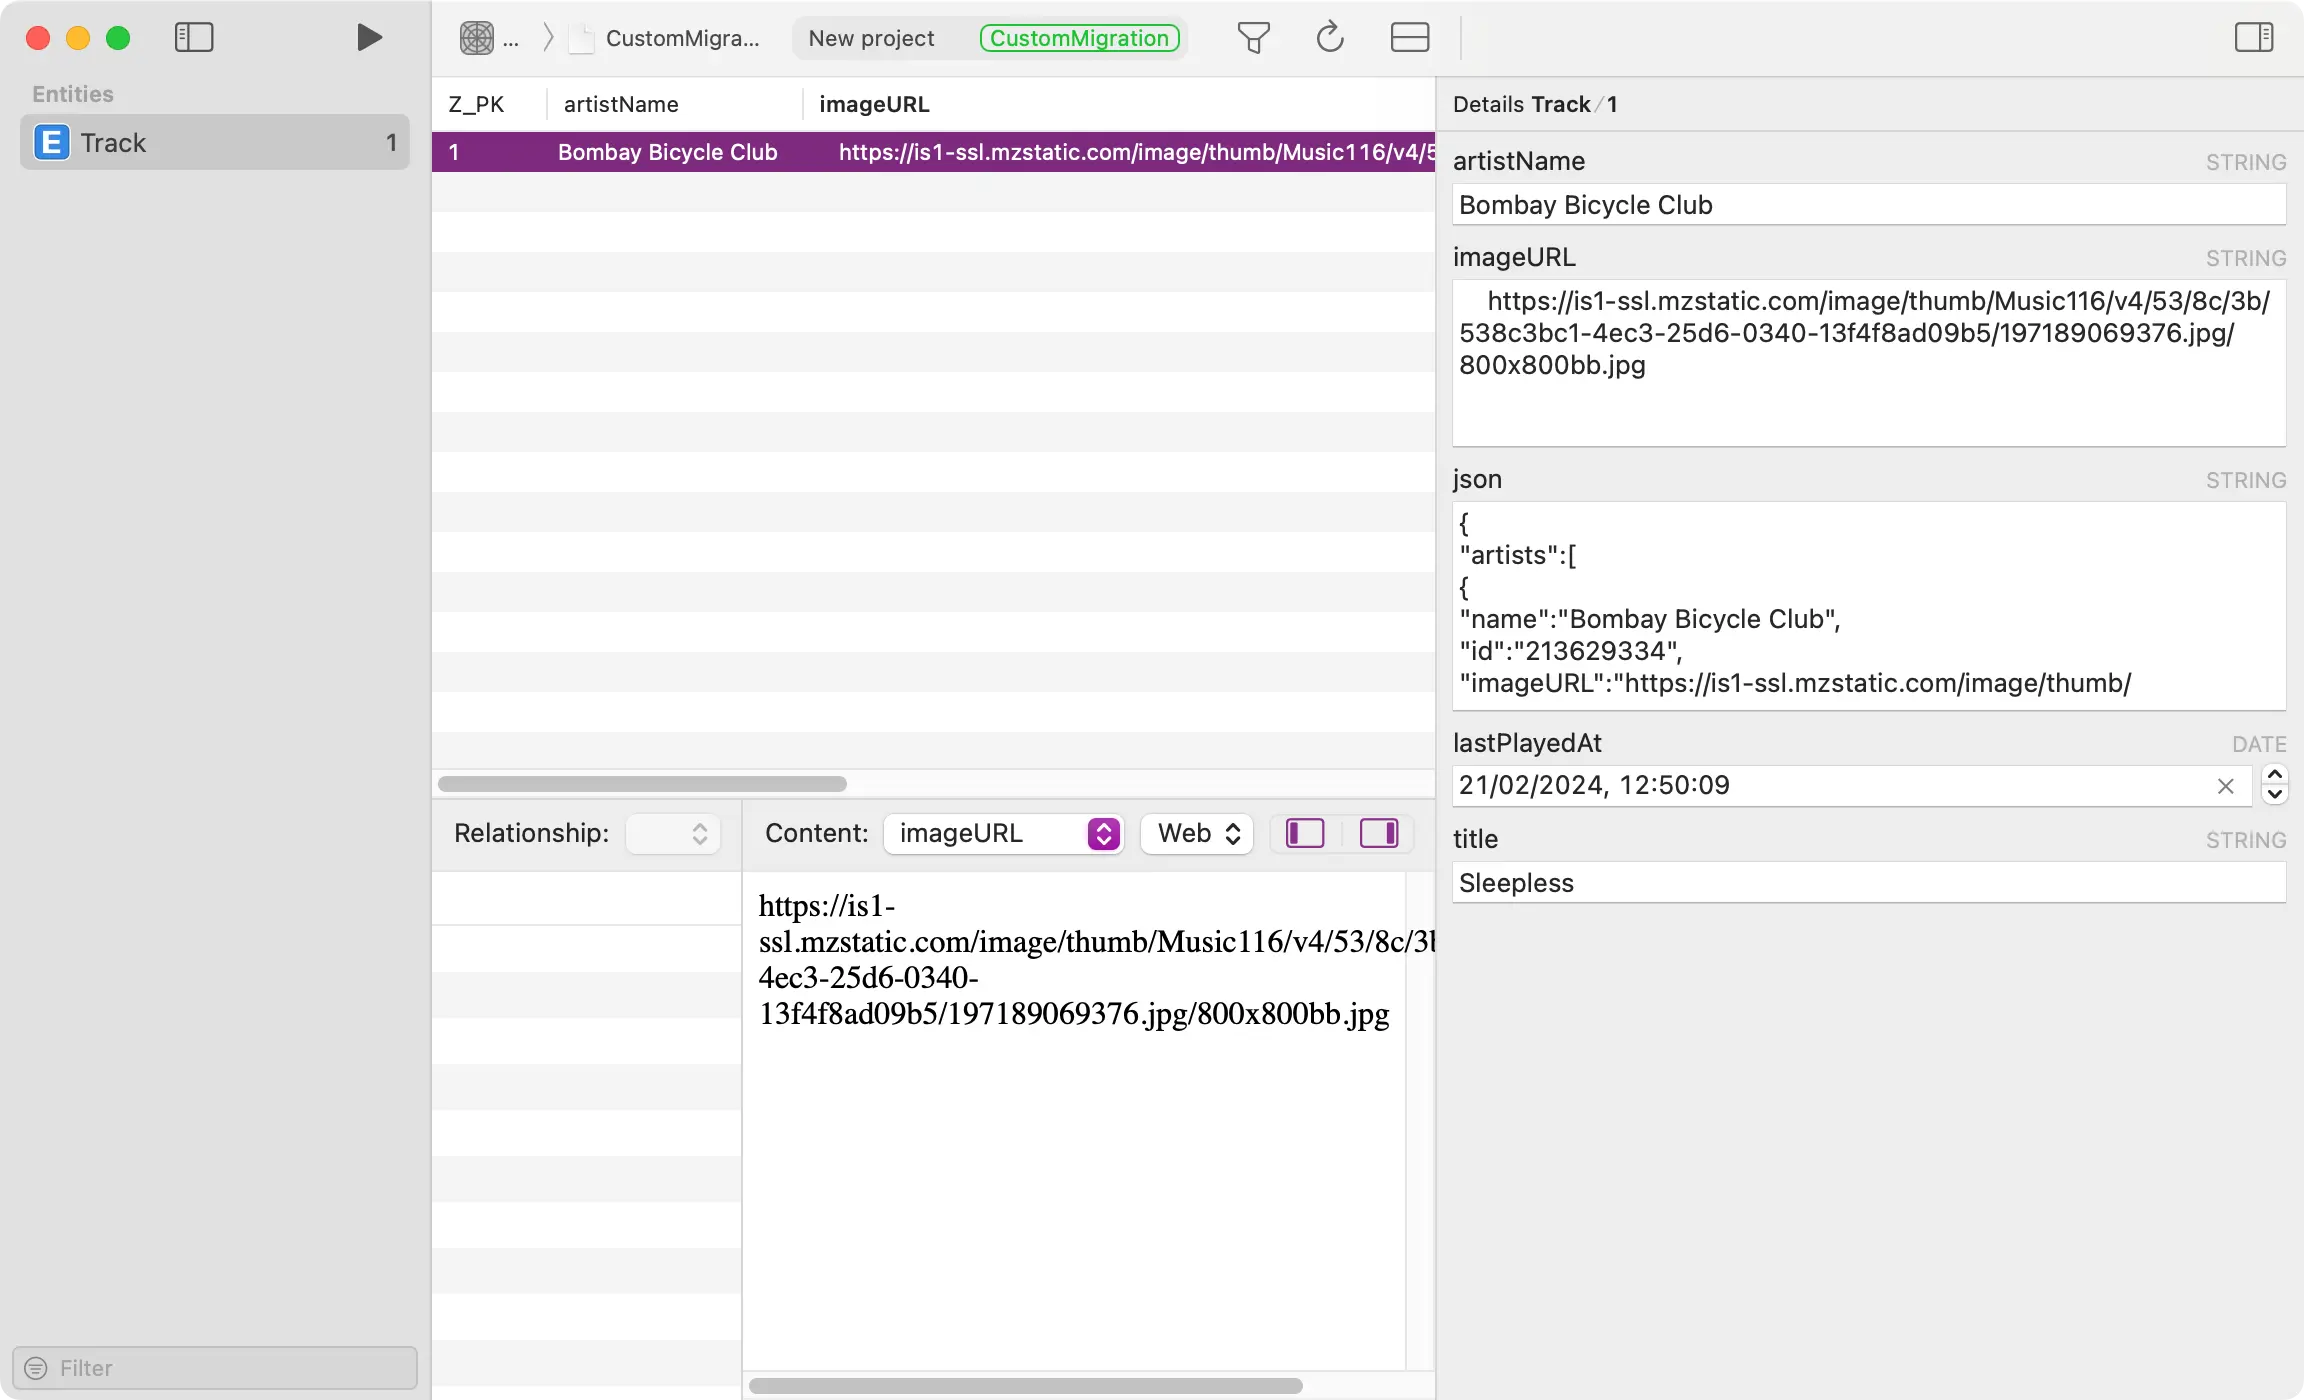
Now, if we run the app again and inspect the database with Core Data Lab, we can see that there is a new entity populated with the correct data: