How to use Stable Diffusion models in a Swift app
Helm Pro yearly subscribers now get a 30% discount on RocketSim thanks to contingent pricing on the App Store.
I have recently been learning about how to use Stable Diffusion models in an iOS app using Apple’s open-source ml-stable-diffusion Swift package.
The library runs Stable Diffusion pipelines by loading CoreML models from the filesystem and then using them to generate images from a given text prompt or image input.
In this article, I will show you how to use already available CoreML models in a Swift app using Apple’s ml-stable-diffusion library as well as converting any HuggingFace model to CoreML using the Apple’s python_coreml_stable_diffusion.torch2coreml script.
Existing CoreML Stable Diffusion models
As the Swift package’s README.md states, there are already some ready-made Stable Diffusion models that have been converted to CoreML and are available for download from HuggingFace.
Downloading the repository with git
Let’s download one of them (apple/coreml-stable-diffusion-v1-5-palettized) using git and inspect its contents:
git lfs install
git clone git@hf.co:apple/coreml-stable-diffusion-v1-5-palettized
Once the download completes, you should have a folder with the model’s name in your current directory containing the following files:
coreml-stable-diffusion-v1-5-palettized
├── original
│   ├── compiled
│   └── packages
└── split_einsum
    ├── compiled
    └── packages
As you can see, for each variation of the package, there are two directories:
- compiled: This version of the model contains the necessary
merges.txt,vocab.jsonand.mlmodelcfiles to be loaded using Apple’s Swift package. - packages: This version of the model contains several
.mlpackagefiles to be loaded using the Python interface of Apple’s library.
Downloading only the model files
Despite git being a convenient way to inspect the contents of a HuggingFace repository, it is not the best way to download the models for use as you just need a small portion of the repository rather than the whole thing.
Instead, you can retrieve the any file in any given repository using a URL with the following format: https://huggingface.co/user/model/resolve/main/file.zip?download=true.
In this particular example, we can retrieve the zip file containing all the compiled models with the following URL: https://huggingface.co/apple/coreml-stable-diffusion-v1-5-palettized/resolve/main/coreml-stable-diffusion-v1-5-palettized_original_compiled.zip?download=true.
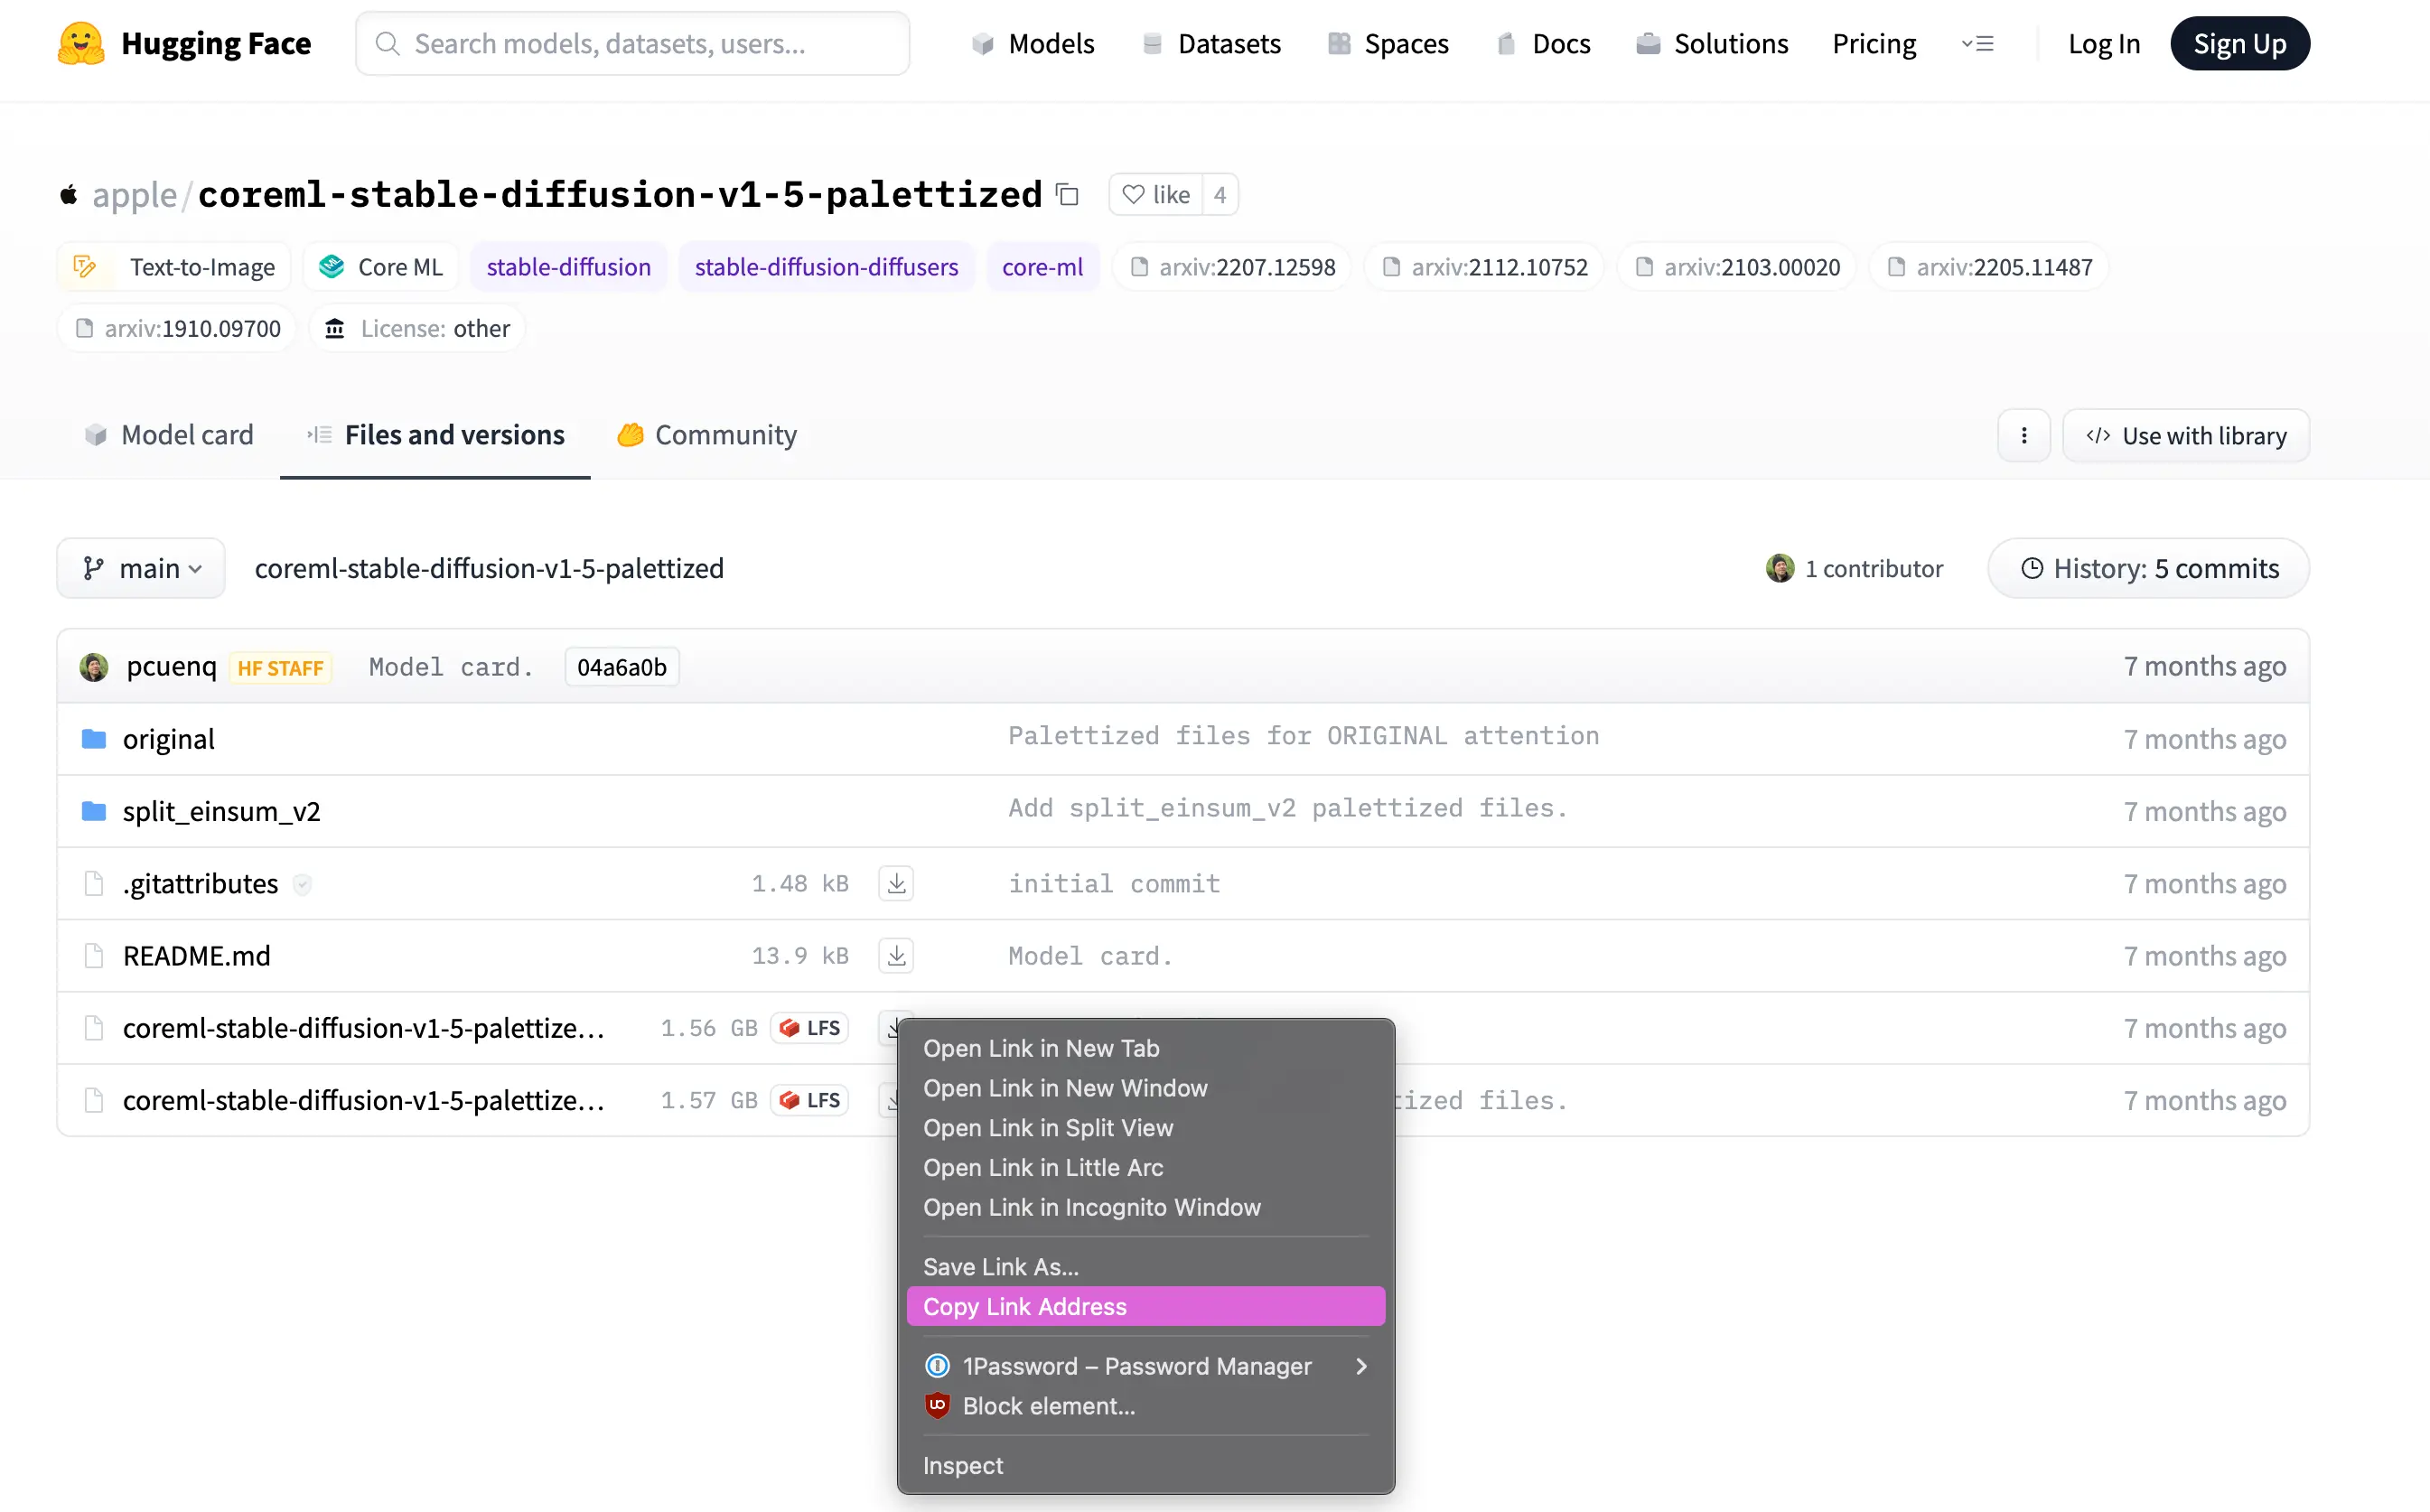
You can find the URL for any file in the repository by going to the Files and versions tab, right-clicking on the download button next to the name of the file you want to download and selecting Copy link address:
As models are usually quite large, you might want to add some logic to your app to download them only when needed instead of bundling them in your app to keep its size in check. Hosting models on HuggingFace and downloading them on demand using the URL above is a great way to achieve this.
Converting a Stable Diffusion model to CoreML
If you can’t find a ready-made CoreML model for the Stable Diffusion model you want to use, you can always convert one yourself using the python_coreml_stable_diffusion.torch2coreml script from Apple’s ml-stable-diffusion library.
Setting up the environment
To do this, you first need to clone the repository and install the necessary Python dependencies in a virtual environment:
# Clone
git clone https://github.com/apple/ml-stable-diffusion.git
cd ml-stable-diffusion

# Create and activate virtual environment
python3 -m venv venv
source venv/bin/activate

# Install dependencies
pip install -e .
You are now ready to run the script and convert any StableDiffusion model from HuggingFace to CoreML.
For this example, let’s convert Runway ML’s 1.5 Stable Diffusion model:
# 1
python -m python_coreml_stable_diffusion.torch2coreml \
    # 2
    --bundle-resources-for-swift-cli \
    # 3
    --model-version runwayml/stable-diffusion-v1-5 \
    # 4
    --convert-unet \
    --convert-text-encoder \
    --convert-vae-decoder \
    --convert-vae-encoder \
    # 5
    -o generated
I am aware that the command above looks daunting, so let’s break it down into smaller chunks:
- First, run the
python_coreml_stable_diffusion.torch2coremlscript. - Tell the script to bundle all compiled files necessary to load the model in Swift into a
Resourcesfolder. Without this flag, you will not get the.mlmodelc,merges.txtandvocab.jsonfiles. - Specify the model version you want to convert. This can be any model from HuggingFace.
- Specify which parts of the model you want to convert, which will depend on your use case. For example, if you want to control the output of the model using
ControlNet, you will need the--convert-controlnetand--unet-support-controlnetflags. - Specify the output directory, in this case, a directory called
generated.
In the output directory, along with some other files, you should now have a Resources folder containing the .mlmodelc, merges.txt and vocab.json files you need to load the model in Swift. You can now zip it up and host it on HuggingFace or just add it to your app’s bundle (I don’t recommend the latter if you intend on shipping your app).
Loading the model in Swift
Now that you have the files necessary to load a model in Swift, you are ready to import the ml-stable-diffusion Swift package and initialize a Stable Diffusion pipeline that loads such files and generates an image based on a text prompt:
import Foundation
import StableDiffusion
import CoreML

func generate(prompt: String, numberOfImages: Int) async throws -> [CGImage] {
    // 1
    guard let resourcesURL = Bundle.module.url(forResource: "Resources", withExtension: nil)?.path() else {
        return []
    }
    let url = URL(fileURLWithPath: resourcesURL)
    // 2
    let configuration = MLModelConfiguration()
    configuration.computeUnits = .all
    // 3
    let pipeline = try StableDiffusionPipeline(resourcesAt: url,
                                               controlNet: [],
                                               configuration: configuration,
                                               disableSafety: false,
                                               reduceMemory: false)
    try pipeline.loadResources()
    // 4
    var pipelineConfig = StableDiffusionPipeline.Configuration(prompt: prompt)
    pipelineConfig.negativePrompt = "low resolution, blurry"
    pipelineConfig.seed = UInt32.random(in: (0..<UInt32.max))
    pipelineConfig.guidanceScale = 7
    pipelineConfig.stepCount = 20
    pipelineConfig.imageCount = numberOfImages

    // 5
    return try pipeline.generateImages(configuration: pipelineConfig, progressHandler: { _ in })
        .compactMap { $0 }
}
A lot is going on in the code above, so let’s break it down step by step:
- Get the path to the
Resourcesfolder of the model, which contains the.mlmodelc,merges.txtandvocab.jsonfiles you downloaded earlier. - Create a CoreML model configuration and set the
computeUnitsto.allto use all available compute units on the device. - Initialise the
StableDiffusionPipelinefrom Apple’s library using theresourcesAtparameter to load the model from the filesystem. - Create a
StableDiffusionPipeline.Configurationobject with the prompt and other parameters to generate the images. - Call the
generateImagesmethod on the pipeline to generate the images.
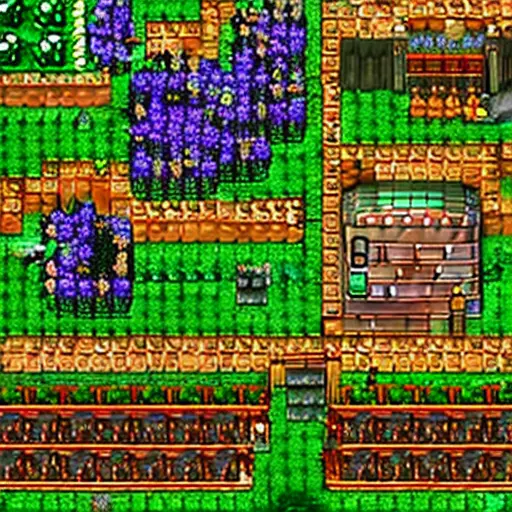
That’s it, if you now run the generate function with a prompt like 'stardew valley, fine details, 4k resolution', you will get an image that looks similar to this: