Xcode 15: Automated accessibility audits
Helm Pro yearly subscribers now get a 30% discount on RocketSim thanks to contingent pricing on the App Store.
Xcode 15 introduces a way of automatically performing accessibility audits on your app through UI tests. Such audits can help you identify accessibility issues such as missing labels for elements, clipped text, insufficient colour contrast, lack of support for Dynamic Type and many more.
If you want to learn more about everything the new audits can catch, please refer to Apple’s documentation on the topic and the great session from this year’s WWDC.
Before Xcode 15, there was no first-party API to do automate these accessibility audits and you had to rely on some brilliant third-party libraries such as Rob Whitaker’s A11yUITests or Cash App’s AccessibilitySnapshot.
In this article, we’ll take a look at what these new changes mean for you as an iOS developer and how you can use them to make sure your app meets the highest accessibility standards.
The demo app
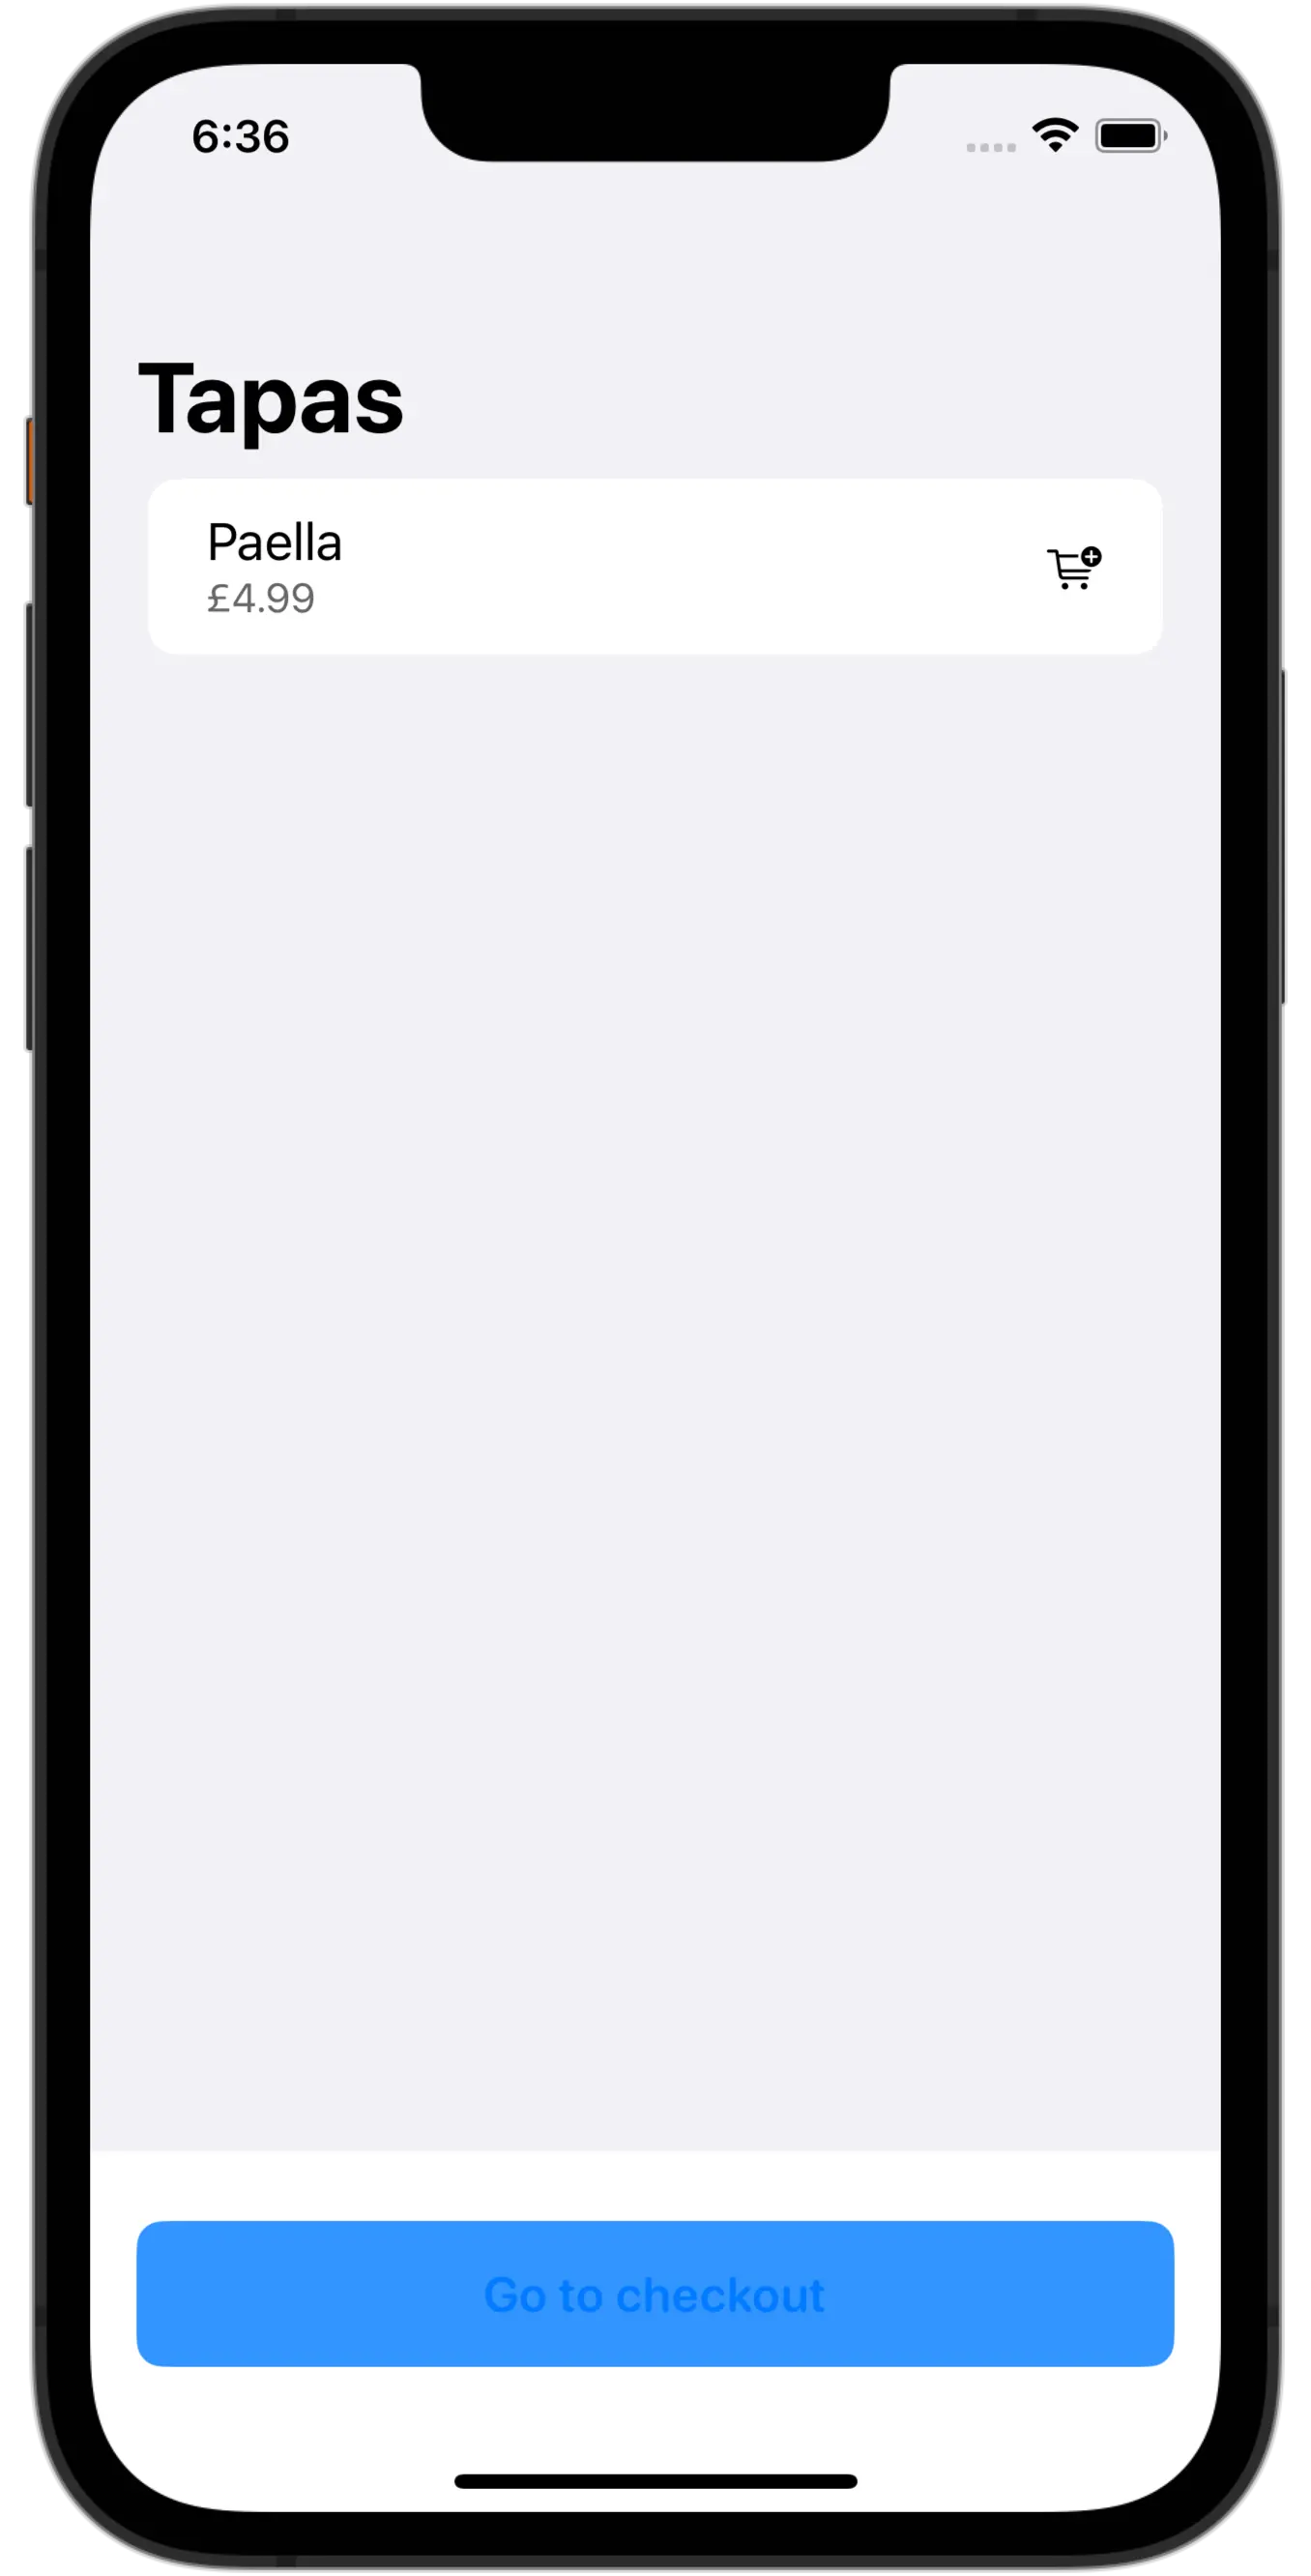
I have made a small demo app that has several accessibility issues that will help us see how the new audits work:
- The app does not scale with dynamic type and uses a fixed font size.
- The title of the ‘Go to checkout’ button at the bottom of the screen does not have sufficient colour contrast and is therefore not readable.
- The small cart icons next to each item do not have a big enough hit region.
- The price labels are not read correctly by VoiceOver.
How do audits work?
The new API is exposed as a method called performAccessibilityAudit() on XCUIApplication. What this means is that to perform an audit you need to have UI tests set up for your target and you need to call the new method from within one of those tests.
Running an audit
In the app’s UI tests target, let’s create a new class that inherits from XCTestCase and add a test method that launches the app and calls the new method:
import XCTest

final class AccessibilityAuditsUITests: XCTestCase {
    func testAccessibilityAudits() throws {
        let app = XCUIApplication()
        app.launch()

        try app.performAccessibilityAudit()
    }
}
Running the audit is then as simple as just running the test we’ve just created.
Viewing the results
If the audit has found no accessibility issues for your app, the test will pass and you will see a green checkmark next to the test run in the Report navigator. On the other hand, if the audit encounters any issues at all, the test run will fail and you will be able to see why in the Report navigator.
For my demo app, the audit fails with several errors, which are listed in the tests section of the latest test run in the local tab of Xcode’s Report navigator:
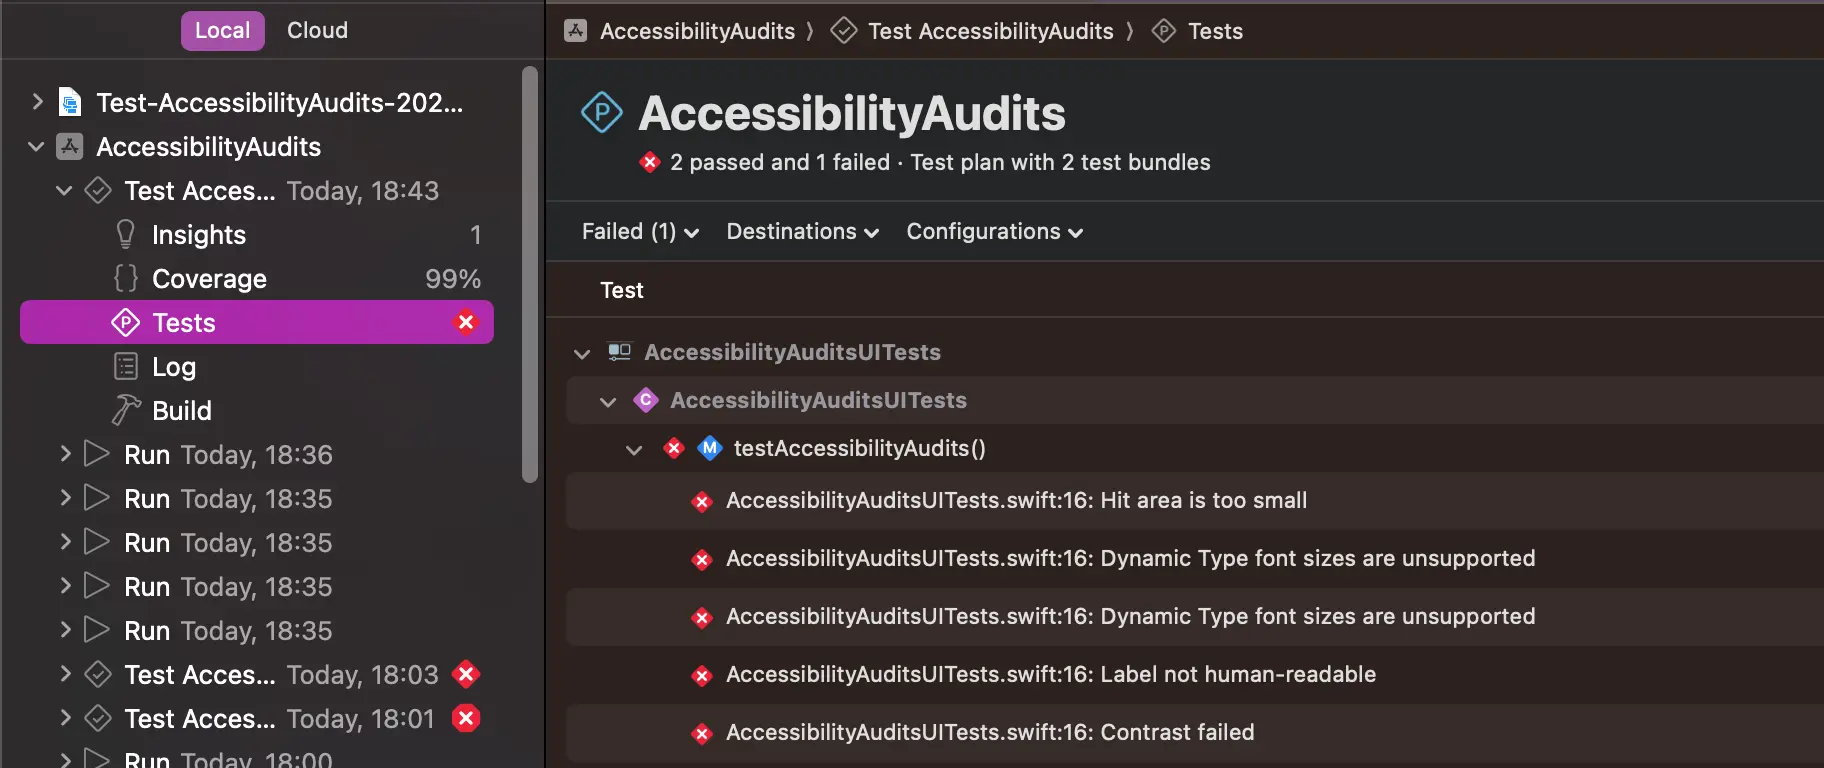
The new accessibility audit feature, paired with the excellent new test reports, makes it very easy to identify and fix accessibility issues in your app.
You can double-click on any of the test failures to see more details about it, including a video of the test run that failed, a screenshot of the app at the time of the failure and a close-up of the specific element that failed the audit! 🎉
Narrowing down the audit scope
If you’re not interested in auditing every kind of accessibility issue in your app, you can narrow down the scope by passing a list of XCUIAccessibilityAuditTypes you are interested in to the performAccessibilityAudit() method.
For example, the method below would only check the app for insufficient colour contrast and lack of support for Dynamic Type:
import XCTest

final class AccessibilityAuditsUITests: XCTestCase {
    func testAccessibilityAudits() throws {
        // UI tests must launch the application that they test.
        let app = XCUIApplication()
        app.launch()

        try app.performAccessibilityAudit(for: [.contrast, .dynamicType])
    }
}
Ignoring specific issues
Let’s say there are some known issues in your app that you’re aware of and that you don’t want the audit to flag.
You can skip specific issues using the second parameter of the performAccessibilityAudit() method, which is a closure that has an instance of XCUIAccessibilityAuditIssue as its only parameter and returns a Bool indicating whether the issue should be ignored or not.
What this closure allows you to do is to inspect the issue in detail (what kind of audit it is, what element the audit has failed on, etc.) and decide whether you want to ignore it or not by returning true or false.
For example, the code below ignores the dynamic type issues for the ‘Go to checkout’ button in the demo app:
import XCTest

final class AccessibilityAuditsUITests: XCTestCase {
    func testAccessibilityAudits() throws {
        // UI tests must launch the application that they test.
        let app = XCUIApplication()
        app.launch()

        try app.performAccessibilityAudit(for: [.contrast, .dynamicType]) { issue in
            guard let element = issue.element, element.label == "Go to checkout" else {
                return false
            }

            return issue.auditType == .dynamicType
        }
    }
}
Bonus track: CI/CD
Similarly to what you can do for building and archiving the app, you can also use xcodebuild run the UI tests where your accessibility audits are performed from the command line and, by extension, from your CI/CD pipeline.
To do so, you need to call the test command on xcodebuild with the environment. I would personally recommend overriding the derived data path to be a folder relative to your app’s root directory so that you have easy access to the test output:
xcodebuild \
  -project YourApp.xcodeproj \
  -scheme AccessibilityAudits \
  -sdk iphonesimulator \
  -destination 'platform=iOS Simulator,name=iPhone 14,OS=17.0' \
  -derivedDataPath derived_data \
  test
You can then find the output xcresult bundle at derived_data/Logs/Test/*.xcresult. You can open this bundle in Xcode to inspect the results.
Something I recommend you do is to add a step to your CI/CD pipeline to upload the xcresult bundle as an artifact whenever the audits job fails so that it can be downloaded and inspected from the job’s page directly rather than having to ssh into the machine to dig it out.